Introduction
Crocheting animal toys is a delightful hobby that allows you to create adorable and personalized gifts. One of the most important features of any crocheted animal is its eyes. While safety eyes are a popular choice, they may not always be the best option, especially for baby toys or projects requiring a softer, more handmade look. This is where yarn eyes come in!
Yarn eyes are not only safer for young children but also offer a unique, handmade aesthetic that can’t be achieved with plastic safety eyes. They allow for greater creativity, as you can customize the size, color, and expression of the eyes to match your project perfectly.
In this comprehensive guide, we’ll show you how to crochet animal eyes using yarn instead of safety eyes. We’ll cover everything from choosing the right materials to adding intricate details that bring your creations to life. Plus, we’ll introduce you to WOOHOBBY, your ultimate destination for crochet supplies, tutorials, and inspiration.
Materials Needed
Yarn Types and Colors
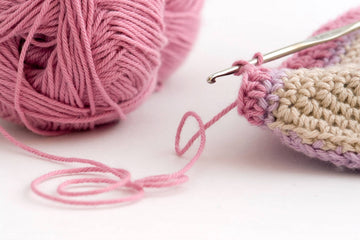
Choosing the right yarn is crucial for creating realistic and durable yarn eyes. Opt for smooth, non-fuzzy yarn in colors like black, white, and brown. Acrylic or cotton yarn works best for this purpose because they are easy to work with and maintain their shape well.
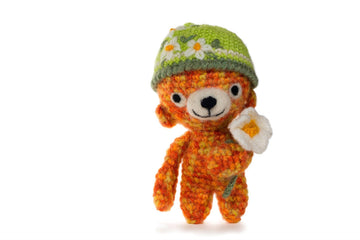
For a more realistic look, consider using gradient or variegated yarns to add depth to the iris. If you’re making eyes for a specific animal, match the yarn color to the natural eye color of that animal. For example, use amber or gold yarn for a lion’s eyes or deep blue for a whale’s eyes.
Crochet Hooks and Tools
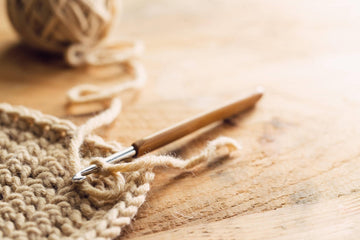
You’ll need a set of crochet hooks (size 2.0mm to 3.5mm), a yarn needle, and scissors. Smaller hooks are ideal for creating detailed and precise stitches, while larger hooks can be used for bigger projects.
If you’re new to crocheting, check out WOOHOBBY’s beginner-friendly kits, which include everything you need to get started. These kits often come with a variety of yarn colors, hooks, and even pattern books to help you practice your skills.

Step-by-Step Guide
Basic Crochet Stitches for Eyes
Before diving into the eye design, familiarize yourself with basic crochet stitches like the magic ring, single crochet (sc), and slip stitch (sl st). These stitches form the foundation of your yarn eyes.
- Magic Ring: This technique allows you to start your project with a tightly closed center, which is perfect for creating the round shape of an eye.
- Single Crochet (sc): This stitch is the most commonly used for amigurumi and small projects like eyes.
- Slip Stitch (sl st): Use this stitch to join rounds or finish off your work neatly.
Creating the Eye Shape
- Start with a magic ring and work 6 sc into the ring.
- Pull the ring tight and join with a sl st.
- Increase stitches in the next round to create a circular shape. For example, work 2 sc into each stitch from the previous round to double the number of stitches.
- Continue crocheting until the eye reaches your desired size. You can adjust the number of rounds depending on how big or small you want the eyes to be.
Adding Details and Depth
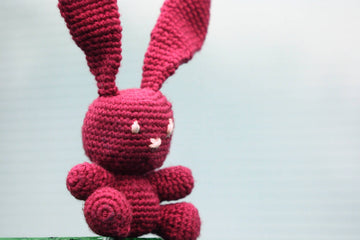
To make the eyes more lifelike, add a smaller circle in a contrasting color for the iris. For example, if you’re making a black eye, use white yarn for the iris. You can also use embroidery techniques to create highlights or eyelashes.
- Highlights: Use a small piece of white yarn to stitch a tiny dot on the iris to mimic light reflection.
- Eyelashes: For a more feminine look, add a few stitches around the edge of the eye to create eyelashes.

Tips and Tricks
Achieving Symmetry
Symmetry is key when crocheting eyes. Use stitch markers to ensure both eyes are the same size and shape. Here’s how:
- Crochet one eye completely.
- Count the number of stitches and rounds used.
- Use the same number of stitches and rounds for the second eye.
Securing Yarn Eyes Safely
To prevent unraveling, weave in the yarn ends securely. For added safety, avoid using small parts like beads. Here’s how to secure your yarn eyes:
- After finishing the eye, leave a long tail of yarn.
- Use a yarn needle to weave the tail through the stitches on the back of the eye.
- Pull tight and trim any excess yarn.
FAQs
Can Yarn Eyes Be Washed?
Yes, yarn eyes can be washed, but it’s best to hand-wash your crocheted items to maintain their shape and color. Use mild detergent and cold water, and lay the item flat to dry.
Are Yarn Eyes Safe for Babies?
Absolutely! Yarn eyes are a safer alternative to safety eyes, as there are no small parts that could pose a choking hazard. However, always ensure the eyes are securely attached to prevent any loose threads.
How to Customize Eye Size?
You can easily adjust the size of your yarn eyes by changing the number of stitches or using thicker/thinner yarn. For smaller eyes, use fewer stitches and a smaller hook. For larger eyes, increase the number of stitches and use a larger hook.
6. Conclusion
Crocheting animal eyes with yarn is a fun and creative way to add personality to your projects. Not only is this method safer for children, but it also allows for endless customization. Whether you’re making a gift for a loved one or adding to your own collection, yarn eyes are a fantastic alternative to safety eyes.
For all your crochet needs, visit WOOHOBBY. From high-quality yarns to step-by-step tutorials, we’ve got you covered. Don’t forget to check out our YouTube channel for video tutorials, like this one on crocheting yarn eyes.