
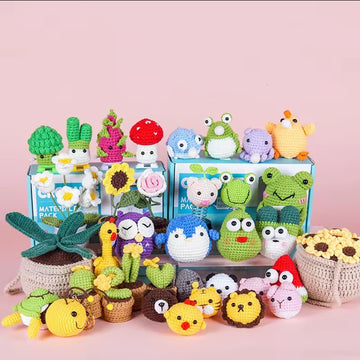
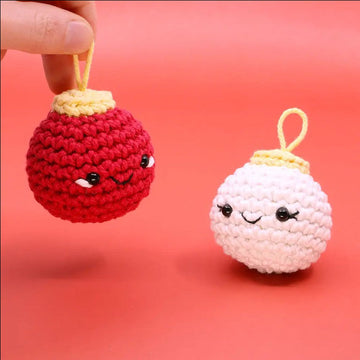
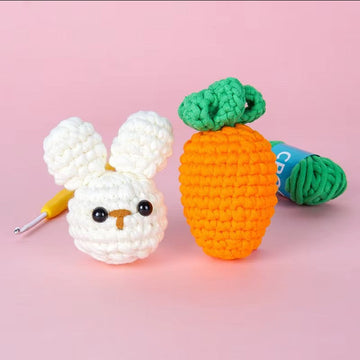
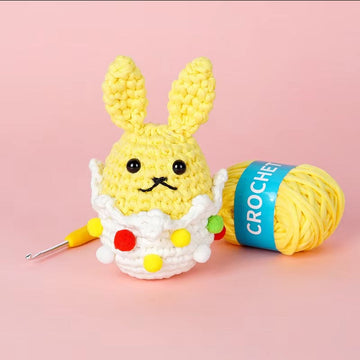
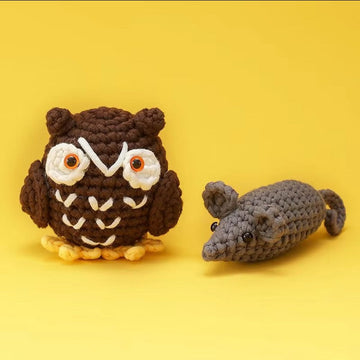

Pick up any plush amigurumi that feels like a store-bought stuffed animal — buttery soft, slightly squishy, with that unmistakable velvety sheen — and chances are it was made with velvet or chenille yarn. These pile yarns have transformed amigurumi over the past several years, turning handmade crochet toys from charmingly rustic into genuinely cuddle-worthy. But they have also earned a reputation as some of the trickiest fibers a crocheter can work with.
If you have ever started a velvet project only to watch little loops of yarn mysteriously pop out of your stitches days later (a phenomenon crocheters call “worming”), or found yourself completely unable to see where your next stitch goes, this guide is for you. We will cover exactly what velvet and chenille yarns are, why they behave so differently from standard acrylic or cotton, and the specific, tested techniques that make plush amigurumi succeed instead of unravel.
What Are Velvet and Chenille Yarns, Exactly?
Velvet and chenille yarns belong to a family called pile yarns. Unlike a standard plied yarn — where two or more strands of spun fiber are twisted around each other — a pile yarn has short fibers (the pile) anchored to a central core. The result is a strand that feels fuzzy and plush in every direction, like a pipe cleaner made of softness instead of wire.
The two terms are often used interchangeably, but there is a meaningful difference:
Chenille Yarn
Chenille (French for “caterpillar,” which the yarn resembles) is the broader category. It is typically made by weaving short lengths of fiber between two tightly twisted core threads, then cutting the pile so it stands out radially. Chenille yarns range from fine, sport-weight versions up to the enormous super-bulky “blanket yarn” used for arm knitting. Most chenille sold for amigurumi is 100% polyester.
Velvet Yarn
Velvet yarn is essentially a fine, dense, short-pile chenille with a noticeable light-catching sheen. The pile is shorter and more tightly packed than on classic chenille, which gives the finished fabric that liquid, velvety look. Popular examples include Bernat Velvet (worsted-ish, around 10.5 oz/300 g per 315 yd skein in the “Baby Velvet” big-ball format), Premier Parfait, and the many unbranded velvet yarns bundled into amigurumi kits.
For amigurumi purposes, the practical differences come down to pile length and density: velvet yarns show stitch definition slightly better and shed less, while longer-pile chenilles look fluffier but hide your stitches almost completely.
Why Velvet Yarn Behaves So Differently (The Science of Worming)
Understanding why velvet yarn misbehaves makes every fix below make sense.
A standard plied yarn grips itself. The twist in the plies creates friction, so once a stitch is formed, the yarn holds its position. A pile yarn is the opposite: the plush surface acts like thousands of tiny ball bearings. There is very little friction between one pass of the yarn and the next, so any excess slack in a stitch does not stay put — it migrates.
Worming is what happens when that migrating slack accumulates: a loop of yarn works itself loose from the fabric and pokes out, looking like a little worm crawling out of your amigurumi. It can happen while you crochet, or hours later as the piece is handled and squeezed. Worming is not a yarn defect — it is a tension problem amplified by the yarn’s slippery structure, and it is almost entirely preventable.
Velvet yarn also has a second quirk: the core thread is much thinner than the yarn appears. A velvet yarn that looks bulky (weight 5) may have a core no thicker than fingering weight. If you crochet loosely, stuffing pressure pushes the pile apart and exposes that thin core, creating see-through gaps.
The 6 Rules of Successful Velvet Amigurumi
Rule 1: Go Down 2–3 Hook Sizes
This is the single most important adjustment. If the yarn label recommends a 6.5 mm hook, use a 4.0–4.5 mm hook for amigurumi. Most crocheters working with worsted-to-bulky velvet yarns land between 3.5 mm and 4.5 mm. The smaller hook compresses the pile as you form each stitch, forcing the fabric tight enough that slack cannot migrate. Your fabric should feel dense and slightly stiff before stuffing — the plush pile guarantees the finished toy will still feel soft.
Rule 2: Crochet Tighter Than Feels Natural
Combine the smaller hook with deliberately firm tension. A good self-test: try to poke your pinky fingertip between stitches of your finished fabric. If it slides through easily, your tension is too loose for velvet. Some crocheters wrap the working yarn one extra time around their tension finger to add drag, compensating for the pile’s slipperiness.
Rule 3: Work Yarn Under, Not Yarn Over (for the Tightest Fabric)
The yarn-under single crochet variation produces shorter, denser, X-shaped stitches that lock the slippery yarn in place more effectively than standard yarn-over stitches. The trade-off is a slightly stiffer fabric — exactly what you want with velvet. If you already crochet very tightly, standard yarn over works fine; if you battle worming, switching to yarn under is often the fix that finally solves it.
Rule 4: Use More Stitch Markers Than You Think You Need
Velvet’s pile hides stitch definition, making it genuinely difficult to see individual stitches. Place a marker in the first stitch of every round without exception, and consider dropping a second marker every 10–15 stitches on larger pieces. Counting after every round is not optional with velvet — it is survival. A locking stitch marker takes 2 seconds to place and can save you from frogging 20 minutes of nearly invisible stitches.
Rule 5: Feel Your Stitches Instead of Looking for Them
Experienced velvet crocheters develop a hybrid technique: they locate the next stitch partly by sight and partly by touch, feeling for the small dip between stitch posts with the hook tip. Working in bright, angled light helps enormously — the pile casts micro-shadows that reveal the V of each stitch. Some crocheters keep a lamp positioned to rake light across the fabric at a low angle specifically for velvet projects.
Rule 6: Frog Gently and Rarely
Ripping out velvet stitches (frogging) damages the pile. Each undo-and-redo cycle strips fibers from the core, leaving thin, balding patches in the yarn. You can typically frog a section once with minimal visible damage; by the third time, the yarn will look noticeably threadbare. This is another reason stitch markers and careful counting matter more with velvet than with any other yarn: prevention is far cheaper than correction.

Choosing the Right Velvet Yarn for Amigurumi
Not all pile yarns are equal for toy-making. Here is what to evaluate:
Pile Length
Short pile (1–2 mm, typical of velvet yarns) is dramatically easier to work with than long pile (3 mm+, typical of blanket chenille). Short pile shows just enough stitch definition to keep you oriented. For your first plush project, choose the shortest pile you can find.
Core Strength
Tug sharply on a strand. A quality velvet yarn resists; a cheap one snaps or sheds a cloud of fibers. Weak-cored chenille breaks mid-stitch, especially during magic ring tightening — the highest-tension moment in amigurumi. If your yarn snaps when you cinch a magic ring, switch to a chain-2 start (chain 2, work 6 single crochet in the second chain from hook) which stresses the yarn far less.
Shedding
All pile yarns shed a little during crocheting; excessive shedding signals poorly anchored pile that will thin out with handling. Run your pinched fingers down 30 cm of strand three or four times — a few fibers are normal, a fuzzy pile on your fingers is a warning.
Washability
Since velvet amigurumi are usually destined for children, check for machine-washable polyester construction. Most 100% polyester velvet yarns tolerate a gentle 30°C cycle in a garment bag, though hand washing preserves the pile’s sheen longest.
Best First Projects with Velvet Yarn
Your first velvet project should minimize the yarn’s weaknesses (invisible stitches, fragile frogging) and showcase its strength (irresistible plushness):
- Simple spheres and blobs: A round octopus, a jellyfish, or a plush ball involves almost no counting complexity. You can focus entirely on tension.
- Chunky-limbed animals: Bears, penguins, and whales with thick, simple shapes work beautifully. Avoid designs with thin limbs (spider legs, mouse tails) — thin velvet tubes expose the core and look scraggly.
- One-piece designs: Every seam in velvet is harder to sew invisibly because you cannot see your whipstitches. Designs worked top-down in one piece eliminate assembly frustration.
If you are still building fundamental skills, it is worth completing two or three standard-yarn projects before attempting velvet. The kits in our Beginner Crochet Kit collection use smooth, high-visibility yarns exactly so you can learn stitch anatomy before graduating to pile yarns that hide it. Once single crochet, invisible decrease, and magic ring feel automatic, velvet becomes a fun challenge instead of a wall of frustration.
Hook Material Matters More with Velvet
With smooth acrylic, hook material is mostly personal preference. With velvet, it changes the experience:
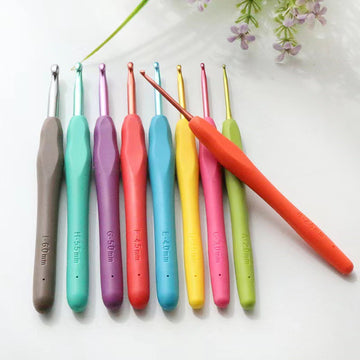
- Aluminum hooks glide fastest through dense pile and are the most popular choice for velvet. The slickness that makes them feel slippery with cotton becomes an asset here.
- Ergonomic handles are strongly recommended because velvet’s required tight tension increases hand fatigue. A rubberized handle reduces grip pressure noticeably over a 2-hour session.
- Bamboo or wooden hooks drag against pile and can catch and pull fibers loose — generally the worst choice for velvet.
- Inline vs tapered: Inline hooks (like Susan Bates) grab the thin core more positively and split the yarn less; many velvet crocheters who normally prefer tapered hooks switch to inline for pile yarns.
Stuffing Velvet Amigurumi: Less Pressure, More Volume
Velvet fabric stretches and gaps under pressure more readily than tight acrylic fabric, so adjust your stuffing strategy:
- Stuff to about 80–85% of the firmness you would use for a standard amigurumi. The pile fills visual gaps, so a slightly softer stuff still looks full — and it prevents the fabric from stretching to expose the core.
- Use small tufts of polyester fiberfill added gradually rather than large wads, which create lumps that show through the smooth velvet surface more visibly than through textured standard fabric.
- Check for gaps under bright light after stuffing. If you can see white fiberfill peeking through, either redistribute stuffing or accept the classic fix: line the piece with a thin layer of matching-color felt or use tinted stuffing.
Safety Eyes and Face Details on Velvet
The dense pile affects face-making in three ways:
Safety eyes sink. The pile swallows the rim of a safety eye, making eyes look smaller than they would on flat fabric. Go up one size — if a pattern calls for 8 mm eyes on standard yarn, use 9–10 mm on velvet.
Embroidery disappears. Fine embroidery details (single-strand whiskers, small stitches) vanish into the pile. Use thicker embroidery: double your strands, or embroider with a thin smooth yarn rather than embroidery floss so features sit on top of the pile.
Placement is forgiving. One genuine advantage: the pile hides small placement errors and the holes left by repositioned safety eyes far better than smooth yarn does. You can test-place eyes multiple times without leaving visible marks.
Caring for Finished Velvet Amigurumi
Velvet plushies live rough lives — they are the toys kids actually drag around. To keep them looking their best:
- Spot clean first: A damp cloth with a drop of mild detergent handles most smudges without wetting the stuffing.
- Machine wash sparingly: Cold or 30°C, gentle cycle, inside a mesh garment bag or pillowcase. Air dry only — tumble drying mats the pile and can partially melt polyester fibers at high heat.
- Revive flattened pile by brushing gently with a soft toothbrush once the toy is fully dry, or holding it 30 cm from a steamer for a few seconds (never touching the fabric directly).
- Expect gentle aging: High-contact areas (a bear’s ears, an octopus’s tentacle tips) will slowly lose pile density over years of love. This is normal for all pile fabrics, including commercial plush toys.

Troubleshooting: Quick Fixes for Common Velvet Problems
“My finished toy is worming after a week of play”
Use a blunt tapestry needle to pull each worm through to the inside of the toy, then stretch and massage the surrounding fabric to redistribute the slack. For a worming-prone toy, this maintenance plus firm re-tensioning usually stabilizes it. The permanent fix for future projects is a smaller hook and yarn-under stitches.
“I keep losing my place and can’t count rounds”
Run a contrasting-color scrap yarn vertically up your work, flipping it front-to-back between the same two stitches at the start of every round. This creates a visible “seam ladder” you can count at any time — much more reliable than a single marker with invisible stitches.
“My yarn keeps snapping at the magic ring”
Switch to the chain-2 alternative start, or make your magic ring with a doubled first wrap and tighten it in two gentle stages instead of one hard pull.
“My stitches look uneven and lumpy”
Velvet magnifies inconsistent tension less than smooth yarn visually (the pile hides it) but magnifies it structurally (loose stitches worm). If the surface looks lumpy, the culprit is usually uneven stuffing rather than stitching — redistribute filling in smaller tufts.
Velvet vs Standard Yarn: When to Choose Which
Velvet is not simply an upgrade; it is a different tool. Choose velvet or chenille when the recipient is a child who will cuddle the toy, when plush softness is the entire point, and when the design has simple, chunky shapes. Choose standard acrylic or cotton when the design has fine details, thin limbs, or color changes (velvet color changes look muddy at the transition), when you are still learning stitch fundamentals, and when you want crisp, visible stitch definition as part of the aesthetic.
Many intermediate crocheters land on a hybrid approach: standard yarn for the detailed head and face, velvet for the plush body — a combination common in modern designer patterns. If you want to explore projects across both yarn styles with everything pre-matched for you, our Crochet Amigurumi Kits collection includes designs specifically engineered around their included yarn, so hook size and tension guesswork is already done.
Frequently Asked Questions
What hook size should I use with velvet yarn for amigurumi?
Use a hook 2–3 sizes smaller than the yarn label recommends. For most worsted-to-bulky velvet yarns (like Bernat Velvet), that means a 3.5–4.5 mm hook instead of the labeled 6.0–6.5 mm. The smaller hook creates the dense, tight fabric that prevents worming and stuffing show-through.
Why does my velvet yarn keep worming and how do I stop it?
Worming happens because pile yarns have almost no internal friction, so any slack in your stitches migrates and pops out as loops. Stop it by using a smaller hook, crocheting tighter, and switching to yarn-under single crochet. To fix existing worms, pull each loop through to the inside of the toy with a tapestry needle and massage the fabric to redistribute slack.
Is velvet yarn good for beginners?
Velvet yarn is not recommended for a first amigurumi project because the pile hides stitch definition, making it hard to see where stitches go, and frogging damages the yarn. Complete 2–3 projects with smooth yarn first, until magic ring, single crochet, and invisible decrease feel automatic. Velvet is best treated as a rewarding second-stage skill.
What is the difference between velvet and chenille yarn?
Both are pile yarns with soft fibers anchored to a core. Velvet yarn has a shorter, denser pile with a light-catching sheen and shows stitches slightly better; chenille is the broader category and often has longer, fluffier pile that hides stitches more. For amigurumi, shorter pile (velvet-style) is easier to work with.
Can you machine wash velvet amigurumi?
Yes, if the yarn is 100% polyester: use a cold or 30°C gentle cycle inside a mesh garment bag, then air dry completely. Never tumble dry — heat mats the pile and can damage polyester fibers. Spot cleaning with a damp cloth is gentler and handles most everyday dirt.
Do safety eyes work on velvet yarn projects?
Yes, but size up by 1–2 mm because the dense pile swallows the eye’s rim and makes eyes look smaller. A pattern calling for 8 mm eyes on standard yarn typically looks right with 9–10 mm eyes on velvet. Always secure the backing washer firmly before stuffing, exactly as with standard yarn.
Final Thoughts
Velvet and chenille yarns reward preparation. The crocheters who love them are the ones who went in knowing the rules: drop your hook size, tighten your tension, mark every round, trust your fingers over your eyes, and choose chunky, simple designs. Follow those rules and the payoff is enormous — handmade toys with genuine commercial-plush softness that children reach for again and again.
Start with one small velvet project — a simple octopus or plush ball — and treat it as tension practice. By your second or third pile-yarn project, the techniques become second nature, and an entire category of irresistibly soft amigurumi opens up to you.


