

Introduction
Teaching a child to crochet is one of the most rewarding things a parent, grandparent, or teacher can do. Not only does it give them a creative skill they can enjoy for the rest of their life, but it also develops fine motor skills, improves focus and concentration, builds patience, and provides a screen-free activity that genuinely engages young minds. In an era where children spend an average of 4 to 7 hours per day on screens, according to the Common Sense Media 2023 report, finding activities that hold their attention without a tablet or phone is more important than ever.
Amigurumi is the perfect entry point for children learning to crochet. Unlike scarves or blankets, which can take weeks and feel like a chore to a child, amigurumi projects are small, cute, and finishable in a single sitting. The instant gratification of completing a tiny animal keeps kids motivated and excited to learn more. This guide will walk you through everything you need to know to teach a child to crochet amigurumi, from choosing the right age to start, to selecting the best materials, to teaching techniques that actually work with young learners. If you are looking for kid-friendly starter projects, our Beginner Crochet Kit collection includes options that are perfect for young beginners.
What Age Can Children Start Crocheting?
One of the most common questions parents ask is, "How old does my child need to be to learn crochet?" The answer depends on the child's individual development, but there are general guidelines that can help you decide when to introduce the craft.
Ages 5 to 6: Early Exploration
At ages 5 and 6, most children do not yet have the fine motor coordination or sustained attention span for formal crochet instruction. However, they can begin exploring the concepts. Finger crochet, which uses only the fingers and bulky yarn (no hook), is an excellent pre-crochet activity. It teaches the basic concept of pulling loops through other loops, which is the fundamental motion of crochet. Finger crocheted chains can be turned into bracelets, headbands, or necklaces, giving the child a sense of accomplishment.
At this age, keep sessions very short, 10 to 15 minutes maximum. The goal is not to produce a finished object but to build familiarity and positive associations with yarn and the idea of making something by hand. Do not correct their technique or worry about consistency. Praise their effort and display their creations proudly.
Ages 7 to 8: Ready to Start
Most children are ready to begin learning crochet with a hook between ages 7 and 8. By this age, they have developed sufficient fine motor control to hold a hook and manipulate yarn, and they have the attention span to focus on a structured activity for 20 to 30 minutes. This is the ideal age to introduce the chain stitch and single crochet.
Children at this age learn best through hands-on demonstration. Show them each step slowly, then let them try while you watch. Be patient with mistakes and avoid the urge to fix everything immediately. If they get frustrated, take a break and come back to it later. The most important thing at this stage is that crochet feels fun, not like a school assignment.
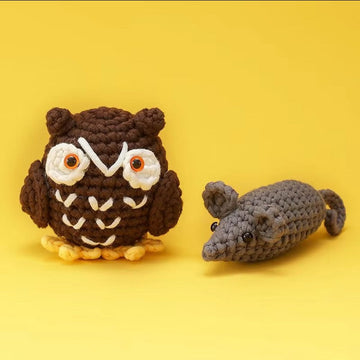
Many 7 and 8 year olds can complete a simple amigurumi ball or a tiny amigurumi mouse with help. The key is choosing projects that work up quickly and use only the most basic stitches. A project that can be completed in one or two sessions is ideal.
Ages 9 to 12: Independent Crocheting
By ages 9 to 12, most children have the dexterity, patience, and pattern-reading ability to crochet independently. They can learn the magic ring, increases, decreases, and even basic color changes. This is the age range where amigurumi truly shines, because children can make toys they actually want to play with and display.
Children in this age group can follow written patterns with guidance, though they may still benefit from video tutorials for new techniques. Encourage them to choose their own projects based on their interests. A child who picks their own project is far more motivated to finish it than one who is assigned a project by an adult.
At this age, children can also start understanding the broader concepts of crochet: gauge, tension, yarn weights, and hook sizes. Introduce these concepts gradually and in the context of real projects rather than as abstract lessons.
Ages 13 and Up: Advanced Projects
Teenagers can tackle almost any amigurumi project, including complex patterns with multiple color changes, intricate shaping, and assembly. Many teens find crochet to be a valuable stress-relief tool during the academic pressures of middle and high school. Encourage them to explore their own style, whether that means making realistic animals, cartoon characters, or abstract sculptures.
For teens, crochet can also become a social activity. Crochet clubs are increasingly popular in schools, and online communities provide a space for young crocheters to share their work and find inspiration. Some teens even start small businesses selling their amigurumi, which teaches entrepreneurship alongside craft skills.
Choosing the Right Materials for Kids
The materials you choose can make or break a child's first crochet experience. The wrong hook or yarn can lead to frustration, hand pain, and abandonment of the craft. Here is what to look for when selecting crochet supplies for children.
Hooks for Kids
For beginners aged 7 to 9, start with a larger hook size, typically 5mm (US H-8) or 6mm (US J-10). A larger hook is easier for small hands to grip and makes it easier to see the stitches. Avoid hooks smaller than 4mm for young beginners, as they require more precise fine motor control and can be frustrating.
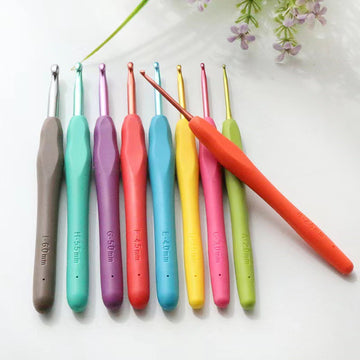
Ergonomic hooks with soft, cushioned grips are worth the investment. They reduce hand fatigue and are easier for children to hold securely. Some children find inline hooks (where the hook portion is the same width as the shaft) easier to use than tapered hooks, but this is largely a matter of personal preference. If possible, let the child try a couple of different hook styles to see which feels most comfortable.
Brightly colored or light-up hooks can add an element of fun for younger children. While these are novelties, they can help motivate a reluctant learner. The hook should feel like a tool they enjoy picking up, not a burden.
Yarn for Kids
The best yarn for children learning to crochet is a smooth, light-colored, worsted weight (size 4) acrylic or cotton blend. Here is why each of these characteristics matters:
Light color: Dark yarn makes it very difficult to see individual stitches, especially for beginners who are still learning to identify where to insert the hook. Choose white, cream, light yellow, light pink, or light blue for first projects.
Smooth texture: Avoid fuzzy, textured, or novelty yarns. They obscure the stitches and make it hard to see what you are doing. A smooth yarn with a slight sheen is ideal because it makes the stitch definition clear.
Worsted weight: This is the most versatile yarn weight and is easy for beginners to work with. It is thick enough that projects work up quickly but not so thick that the resulting fabric is stiff and unmanageable.
Acrylic or cotton blend: These yarns are affordable, widely available, easy to care for, and come in a huge range of colors. Avoid wool for children's first projects, as it can be scratchy and some children have wool allergies or sensitivities.
Avoid very splitty yarns, where the plies separate easily when you insert the hook. This is a common source of frustration for beginners. A tightly plied yarn like a standard acrylic worsted is much more forgiving.
Other Essential Supplies
Beyond hooks and yarn, a few additional supplies will make the learning process smoother:
Stitch markers: These are essential for amigurumi, even for beginners. Use locking stitch markers to mark the first stitch of each round. This helps children keep track of where they are and prevents the common mistake of losing count.
Tapestry needle: A blunt-tipped tapestry needle with a large eye is needed for weaving in ends and sewing pieces together. Choose one with a bent tip, which makes it easier to pick up stitches.
Scissors: A small pair of sharp scissors with rounded tips is safest for children. Keep them dedicated to yarn cutting to keep them sharp.
Stuffing: Polyester fiberfill is the standard stuffing for amigurumi. It is inexpensive, washable, and hypoallergenic. A small bag will last for many projects.
You can find all of these supplies and more in our Accessories collection, which includes tools selected specifically for beginner and young crocheters.

Step-by-Step: Teaching a Child Their First Crochet Stitches
When teaching a child to crochet, the order in which you introduce skills matters. Start with the simplest motions and build gradually. Here is a proven sequence that works for most children.
Step 1: Making a Slip Knot
Begin by teaching the slip knot. This is the first step of every crochet project. Show the child how to make a loop with the yarn, pull the working end through, and tighten it on the hook. Let them practice this several times until they can do it confidently. Some children struggle with the finger dexterity required, so be patient and offer hands-on help if needed.
A simple way to teach the slip knot: Hold the yarn about 6 inches from the end. Make a loop by crossing the short end over the long end. Reach through the loop from behind, grab the long end, and pull it through. Tighten by pulling on both ends. Slide the knot onto the hook.
Step 2: The Chain Stitch
The chain stitch (abbreviated as "ch") is the foundation of all crochet. Teach the child to hold the hook in their dominant hand (like a pencil or a knife, whichever is more comfortable) and the yarn in their non-dominant hand. Show them how to yarn over (wrap the yarn over the hook from back to front) and pull through the loop on the hook. This creates one chain stitch.
Have them practice making chains until they can produce a consistent, moderately loose chain. A common problem for beginners is making chains that are too tight, which makes it difficult to work into them later. Encourage them to relax their tension and not pull too tightly after each stitch.
Turn the practice chains into a fun project. A long chain can become a necklace, a belt, or a jump rope. This gives the child something tangible to show for their effort, even though they have only learned one stitch.
Step 3: Single Crochet
Once the child is comfortable with chains, introduce the single crochet (abbreviated as "sc"). This is the most important stitch in amigurumi and the one they will use most frequently. Start by having them chain 10 to 15 stitches, then work single crochets back into the chain.
Teach the four steps of single crochet: insert the hook into the stitch, yarn over, pull up a loop (now there are two loops on the hook), yarn over again, and pull through both loops. Break this down into manageable chunks and have them repeat each step verbally as they do it. Saying "insert, yarn over, pull up, yarn over, pull through" helps cement the sequence in their memory.
Expect uneven stitches and wobbly edges at first. This is completely normal. Do not correct every mistake. Focus on the motion and the rhythm. As they practice, their tension will naturally become more consistent. Praise improvement, not perfection.
Step 4: Working in the Round
After the child can produce a reasonably consistent single crochet in rows, introduce working in the round. This is the foundation of amigurumi. Start with the magic ring, which can be tricky for small hands. If the magic ring is too difficult, start with the chain-2 method: chain 2, then work all the stitches for the first round into the second chain from the hook.
The magic ring technique: Wrap the yarn around two fingers to create a ring. Insert the hook through the ring, yarn over, and pull up a loop. Chain 1 to secure, then work the required number of single crochets into the ring. Pull the tail to close the ring tightly. This creates the closed center that is characteristic of amigurumi.
Some children find the magic ring frustrating at first. If so, let them use the chain-2 method and come back to the magic ring later. The important thing is that they experience success and keep crocheting. Many of the projects in our Beginner Crochet Kit collection are designed to accommodate both methods, so children can use whichever they find easier.
Step 5: Increases and Decreases
Once the child can work in the round, teach increases and decreases. An increase (abbreviated as "inc") simply means working two single crochets into the same stitch. A decrease (abbreviated as "dec") means combining two stitches into one. For beginners, teach the standard decrease (sc2tog) first. The invisible decrease can be introduced later once the child has more experience.
Explain that increases make the piece bigger (wider) and decreases make it smaller (narrower). This intuitive understanding helps children visualize how flat rounds of crochet become three-dimensional shapes. Use the analogy of a balloon: blowing air in (increasing) makes it round, letting air out (decreasing) makes it smaller.
First Amigurumi Projects for Kids
Choosing the right first project is critical. The project should be simple enough to complete successfully but interesting enough to keep the child motivated. Here are three ideal first amigurumi projects for children, arranged in order of difficulty.
Project 1: The Amigurumi Ball (Easiest)
The simplest amigurumi project is a stuffed ball. It uses only single crochet, increases, and decreases, with no color changes or assembly required. The child makes a sphere, stuffs it, and closes it. This can become a pet toy, a juggling ball, or a decorative pom-pom.
A basic ball pattern for beginners:
Rnd 1: 6 sc in magic ring [6]
Rnd 2: inc x 6 [12]
Rnd 3: (sc, inc) x 6 [18]
Rnd 4: (2 sc, inc) x 6 [24]
Rnd 5-8: sc in each st around [24] (4 rounds)
Rnd 9: (2 sc, dec) x 6 [18]
Rnd 10: (sc, dec) x 6 [12]
Rnd 11: dec x 6 [6]
Stuff firmly, then close the opening. This project teaches the complete amigurumi workflow, from magic ring to finishing, in a single session. It typically takes a child 1 to 2 hours to complete.
Project 2: The Simple Mouse
A mouse is slightly more complex than a ball but still very achievable. It is essentially an elongated ball with ears and a tail. The body uses the same increase and decrease pattern as the ball but is worked into an oval shape. The ears are two small circles sewn onto the head, and the tail is a chain stitched onto the back.
This project introduces basic assembly: sewing pieces together and adding simple features like eyes (embroidered for young children, safety eyes for older ones). It typically takes 2 to 3 hours for a child to complete.
Project 3: The Tiny Bear
A tiny bear is the classic first amigurumi project. It involves making multiple pieces (body, head, two arms, two legs, two ears) and sewing them together. This project is best suited for children aged 9 and up who have already completed at least one simpler project.
The tiny bear teaches assembly skills, proportion, and the importance of consistent tension. It is also the project that produces the most pride. A child who completes a tiny bear has truly learned to crochet amigurumi and will have a keepsake they treasure. Kits designed for this level of project are available in our Crochet Amigurumi Kits collection, with step-by-step instructions written specifically for beginners.
Teaching Tips: How to Keep Kids Engaged
Teaching crochet to children requires a different approach than teaching adults. Children have shorter attention spans, lower frustration tolerance, and different motivation patterns. Here are strategies that experienced crochet teachers use to keep young learners engaged.
Keep Sessions Short
For children under 10, limit crochet sessions to 20 to 30 minutes. Even if the child wants to keep going, it is better to stop while they are still enjoying it rather than pushing until they become tired and frustrated. End each session on a positive note, with a visible accomplishment like completing a round or finishing a piece.
Celebrate Small Wins
Children need frequent positive reinforcement. Celebrate every milestone, no matter how small. The first completed chain. The first single crochet. The first round worked in the round. The first finished project. Take photos of their progress and display their finished pieces prominently. This external validation keeps children motivated through the learning curve.
Let Them Choose
Whenever possible, let the child choose the project, the yarn color, and even the hook (within appropriate size ranges). Children are far more invested in projects they have chosen themselves. If they want to make a purple dinosaur, help them find or adapt a pattern for a purple dinosaur. The specific project matters less than the child's enthusiasm for it.
Model the Behavior
Crochet alongside your child. When they see you enjoying the craft and working on your own projects, it normalizes the activity and creates a shared experience. This is also a natural opportunity for teaching moments, as you can demonstrate techniques and troubleshoot problems in real time.
Do Not Over-Correct
One of the fastest ways to kill a child's enthusiasm for crochet is constant correction. If their stitches are uneven, let them be. If they miss a stitch, help them fix it gently without making a big deal. The goal in the early stages is to build confidence and muscle memory, not to produce perfect work. As they gain experience, their technique will naturally improve.

The Educational Benefits of Crochet for Children
Beyond the practical skill of making things, crochet offers significant educational and developmental benefits for children. Research in occupational therapy and child development has consistently shown that handcrafts like crochet support multiple areas of development.
Fine Motor Skills
Crochet requires precise hand movements that strengthen the small muscles in the fingers and hands. This improves overall dexterity, which translates to better handwriting, improved keyboard skills, and greater independence in daily tasks like buttoning clothes and tying shoes. Occupational therapists frequently recommend crochet and similar handcrafts for children who need additional fine motor development.
Mathematical Thinking
Crochet involves counting, pattern recognition, and basic arithmetic. Children must count stitches, track rounds, and understand multiplication when working repeats like "(sc, inc) x 6." These practical applications of math make abstract concepts concrete and relevant. A child who struggles with math in the classroom may find that counting stitches comes naturally because it has a tangible purpose.
Focus and Concentration
In a world of constant digital stimulation, the ability to focus on a single task for an extended period is becoming increasingly rare. Crochet requires sustained attention, which strengthens the brain's capacity for concentration. Parents of children with attention difficulties often report that crochet is one of the few activities that can hold their child's focus for more than a few minutes.
Emotional Regulation
The repetitive, rhythmic motion of crochet has a calming effect on the nervous system. For children who experience anxiety, anger, or sensory overload, crochet can serve as a self-regulation tool. The tactile sensation of the yarn and the predictable motion of the hook provide sensory grounding that helps children manage big emotions.
Self-Esteem and Confidence
Completing a crochet project gives children a tangible sense of accomplishment. They made something real, with their own hands, from raw materials. This builds self-esteem in a way that digital achievements (like completing a video game level) cannot. The finished amigurumi is proof of their capability, and they can show it off, gift it, or keep it as a reminder of what they can achieve.
FAQ: Teaching Kids to Crochet Amigurumi
Q: What is the best age to teach a child to crochet?
A: Most children are ready to begin crocheting with a hook between ages 7 and 8. At this age, they have the fine motor skills and attention span needed for basic stitches. Children as young as 5 can start with finger crochet, which uses only yarn and fingers, no hook. By ages 9 to 12, most children can crochet independently and tackle simple amigurumi projects.
Q: What size hook and yarn should I start with for a child?
A: Start with a 5mm (US H-8) or 6mm (US J-10) hook and light-colored worsted weight acrylic yarn. The larger hook is easier for small hands to grip, and the light color makes it easy to see individual stitches. Avoid dark colors, fuzzy textures, and very thin yarns for beginners.
Q: How long should a crochet session be for a child?
A: For children under 8, keep sessions to 15 to 20 minutes. For children 8 to 10, 20 to 30 minutes is appropriate. For children 11 and up, 30 to 45 minute sessions work well. Always stop before the child becomes frustrated or tired, even if they want to continue. It is better to end on a high note and keep them eager for the next session.
Q: Can crochet help children with ADHD or anxiety?
A: Yes. The repetitive, focused nature of crochet can be particularly beneficial for children with attention difficulties or anxiety. It provides a structured, tactile activity that channels nervous energy into productive motion. Many occupational therapists recommend crochet as a grounding and focus-building activity. However, it should be introduced gently and without pressure, as frustration can have the opposite effect.
Q: What if my child gets frustrated and wants to quit?
A: This is normal, especially in the early stages when the child is still developing muscle memory. Take a break, put the project away for a few days, and try again later. Sometimes switching to a different color yarn or a simpler project can renew enthusiasm. Do not force the child to continue if they are genuinely not enjoying it. Crochet should be a source of pleasure, not a chore. You can always try again in a few months when their fine motor skills have developed further.
Q: Should I teach my child to read written patterns or use video tutorials?
A: Both. Video tutorials are excellent for learning new techniques because they show the motion clearly. Written patterns are important for independence, as they allow the child to follow any pattern without needing a video. Start with video tutorials for the basics, then gradually introduce written patterns as the child gains confidence. Many children enjoy the puzzle-like challenge of decoding pattern abbreviations.
Q: Are crochet kits good for teaching children?
A: Yes. A well-designed crochet kit eliminates the guesswork of choosing materials and provides structured, step-by-step instructions that are ideal for beginners. Kits also ensure that the child has everything they need in one package, which reduces barriers to starting. Look for kits specifically labeled as beginner-friendly, with clear instructions and simple projects. Our Beginner Crochet Kit collection is curated with exactly these criteria in mind.
Conclusion
Teaching a child to crochet is an investment in their development that pays dividends far beyond the finished project. The fine motor skills, mathematical thinking, sustained focus, emotional regulation, and self-esteem that crochet builds are benefits that will serve them throughout their life. And the joy of watching a child's face light up when they complete their first amigurumi, holding up a slightly lopsided but entirely handmade creation, is a moment that neither of you will forget.
Start simple, be patient, and let the child's interests guide the journey. Remember that every expert crocheter was once a beginner who struggled with their first chain stitch. By introducing a child to crochet, you are opening the door to a lifelong creative skill, a source of calm and accomplishment, and a community of makers who share their passion. When you and your child are ready to begin, explore our Crochet Amigurumi Kits collection for beginner-friendly projects that include everything you need to start creating together.


