
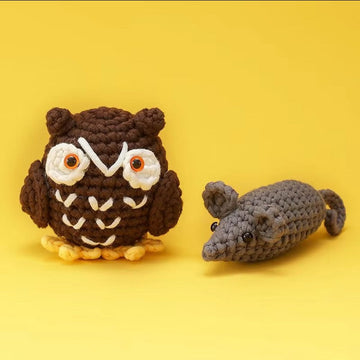

Penguins are one of the most universally loved animals on the planet — waddling, tuxedo-wearing, impossibly charming. And as an amigurumi subject, they're a brilliant choice for beginner crocheters. Their shape is forgiving, their color palette is simple (mostly black, white, and a pop of orange or yellow), and the finished result is so adorable that it makes a perfect gift for children and adults alike.
In this complete step-by-step guide, you'll learn everything you need to crochet your very first amigurumi penguin from scratch. We'll cover every piece — the round body, the head, the wings, the feet, and the beak — with clear instructions, stitch counts, and beginner-friendly tips throughout. Even if you've only just learned to make a magic ring, you can follow along with this tutorial.
Why Amigurumi Penguins Are Great for Beginners
Before we jump into the pattern, let's talk about what makes penguins such a great starter amigurumi project. First, the penguin's body is essentially a rounded oval — you're working in continuous rounds (also called working in the round), which is the foundational skill for all amigurumi. There are no flat panels or tricky seams.
Second, the color work is minimal. A classic penguin is crocheted primarily in black with a white belly patch that you can either embroider on afterward or crochet separately and sew on. You don't need to manage multiple active yarn strands at once — a relief for beginners who haven't tackled color changes yet.
Third, the proportions are fun but simple. The body is a large sphere or egg shape, the head is a slightly smaller sphere, and the wings, feet, and beak are small flat pieces that are easy to sew on. There's no complex shaping or intricate stitching required.
Materials You'll Need
Here's what to gather before you start crocheting:
- Yarn: DK weight (light worsted) or worsted weight yarn in black and white. A small amount of orange or yellow yarn for the beak and feet. Exact yardage will depend on your gauge, but plan for approximately 80–100 yards of black, 25–30 yards of white, and 5–10 yards of orange/yellow.
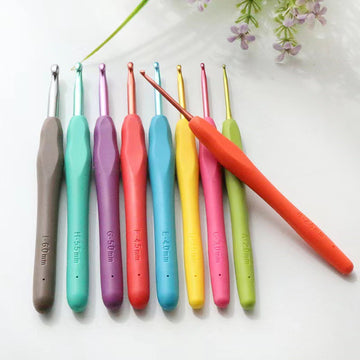
- Crochet hook: For DK weight yarn, use a 2.5 mm or 3.0 mm hook. For worsted weight, use a 3.5 mm hook. Using a smaller hook than the yarn label recommends is intentional in amigurumi — it creates tight, dense stitches that prevent the fiberfill from showing through.
- Fiberfill stuffing: Polyester fiberfill is the standard. You'll need enough to fill the body and head firmly but not to the point of distortion.
- Safety eyes: Two 9 mm or 12 mm black safety eyes. (If making the toy for a child under 3, use embroidered yarn eyes instead, as safety eyes can be a choking hazard.)
- Yarn needle: A blunt tapestry needle for sewing pieces together and weaving in ends.
- Stitch marker: A small locking stitch marker to mark the first stitch of each round.
- Scissors
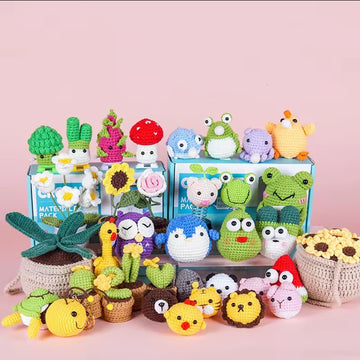
If you'd rather have everything pre-measured and bundled for you, our Beginner Crochet Kit collection includes kits with pre-cut yarn, the right hook size, safety eyes, stuffing, and a pattern — making it much easier to dive straight into crocheting without a supply run.
Key Stitches and Abbreviations
This pattern uses US crochet terminology. Here's a quick reference:
- MR — Magic ring (adjustable loop to start crocheting in the round)
- sc — Single crochet
- inc — Increase: 2 single crochets in the same stitch
- dec — Decrease: single crochet 2 stitches together (sc2tog). For amigurumi, use the invisible decrease: insert hook through the front loops only of the next 2 stitches, then complete the single crochet.
- sl st — Slip stitch
- ch — Chain
- BLO — Back loop only
- FLO — Front loop only
- Numbers in parentheses at the end of a row, e.g. (18), indicate the total stitch count for that round.
If any of these are unfamiliar, take a few minutes to practice each one on a small swatch before beginning the pattern. The magic ring in particular is worth mastering — it creates a tight, no-gap center for all round amigurumi pieces.
How to Make a Magic Ring
The magic ring (also called magic loop or adjustable ring) is the starting point for almost every piece in this penguin. Here's how to make one:
- Wrap the yarn around your index finger twice, creating a loop.
- Insert your crochet hook through the loop from front to back.
- Pull up a loop of working yarn through the ring.
- Chain 1 (this counts as the first stitch position, though it does NOT count as a stitch in amigurumi).
- Work the specified number of single crochets into the ring.
- Pull the tail end of the yarn to close the ring tightly.
Once closed, you should have a flat circle with no hole in the center. This is exactly what you want — a gap at the start would look messy and allow stuffing to poke through.
Crocheting the Penguin Body
The body is the largest piece and the one you'll start with. Use black yarn unless noted. Work in continuous rounds — do not join at the end of each round. Use a stitch marker to mark the first stitch of every round.
Round 1: MR, 6 sc into ring. (6)
Round 2: inc in each st around. (12)
Round 3: *sc 1, inc* repeat 6 times. (18)
Round 4: *sc 2, inc* repeat 6 times. (24)
Round 5: *sc 3, inc* repeat 6 times. (30)
Round 6: *sc 4, inc* repeat 6 times. (36)
Round 7: *sc 5, inc* repeat 6 times. (42)
Rounds 8–14: sc in each st around. (42) — 7 rounds even
Round 15: *sc 5, dec* repeat 6 times. (36)
Round 16: *sc 4, dec* repeat 6 times. (30)
Round 17: *sc 3, dec* repeat 6 times. (24)
Before closing further, sew the white belly patch on now (see instructions below) or embroider it on at the end. Then stuff the body firmly with fiberfill.
Round 18: *sc 2, dec* repeat 6 times. (18)
Round 19: *sc 1, dec* repeat 6 times. (12)
Round 20: dec 6 times. (6)
Fasten off, leaving a long tail. Use your yarn needle to weave through the remaining 6 front loops and pull tight to close the opening. Weave in the end securely.
The White Belly Patch (Optional Sewn-On Method)
For the classic tuxedo look, crochet a white oval and sew it onto the front of the body. Here's a simple oval:
Row 1: Ch 5 in white. Sc in 2nd ch from hook, sc 2, 3 sc in last ch. Working along the other side of the chain: sc 2, 2 sc in last ch. Sl st to join. (10)
Round 2: inc, sc 2, inc 3, sc 2, inc 2. (16)
Round 3: sc 1, inc, sc 2, *sc 1, inc* 3 times, sc 2, *sc 1, inc* twice. (22)
Fasten off leaving a long tail. Pin the oval to the front lower half of the body and sew around the edge with your yarn needle and the tail end. Weave in all ends.
Crocheting the Head
The head is a slightly smaller sphere worked the same way. Use black yarn.
Round 1: MR, 6 sc. (6)
Round 2: inc in each st. (12)
Round 3: *sc 1, inc* repeat 6 times. (18)
Round 4: *sc 2, inc* repeat 6 times. (24)
Round 5: *sc 3, inc* repeat 6 times. (30)
Rounds 6–10: sc in each st around. (30) — 5 rounds even
Round 11: *sc 3, dec* repeat 6 times. (24)
Insert safety eyes between rounds 7 and 8, with approximately 6–8 stitches between them. Push the post of each safety eye through the fabric and attach the backing firmly on the inside. Once the safety eye backings are clicked in, they cannot be removed — so check the position carefully before securing.
Round 12: *sc 2, dec* repeat 6 times. (18)
Round 13: *sc 1, dec* repeat 6 times. (12)
Stuff the head firmly. Then:
Round 14: dec 6 times. (6)
Fasten off, close, and weave in end.
Crocheting the Wings (Make 2)
The wings are flat oval pieces with a slight curve. Work in black.
Row 1: Ch 9. Sc in 2nd ch from hook, sc in next 6 ch, 3 sc in last ch. Working back along the other side: sc in 6 ch, inc in last. Do not join — turn. (18)
Row 2: Ch 1, sc 7, inc, sc 1, inc, sc 7, inc. (21)
Row 3: Ch 1, sc across. Sl st to join in first sc. Fasten off leaving a long tail for sewing.
Each wing should be a rounded paddle shape about 3–4 cm long, depending on your gauge. Do not stuff the wings — they should remain flat so the penguin's flippers lay naturally against its sides.
Crocheting the Feet (Make 2)
Work in orange or yellow yarn.
Row 1: Ch 8. Sc in 2nd ch from hook, sc across. (7)
Rows 2–4: Ch 1, turn, sc across. (7)
Now make the three toe prongs:
First toe: Ch 4. Sc in 2nd ch from hook, sc 2. Sl st back into the main foot piece at the current position.
Second toe: Move 2 stitches to the left. Ch 4. Sc in 2nd ch from hook, sc 2. Sl st back.
Third toe: Move 2 stitches to the left again. Ch 4. Sc in 2nd ch from hook, sc 2. Sl st back.
Fasten off leaving a tail for sewing. The foot should look like a small webbed flipper with three prongs. Don't worry if it's imperfect — when sewn to the bottom of the body, these add a ton of character.
Crocheting the Beak
Work in orange or yellow yarn.
Round 1: MR, 4 sc. (4)
Round 2: *sc 1, inc* repeat twice. (6)
Round 3: sc in each st around. (6)
Round 4: *sc 2, inc* repeat twice. (8)
Fasten off, leaving a tail. Do not stuff the beak — it should stay flat or only lightly filled. The small triangular beak shape is very recognizable as a penguin bill and gives the face a lot of expression.

Assembly: Putting Your Penguin Together
Assembly is where your penguin comes to life. Follow this order:
Step 1: Attach the Head to the Body
Position the head on top of the body, slightly toward the front (not perfectly centered top-to-bottom). Thread a yarn needle with the tail from the head and whipstitch around the entire opening, catching both the head and body in each stitch. Make sure the seam is tight and secure — this is the most stress-bearing joint on the toy. Pull the yarn tail to the inside and weave in securely.
Step 2: Sew On the Beak
Position the beak in the center of the face, between the eyes and slightly below them — typically around round 8–9 of the head. Pin it in place and check the expression before committing. Sew around the edges with your needle and the beak's tail, then weave in the end inside the head.
Step 3: Attach the Wings
Position each wing on the sides of the body, roughly level with the middle of the body, with the point of the wing angled slightly downward. The wing should lay flat against the body. Whipstitch along the top straight edge of the wing only, leaving the bottom free so the wing has a natural hanging movement. Weave all ends inside the body.
Step 4: Sew On the Feet
Position the feet flat under the body, one on each side of the bottom-center seam. The toes should point forward. Sew each foot securely through several rows of body stitches. Make sure your penguin can balance upright — adjust positioning as needed for stability.
Adding Expression and Final Touches
With all pieces attached, step back and look at your penguin. Here are a few ways to add extra personality:
- Rosy cheeks: Use a small amount of pink yarn (or blush-colored felt) and embroider or glue two small circles below the eyes for a cute blushing effect.
- Embroidered smile: Use a strand of white yarn and two small straight stitches just below the beak for a subtle smile.
- White eye highlights: Thread a single strand of white yarn and make one or two tiny stitches over each safety eye to create the classic cartoon "sparkle" highlight in the eye.
- Scarf: Crochet a simple chain about 25–30 stitches long in a contrasting color and wrap it around the penguin's neck, tying a small knot or bow.
Beginner Tips for a Perfect Amigurumi Penguin
Keep a tight, even tension
The number-one challenge beginners face with amigurumi is loose stitches that allow the white stuffing to peek through the dark yarn. Work with a hook that is one or two sizes smaller than the yarn label recommends, and consciously keep your tension snug. If you can see fiberfill between your stitches, try going down another hook size.
Count every round
Use a stitch marker religiously and count your stitches at the end of every round. Getting off by even one stitch will throw off the symmetry of the entire piece. If you find a mistake after a few rounds, it's usually worth frogging (unraveling) back to fix it.
Stuff as you go
Don't wait until the opening is too small to stuff the body. Add fiberfill when the piece is about 60–70% closed, then add a bit more in the last few rounds. This lets you check the firmness and shape continuously.
Leave long tails when fastening off
When finishing each piece, cut your yarn leaving a tail of at least 20–25 cm (8–10 inches). This gives you enough to sew the pieces together and weave in the ends without running short.
Use a pin to test positions before sewing
Before committing to where the head, wings, or beak goes, use pins to test the position and look at the overall character. A beak that's 2 stitches higher or lower dramatically changes the expression. Take your time here — it's worth the extra few minutes.
Choosing Yarn for Amigurumi Penguins
For most beginners, cotton or cotton-blend yarn in DK weight is a joy to work with for amigurumi. It has very little stretch (unlike acrylic), which makes stitch placement easy to see and control, and it has a slight sheen that looks great for animal toys. However, a smooth, light-colored worsted acrylic works equally well and is more widely available.
For the black sections of your penguin, avoid very dark navy that might photograph as black — true black yarn is best for that crisp tuxedo look. Also avoid highly textured or fluffy yarns (like mohair or boucle) for this project; they're beautiful in other contexts but make counting stitches nearly impossible for beginners.
If you're new to amigurumi and want everything sorted for you in one package, take a look at our Crochet Amigurumi Kits — each one comes with the pre-measured yarn, the right hook, safety eyes, stuffing, and step-by-step instructions in one box.
Frequently Asked Questions
How long does it take to crochet an amigurumi penguin?
For a beginner working at a relaxed pace, expect 5–8 hours total across the body, head, wings, feet, and beak — broken into several comfortable sessions. An experienced crocheter can finish the same project in 2–3 hours. The assembly and finishing typically adds another 30–45 minutes.
What size will the finished penguin be?
Using worsted weight yarn with a 3.5 mm hook, the finished penguin will stand approximately 15–18 cm (6–7 inches) tall. Using DK weight with a 3.0 mm hook produces a slightly smaller penguin, around 12–14 cm (4.5–5.5 inches).
Can I use regular sewing thread instead of yarn to sew pieces together?
It's not recommended. Regular sewing thread is too thin and can cut through yarn fibers over time, especially at stress points like the neck joint. Use yarn — specifically the same yarn you crocheted with — or a matching embroidery floss threaded several times for small color-matching details.
How do I make the penguin safe for babies and toddlers?
Replace all safety eyes with embroidered eyes made from black yarn. Skip any small plastic or button embellishments. Use only polyester fiberfill (check that it's hypoallergenic and certified toy-safe). Make sure all yarn ends are woven in at least 3–4 times through the body of the piece so they cannot be pulled out. At minimum, use a thread that meets EN71 (Europe) or ASTM F963 (US) toy safety standards if making this as a gift for a child under 3.
Why are my rounds looking twisted or spiraling?
This is completely normal in amigurumi. Because you're working in continuous rounds without joining, you'll naturally see a slight "jog" or spiral at the stitch marker. This almost always hides under the assembled toy, particularly at seams. If the spiral is very dramatic, check that you're not accidentally skipping stitches or working into the wrong part of each stitch.
Can I change the colors to make a different type of penguin?
Absolutely. Emperor penguins have yellow-orange ear patches; gentoo penguins have a distinctive white stripe across the top of the head; Adélie penguins have a white ring around each eye. You can add these details with small pieces of felt, embroidered stitches, or by adding short rows of color change during crocheting. The base pattern works for all of them.

What to Make Next
Once you've finished your amigurumi penguin, you'll have solid practice with the magic ring, increases, decreases, and assembly — the four core skills of all amigurumi. From here, try branching out to other bird-shaped amigurumi (parrots and owls use similar round body construction) or expand to four-legged animals, which introduce leg attachment techniques.
Each new project builds on the last. Many crafters find that after their second or third amigurumi, the process becomes almost meditative — the rhythmic rounds, the gradual emergence of a shape, the satisfying click of a safety eye going in. It's one of the most rewarding beginner crafts you can pick up.
Happy crocheting, and enjoy your new penguin!


