
Why Assembly and Finishing Make or Break Your Amigurumi
You've crocheted all the pieces. The body, the head, the tiny ears, the little arms. And now they're sitting in a pile on your table, waiting. This moment — where individual crocheted parts become a complete, charming character — is where many beginners feel most uncertain. How tight should the stuffing be? How do you make a seam look invisible? Where exactly should the arms go?
The good news: stuffing and assembling amigurumi is a learnable skill, and once you understand a handful of core principles, every future project becomes easier and faster. This guide covers everything from choosing and inserting stuffing to professional-looking sewing techniques, positioning and pinning, and the finishing touches that separate a polished amigurumi from a lumpy one.
If you want to jump straight into a project that includes pre-cut yarn, stuffing, and a step-by-step assembly guide, our crochet amigurumi kits are designed to make this easier — but this guide will help you regardless of whether you're working from a kit or sourcing supplies yourself.

Part 1: Stuffing Your Amigurumi
Choosing the Right Stuffing
The most widely available and recommended stuffing for amigurumi is polyester fiberfill (also called polyfill or toy stuffing). It's lightweight, washable, non-allergenic, and available in craft stores worldwide. Aim for a brand labeled "premium" or "hypoallergenic" — cheaper fiberfill tends to clump over time, leaving your amigurumi lumpy after a few washes.
For reference: a medium-sized amigurumi figure (approximately 15–20 cm tall) typically uses 30–50 g of fiberfill. A bag of 250 g of polyfill will stuff 5–8 medium figures comfortably.
Alternative stuffing materials and when to use them:
- Plastic pellets (poly pellets or weighted beads): Use a small amount (5–10 g) in the base of figures that need to sit or stand upright. Layer fiberfill on top. The pellets add weight that keeps figures stable on shelves or desks.
- Yarn scraps: Usable for small, non-washable decorative pieces only. Yarn scraps clump unpredictably and can't be laundered, so avoid in children's toys or anything that will be used regularly.
- Wool roving: Creates a natural, slightly firmer feel. Works well for sculptural display pieces. Not recommended if the item will be washed, as wool roving can felt and shrink.
- No stuffing: Small flat pieces like ears, fins, or decorative patches often work better without any stuffing — they sew on more neatly when left flat.
How to Stuff Correctly: The Key Principles
Stuffing technique matters as much as the amount you use. Follow these principles:
Principle 1: Add stuffing incrementally
Don't wait until the opening is nearly closed to add stuffing. For any piece with a decreasing top (which is most amigurumi), begin adding small pinches of fiberfill when you're about two-thirds of the way through the decrease rounds. This lets you reach all the way into corners and extremities. Once the opening is smaller than the diameter of your fist, it becomes very difficult to position stuffing accurately.
Principle 2: Break fiberfill into small pieces
Rather than pushing in large chunks, tear the fiberfill into pieces roughly the size of a golf ball or smaller. Small pieces pack evenly without creating the air pockets that cause lumps. Push each piece fully into place before adding the next.
Principle 3: Stuff extremities first
For elongated shapes — rabbit ears, giraffe necks, arms, legs — use a blunt pencil, knitting needle, or chopstick to push tiny amounts of fiberfill all the way into the tip. These narrow sections need to be firmly stuffed or they'll look deflated. Once the tip is filled, continue stuffing the rest of the piece normally.
Principle 4: The right density for the piece type
- Heads: Stuff very firmly. The head needs to hold its shape and support whatever accessories (ears, horns, hats) are sewn onto it. When you press the stuffed head firmly with a finger, it should feel solid with minimal give.
- Bodies: Stuff firmly but with slightly more give than the head. The body is the anchor for attached limbs, so it needs substance, but a small amount of squishiness makes the figure feel more huggable.
- Limbs (arms, legs): Stuff lightly to moderately. Overstuffed arms splay outward awkwardly; overstuffed legs make the figure hard to sit upright. Aim for pliable but not floppy.
- Flat pieces (ears, wings, fins, tails): Generally unstuffed. Leave them flat for clean, easy attachment.
Principle 5: Check the surface for lumps before closing
Before sewing the final closing stitches, squeeze and rotate the piece while looking at the surface from all angles. Any lumps or dimples indicate uneven stuffing. Reach in with your finger or a thin tool to redistribute fiberfill as needed. It's far easier to fix now than after the piece is closed.
Part 2: Closing the Last Opening
Most amigurumi pieces are crocheted in the round with decreases that bring the stitch count down to 6 stitches. At 6 stitches, here's how to close neatly:
- Cut the yarn leaving a 20–25 cm tail
- Thread the tail onto a tapestry needle
- Insert the needle through the front loop only of each of the 6 remaining stitches, going all the way around
- Pull tight — the opening will gather and close like a drawstring
- Insert the needle back into the center of the closure and bring it out through the side of the piece (several rows down)
- Pull snug and trim flush with the surface — the tail end disappears inside
This method creates a nearly invisible closure. Do not use a standard whip stitch to close (looping over the outside edge) — it creates a visible ridge on the surface of the finished figure.
Part 3: Installing Safety Eyes Before Closing
Safety eyes must be installed while the piece is still open enough to reach inside and attach the washer. This is the most time-sensitive step of the entire process — once the final closure is made, safety eyes cannot be added without cutting the fabric.
Standard Safety Eye Installation Steps
- Determine eye position (see positioning guide below)
- Part the stitches at the desired location — no cutting needed. The post of the safety eye is pushed between existing stitches
- Push the post firmly through the fabric from outside to inside
- On the inside, snap the locking washer onto the post as far as it will go. You should hear a click or feel it lock firmly. If it slides off easily, it's not fully seated
- Repeat for the second eye
- Step back and check alignment from straight-on before final stuffing and closure
Eye Positioning Guide
Correct eye placement dramatically affects the expression and personality of your amigurumi. Here are reliable placement rules:
- Height: Eyes are typically placed between the 40th and 60th percentile of the head height (measured from the bottom). On a 30-round head, rounds 13–18 are the usual eye zone.
- Width: For a friendly expression, place eyes 6–10 stitches apart (center to center). Wider placement looks more surprised; closer placement looks more intense or sleepy depending on other features.
- Low placement: Placing eyes slightly lower on the face (below the center line) makes the forehead look larger and the figure more baby-like — great for stuffed animal aesthetics.
- High placement: Placing eyes at or above the center line creates a more alert, adult expression.
When uncertain, use quilting pins as placeholders: pin them at your proposed locations, stuff the piece lightly, and photograph it straight-on. Small mistakes in positioning are very hard to see in real life but obvious in photos.

Part 4: Sewing Pieces Together
This is the step most beginners dread — and the one that makes the biggest visible difference in your finished amigurumi. Good sewing technique makes joins look clean and intentional; poor technique creates visible gaps, loose pieces, or uneven positioning.
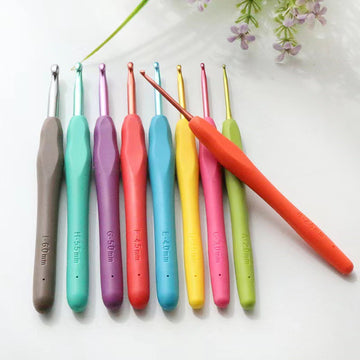
The Right Needle
Use a tapestry needle (also called a yarn needle or darning needle) with a blunt tip and a large eye. A sharp embroidery needle will split your yarn strands and weaken stitches. Needle length matters: a needle that's 5–7 cm long gives you good control; shorter needles are hard to grip; longer ones are awkward for small pieces.
The Mattress Stitch (for joining flat pieces to a surface)
The mattress stitch is the most-used technique for attaching ears, arms, legs, and other appendages to the main body. It creates a nearly invisible join:
- Thread the long tail from the piece onto your tapestry needle
- Position the piece exactly where you want it and hold or pin in place
- Insert the needle up through the body fabric at one edge of the piece's perimeter
- Insert through the edge of the piece itself (going through the outermost stitch)
- Back down through the body at the next stitch along the perimeter
- Continue working your way around the entire perimeter of the piece in this way, alternating between body and piece
- Pull the thread snug (not tight — tight stitches pucker the fabric) as you go
- After completing the circuit, insert the needle into the piece and out through the other side, then trim
The Whip Stitch (for joining two edges)
Use the whip stitch to join two crocheted edges to each other — for example, when attaching an open flat piece (like some ear styles) edge-to-edge with the body.
- Align both edges
- Insert needle through both pieces from front to back at one end
- Loop the yarn over the top edge and repeat, moving one stitch along with each loop
- The result is a diagonal ridge along the seam — neat and strong but visible on close inspection
Key Sewing Tips
- Pin before sewing. Use quilting pins to hold pieces in position before making a single stitch. Once you're satisfied with placement, sew with confidence.
- Use the original yarn tail. Leave a tail at least 25–30 cm long on each piece specifically for sewing. Using the original tail means the join color matches perfectly without needing a separate thread.
- Anchor before and after. Start with a knot or loop anchor at the first stitch, and finish with 2–3 half-hitch knots before weaving in the end. This prevents joins from working loose over time.
- Sew all the way around. It's tempting to sew only partway around a piece (especially small ones), but partial joins allow pieces to flip or rotate. Always sew the full perimeter of contact.
- Leave an opening for flat unstuffed pieces. For ears and similar flat pieces that you want to look dimensional rather than paper-flat, sew around most of the perimeter but leave a small gap — the crocheted thickness of the piece itself provides a small amount of lift.
Part 5: Assembly Order
The order in which you assemble your amigurumi matters — some pieces are impossible or awkward to attach after surrounding pieces are already in place. Here's a reliable assembly sequence for most humanoid or animal amigurumi figures:
- Install safety eyes in the head (before closing)
- Close and finish all individual pieces (body, head, limbs, ears, tail, etc.)
- Attach ears/horns/hair to the head — do this before attaching the head to the body, when you have maximum access to the head surface
- Embroider any face details (nose, mouth, eyebrows, blush marks) — again, easier on a detached head
- Attach the head to the body
- Attach arms/wings
- Attach legs/feet
- Attach any tail
- Add accessories (bow, hat, flower, etc.) last
Always do face details on the head before it's attached to the body — you have 360-degree access and can position embroidery precisely. Trying to embroider a nose on an assembled figure while working around an attached body is genuinely difficult.
Part 6: Embroidery Details
Many amigurumi patterns include embroidered features: noses, mouths, eyebrows, paw pads, whiskers, and blush marks. These small touches transform a good amigurumi into a great one.
Nose
The most common nose shape is a small upside-down triangle of satin stitch, typically in black or dark brown. Use embroidery floss or thin yarn. Make 3–5 parallel horizontal stitches of increasing then decreasing width to build a filled triangle shape. Alternatively, for a rounded button nose, work a cluster of satin stitches in a circular pattern.
Mouth
A simple stitched smile uses 2–3 long stitches arranged in a "U" or crescent shape below the nose. Anchor at one corner, run a long stitch to the center bottom, then bring out at the other corner. This creates a Y-shape that reads as a smile. For a wider, cartoon-style smile, add an upward angle stitch at each corner.
Blush Marks
Blush marks are not embroidered — they're applied with a cosmetic blush brush and pink powdered blush (or a pink chalk pastel ground down). Dab lightly below each eye and on cheek areas. This technique is reversible (you can blow it off before it's set) and gives a soft, rosy glow that embroidery can't replicate. Some makers lightly spray the finished figure with craft fixative to prevent the blush from rubbing off.
Part 7: Finishing and Weaving In Ends
Every yarn tail must be woven in securely. Here's how to do it properly:
- Thread the tail onto a tapestry needle
- Insert through the fabric and weave in an S-curve or zigzag pattern through at least 4–5 stitches in different directions
- This changes-direction approach locks the end against unraveling far better than weaving in a straight line
- Pull gently and trim flush with the surface — the slight tension causes the cut end to retract inside the fabric where it's invisible
Never tie knots to secure yarn ends in amigurumi. Knots create bumps visible through the fabric surface, and they can work loose over time. The weaving method is both more secure and more invisible.
For tails you used for sewing, after completing the seam, insert the needle deep into the adjacent piece and bring it out 2–3 cm away, then trim. This buries the tail inside the body of an attached piece rather than leaving it at the seam.
Quick Assembly Checklist
Before calling your amigurumi finished, run through this checklist:
- ☐ All safety eyes locked with washers on the inside
- ☐ All pieces sewn fully around their perimeter (no partial joins)
- ☐ All yarn tails woven in and trimmed (check by gently tugging each piece)
- ☐ No stuffing visible through stitches
- ☐ Figure stands, sits, or hangs as intended
- ☐ Face details centered and symmetrical
- ☐ No loose stitches or dropped rows in the final crocheted fabric
Once you've mastered stuffing and assembly, every pattern becomes more approachable. If you're ready for your next project, browse our full range of amigurumi crochet kits — each one comes with all the materials, full instructions, and tips for assembly.
Frequently Asked Questions
How much fiberfill stuffing do I need for a typical amigurumi?
A medium amigurumi figure (15–20 cm tall) typically uses 30–50 g of polyester fiberfill. Larger figures (25–30 cm) may need 80–100 g. A standard 250 g bag of polyfill is enough for 5–8 medium figures. Buy more than you think you need — understuffing is a common beginner mistake and you can't easily add more once the piece is closed.
When should I stuff my amigurumi while crocheting?
Start adding stuffing when you're approximately two-thirds through the decrease rounds on any piece — before the opening gets too small to reach inside. For pieces with no decreasing top (like some bodies), stuff just before the final round. Stuff in small increments rather than all at once for the most even distribution.
How do I make amigurumi parts stay attached securely?
Use the long yarn tail left on each piece and sew all the way around the full perimeter of contact using the mattress stitch. Anchor with a knot or loop at the start, and finish with 2–3 half-hitch knots. Always weave in ends by changing direction multiple times. A properly sewn arm or ear should not pull off even under firm tugging — this is especially important for children's toys.
What is the best sewing stitch for attaching amigurumi pieces?
The mattress stitch is the most versatile and creates the least visible seam for attaching round or flat appendages to a curved body surface. The whip stitch is used for edge-to-edge joins. Avoid the running stitch for joins — it creates gaps along the seam and doesn't hold as well under tension.
Can I use regular sewing thread instead of yarn to sew amigurumi pieces?
No — regular sewing thread is far too thin for amigurumi and will cut through the yarn strands of your fabric under tension. Always use the same weight yarn as your project, or at minimum a yarn of similar weight. For very fine detail work (embroidering features), 6-strand embroidery floss is appropriate.
How do I stop amigurumi stuffing from going lumpy?
Use a premium polyester fiberfill and tear it into small pieces before inserting. Cheap fiberfill compresses and clumps; premium grades maintain loft better after washing and use. Store finished amigurumi in a dry location away from direct sunlight, which can degrade fiberfill over time. If a figure does become lumpy after washing, knead it gently while still damp to redistribute the stuffing.
Is it safe to give stuffed amigurumi to babies?
If the amigurumi uses safety eyes, it is NOT safe for children under 3 years old. Safety eyes have small parts (the post and washer) that are choking hazards, even when firmly installed. For infant-safe amigurumi, embroider all eye and facial details using yarn or embroidery floss. Use hypoallergenic polyfill stuffing and machine-wash-safe yarn. Always supervise young children with handmade toys.
My amigurumi head wobbles on the body — how do I fix it?
A wobbly head usually means the join isn't sewn firmly enough around the full circumference, or the contact area between head and body is too small. Try sewing through more stitches on each piece, covering the full circle of contact. For extra security, after sewing the perimeter, run 2–3 stitches from head to body through the center (like a button stitch) and pull snug before knotting off.


