
Introduction
Crochet is a beloved craft that allows us to create beautiful, functional pieces with our own two hands. However, even the most experienced crocheters can sometimes encounter unexpected challenges and make mistakes along the way. From tension issues and uneven stitches to dropped stitches and unsightly gaps, these errors can often derail our projects and leave us feeling frustrated.
Fear not, fellow crocheters! In this comprehensive guide, we're going to dive deep into 10 of the most common crochet mistakes and equip you with the knowledge and techniques to fix them with ease. Whether you're a beginner just starting your crochet journey or a seasoned pro looking to refine your skills, this post will provide you with the tools you need to crochet with confidence and achieve flawless results every time.
| Table of Contents |
| Introduction |
| Uneven Tension |
| Dropped Stitches |
| Tight or Loose Gauge |
| Uneven Edge Stitches |
| Holes and Gaps in the Fabric |
| Conclusion |
Uneven Tension
One of the most common crochet challenges is maintaining even tension throughout your project. Uneven tension can result in a lumpy, uneven fabric, making it difficult to achieve the desired look and fit of your finished piece.
Identifying Tension Issues
Recognizing uneven tension is the first step in addressing this problem. Look for areas in your work where the stitches appear tighter or looser than the surrounding stitches. These inconsistencies can be caused by a variety of factors, including changes in your grip, variations in yarn tension, or simply fatigue as you work.
Adjusting Your Grip and Tension
To correct uneven tension, start by examining your grip and the way you're holding the yarn. Try experimenting with different hand positions and techniques to find the grip that allows you to maintain a consistent tension. Some crocheters find it helpful to hold the yarn in their non-dominant hand, while others prefer to tension the yarn around their pinky finger.
Additionally, pay attention to the tension in your yarn as you work. Avoid pulling the yarn too tightly or letting it become too loose, as both can contribute to uneven stitches.
Blocking to Even Out Stitches
If your finished project still has areas of uneven tension, blocking can be an effective solution. Blocking involves wetting or steaming your crochet piece and then pinning it into the desired shape to set the stitches. This process can help to even out any inconsistencies and create a smooth, uniform fabric.
Follow the blocking instructions specific to your project, taking care to gently stretch and manipulate the fabric without overstressing the stitches. With a little patience and attention to detail, you can transform an unevenly tensioned piece into a beautifully uniform crochet masterpiece.
Dropped Stitches

Dropped stitches are another common crochet dilemma that can derail your project if left unaddressed. These missing stitches can create unsightly gaps in your fabric and compromise the structural integrity of your work.
Recognizing Dropped Stitches
Identifying a dropped stitch can be tricky, especially for beginners. Look for a loop of yarn that appears to be hanging down or a "hole" in your fabric where a stitch should be. Pay close attention to the end of each row or round, as this is where dropped stitches most commonly occur.
Locating and Fixing Dropped Stitches
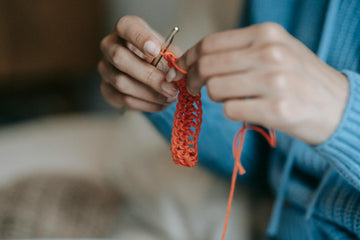
If you notice a dropped stitch, don't panic! With a little care and attention, you can usually fix the issue without too much trouble. Carefully examine your work to locate the exact row or round where the stitch was dropped, and then use a crochet hook to carefully pull the dropped loop back up and secure it with a slip stitch.
Preventing Dropped Stitches
To avoid dropped stitches in the first place, establish a habit of carefully counting your stitches at the end of each row or round. Additionally, be mindful of your tension and avoid pulling the yarn too tightly, as this can cause stitches to slip off the hook.
It's also a good idea to use stitch markers to designate the beginning and end of rounds, as well as any important stitch placements. This can help you quickly identify any missing stitches and make corrections before they become a bigger problem.
Tight or Loose Gauge

Achieving the correct gauge is essential for ensuring your crochet projects turn out as intended. Gauge refers to the number of stitches and rows per inch (or centimeter) of your fabric, and it can have a significant impact on the final size and shape of your finished piece.
Understanding Gauge
When a pattern specifies a particular gauge, it's important to match that gauge as closely as possible. If your gauge is too tight or too loose, the finished dimensions of your project may not match the pattern's intended measurements, leading to ill-fitting garments or disproportionate accessories.
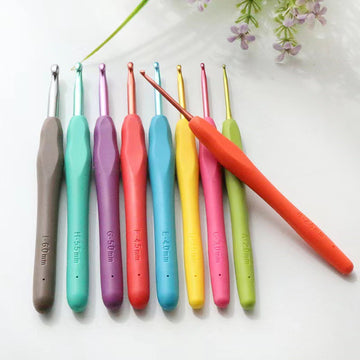
Adjusting Your Hook Size
One of the most effective ways to correct gauge issues is to adjust your hook size. If your stitches are too tight, try going up a hook size or two to create a looser, more open fabric. Conversely, if your stitches are too loose, drop down to a smaller hook to tighten up the gauge.
Maintaining Consistent Tension
In addition to hook size, your overall tension can also impact the gauge of your crochet work. Be mindful of maintaining a consistent tension throughout your project, and don't be afraid to take breaks or switch up your grip if you notice your tension starting to vary.
Remember, achieving the correct gauge may take some trial and error, but it's an essential step for ensuring your crochet projects turn out as planned.
Uneven Edge Stitches

Maintaining clean, straight edges is crucial for many crochet projects, especially when it comes to garments, blankets, and other items that need to hang or drape properly. Uneven edge stitches can create a messy, sloppy appearance and make it challenging to seam or join your pieces together.
Identifying Uneven Edges
Uneven edge stitches are typically characterized by a ragged, jagged appearance along the sides of your work. You may notice that the stitches appear tighter or looser in certain areas, creating an uneven, wavy effect.
Techniques for Maintaining Straight Edges
To keep your edges neat and even, try implementing the following techniques:
Consistently work the same number of stitches in each row or round, carefully counting as you go.
Use stitch markers to designate the first and last stitches of each row, helping you maintain a consistent edge.
Work the last stitch of each row into the very last loop of the previous row, ensuring a clean, even finish.
Pay attention to your tension, and try to maintain a consistent tension throughout your project.
Fixing Uneven Edges
If you've already completed a project with uneven edges, don't despair! There are a few strategies you can use to clean up and straighten out the sides:
Blocking: Wet or steam blocking your finished piece can help to even out the stitches and create a more uniform edge.
Edging: Adding a simple edging, such as a row of single crochet or a decorative border, can help to conceal and smooth out any unevenness.
Seaming: If your project is made up of multiple pieces, carefully seaming the edges together can help to blend and straighten out any irregularities.
With a little patience and attention to detail, you can achieve beautifully even edges on all your crochet projects.
Holes and Gaps in the Fabric
Unsightly holes and gaps in your crochet fabric can be frustrating, as they can detract from the overall appearance and functionality of your finished piece. Understanding the common causes of these issues and how to address them can help you create a cohesive, professional-looking crochet project.
Causes of Holes and Gaps
Holes and gaps in crochet can be caused by a variety of factors, including:
Missed or dropped stitches
Incorrect stitch placement
Inconsistent tension
Improper technique when working increases or decreases
Closing Holes and Gaps
If you've already encountered holes or gaps in your crochet fabric, there are a few techniques you can use to address the problem:
Carefully insert your hook into the affected area and work additional stitches to close the gap.
Use a tapestry needle and the same yarn to weave the loose strands back into the fabric, effectively closing the hole.
For larger gaps, you may need to carefully frog (rip out) the affected area and re-work the stitches to restore the integrity of the fabric.
Preventing Holes and Gaps
To avoid holes and gaps in the first place, focus on maintaining consistent tension, paying close attention to your stitch counts, and mastering techniques like increases and decreases. Regularly checking your work as you go and making corrections as needed can also help you catch and resolve any issues before they become more pronounced.
Remember, a little diligence and attention to detail can go a long way in ensuring your crochet projects turn out flawless and gap-free.

Conclusion
WOOHOBBY is a must-visit destination for crocheters and craft enthusiasts alike. Their curated selection of high-quality DIY kits covers a wide range of projects, from intricate amigurumi and lace shawls to cozy blankets and stylish home decor. With comprehensive instructions, premium materials, and a focus on attention to detail, WOOHOBBY's kits are designed to set you up for success, whether you're a beginner looking to expand your skills or an experienced crocheter seeking new creative challenges. Unlock your inner artist and elevate your crochet projects with the help of WOOHOBBY's inspiring kits.


