
Why Color Changes Are Worth Learning Early
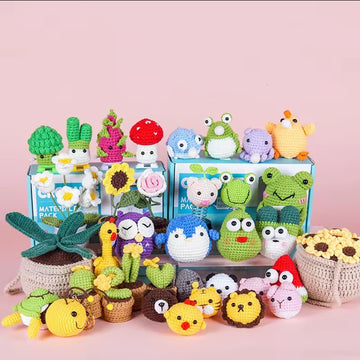
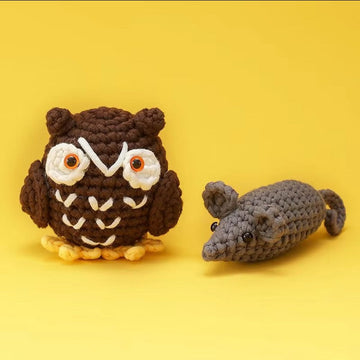
Most beginner amigurumi patterns are single-color — and there's nothing wrong with that. A classic brown bear or white bunny in one yarn is satisfying to make and looks wonderful finished. But as soon as you see a chubby striped penguin or a panda with a contrasting belly panel on someone's shelf, you'll wonder: how do they get those clean color lines?
The answer is simpler than you'd expect. Color changes in crochet boil down to one core technique with a few variations for different scenarios. Master it once and you unlock a whole new level of amigurumi design — from striped octopus arms to ombre owls to penguins with crisp black-and-white sections. This guide breaks down every method you'll actually need.

The Core Rule: Change Color on the Last Pull-Through
Every color change in crochet — regardless of stitch type — happens on the final yarn-over and pull-through of the last stitch before the change. For single crochet (the stitch used in virtually all amigurumi), that looks like this:
- Insert hook into stitch, yarn over with Color A, pull up a loop (2 loops on hook)
- Drop Color A — don't cut it yet — and yarn over with Color B
- Pull Color B through both loops on the hook to complete the stitch
- Continue crocheting with Color B
The first complete stitch you make pulling through with Color B is clean and fully that new color. If you complete the stitch with Color A and then switch, you'll see a small "bleed" of the old color at the top of that stitch — visible and messy on dense amigurumi fabric.
This principle is identical for double crochet, half double crochet, and any other stitch. The color always changes on the last pull-through of the stitch that precedes the new color section.
Method 1: Changing Color Between Rounds (Stripes)
Stripes are the most common color pattern in amigurumi — alternating rounds of two or three colors on a body, arms, or tail. Here's how to execute clean stripes in continuous-round amigurumi.
2-Round Stripes
Work the last stitch of a Color A round, but on the final pull-through, swap to Color B. Place your stitch marker in the first stitch of the new Color B round as normal. Complete two rounds in Color B, then swap back to Color A on the last pull-through of the final Color B round. Repeat.
Since amigurumi uses spiral rounds (no joining), you'll notice a tiny "step" at each color change — a jog where the round ends. This is unavoidable in spiral construction and is usually negligible on small amigurumi. If it bothers you, there's a fix below.
Hiding the Jog in Spiral Rounds
After completing the first round in the new color, when you reach the stitch where you changed colors, pick up the left leg of the stitch below it (the last stitch in the previous color) with your hook, then insert into the current stitch normally and complete your single crochet. This lifts the old stitch to the same level as the new round, making the jog nearly invisible. It takes 10 seconds and is worth doing for any stripe wider than 2 rounds.
Carrying the Unused Color
If you're alternating colors every 2–4 rounds, don't cut the yarn each time — carry it up the inside of your work. Hold the unused strand loosely against the inside of the fabric as you crochet over it, catching it every 3–4 stitches by crocheting over it (not into it). This creates a small woven strand along the inside. When you need the carried color again, it's right there — no re-joining, no extra ends to weave in.
Carrying works well for alternating 2–6 round stripes. For longer sections (8+ rounds between color uses), it's cleaner to cut and rejoin — the long carried strand can create tension problems.
Method 2: Changing Color Mid-Round (Color Sections)
Some amigurumi designs need a color to change partway through a round rather than at the round boundary — for instance, a penguin body that's white in front and black in back, or a two-toned owl.
This uses the same last-pull-through rule, but you need to manage two (or more) yarn balls simultaneously. There are two main approaches:
Intarsia-Style (Two Separate Yarn Balls)
Use a separate small yarn butterfly or bobbin for each color section. When you hit the point where Color A ends, switch to Color B using the last-pull-through method. Twist the two yarn strands once around each other at the color transition to prevent a gap. Continue with Color B until the next switch point, where you twist again and return to Color A.
This method leaves almost no floats on the inside of the work, which is ideal for amigurumi because you won't have loose strands showing through the stuffed fabric or catching on the polyfill.
Tapestry Crochet (Carrying Across)
In tapestry crochet, you carry the unused color as a float across the inside of the round, crocheting over it with the active color. You switch colors by simply picking up the carried strand instead of the working strand on the appropriate stitch's final pull-through.
Tapestry crochet creates a denser, slightly stiffer fabric than standard single crochet — actually desirable for amigurumi that needs to hold a shape — and it reduces the number of ends to weave in dramatically. The downside is that small color sections become fiddly to manage as the inside fills with polyfill. Most amigurumi crafters use tapestry crochet for geometric surface patterns (checkers, dots) and intarsia for large bilateral sections.
Method 3: Joining a New Color (Starting a New Yarn)
When you're starting a completely new section after a long solid color, or you've cut the old yarn, you rejoin the new color the same way you'd join any new yarn ball:
- Insert hook into the stitch where the new color begins
- Pull up a loop of the new color yarn (leaving a 10 cm tail)
- Chain 1 if pattern instructs, or simply single crochet across — crocheting over the tail for the first 6–8 stitches to secure it without weaving later
The same last-pull-through rule applies if you're switching mid-stitch (after starting a stitch in the old color). If you've fully cut and need to rejoin at the beginning of a new round, use a standing single crochet: place a slip knot on your hook, insert into the first stitch, and complete a normal single crochet. This gives a clean standing stitch without a conspicuous loop or chain at the start.

Weaving In Ends Cleanly
Color changes generate yarn ends. Weaving them in securely — but invisibly — is arguably the most underrated skill in amigurumi. Here's the best method for stuffed amigurumi specifically:
- Thread the tail onto a tapestry needle
- Insert the needle under 4–5 stitches going in one direction, following the V shapes of the stitches rather than piercing through them
- Turn and weave in the opposite direction through 4–5 more stitches
- Give the yarn a gentle tug to set it, then trim close to the fabric
For amigurumi that will be handled frequently (children's toys), do three passes in different directions rather than two. The friction over that many stitch legs makes it essentially impossible for the tail to work free over time. Never just weave straight across — the tail will migrate out.
If a piece will be stuffed, you can also hide the tail entirely inside the polyfill: weave through 2–3 stitches, then insert the needle deep into the stuffing, exit through a seam or the base of the piece, and trim — the tension of the stuffing holds it invisibly.
Applying Color Changes to Specific Amigurumi Projects
Striped Octopus Arms
Each arm of an octopus amigurumi is crocheted as a long tube. Stripes of 2–3 rounds make excellent tentacles. Work in continuous rounds, carrying the unused color on the inside of the tube. Since octopus arms are narrow (typically 6–10 stitches), the interior carry is very short and won't create tension issues.
Penguin Body
A classic amigurumi penguin has a white front/belly and black back/sides. Start the body in black (back color), work up to the belly section, then use intarsia to split the round: black for the back ~60% of stitches, white for the front ~40%. Use separate yarn strands for each section, twisting at both transition points. This creates the distinctive penguin silhouette without any complicated pattern math.
Panda Markings
Panda eye patches and ear tips are easier to embroider or sew on as separate pieces than to work in as color changes. However, the classic panda "saddle" (the dark body section around the middle) works perfectly as 8–10 rounds of color change stripes on an otherwise white body.
Rainbow-Striped Bear
One of the most popular modern amigurumi styles. Start from the top of the head and work down through the color spectrum — violet, indigo, blue, green, yellow, orange, red — changing color every 3–4 rounds. Carry colors that will be reused; cut colors that won't return. The result is a pastel gradient bear that photographs beautifully and makes an excellent personalized gift.
For the full kit to make rainbow-gradient amigurumi, check out the crochet amigurumi kits collection — several include multi-color yarn bundles pre-measured for specific projects.
Color Theory for Amigurumi: Choosing Combinations
Technical execution aside, color choice has a massive impact on the finished toy. A few principles that work reliably:
High Contrast for Small Features
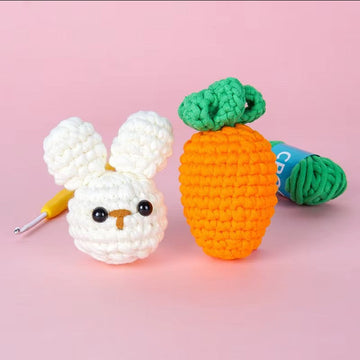
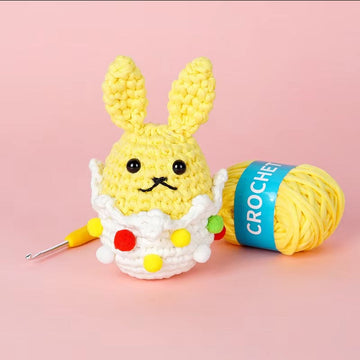
Small amigurumi markings — ear tips, paw pads, belly panels — need strong contrast to read clearly. A mid-tone pink belly against a medium brown bear body can get lost. Use light cream or white for belly panels on animals that are darker than a pale tan. Similarly, very dark or black safety eyes work best against light or medium body colors.
Analogous Colors for Cohesion
If you're doing a multi-color fantasy creature (dragon, unicorn, mythical bird), choose colors that sit adjacent on the color wheel — blue, teal, and green; or pink, lavender, and soft blue. These harmonize naturally and look intentional rather than random.
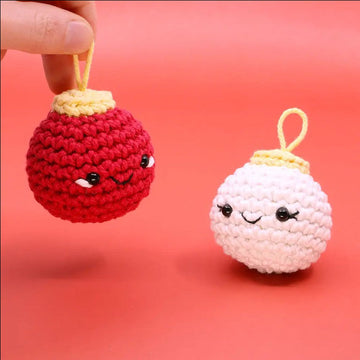
One Accent Color Rule
A single accent color on a neutral base almost always looks professional. A grey cat with coral orange paw pads. A white bunny with dusty sage inner ears. A cream teddy bear with one rust-orange bow. Adding a second accent risks visual clutter in a small object.
Practice Projects to Build Color Change Confidence
- Striped ball: A 6-round sphere worked entirely in 2-round stripes. 30 minutes, zero assembly, instant color practice.
- Two-color worm: A simple tube with alternating 4-round stripes. Add a face with safety eyes at one end. Great first color project for kids too.
- Basic penguin: 3 colors (black, white, orange for the beak/feet), intarsia belly panel, 2–3 hours total. Classic beginner-to-intermediate bridge project.
- Ombre egg: Work a small egg shape starting in white and gradually stepping through yellow, peach, and coral over 8 rounds. Simple gradient, no complicated carries.
Avoiding Common Color Change Mistakes
Loose tension at the color join
The stitch at the color transition often comes out looser than surrounding stitches because you're handling two yarn strands. After completing the switch stitch, give both yarn tails a firm tug to tighten before continuing. With practice, your tension at joins will become automatic.
The yarns become tangled
When working with multiple yarn sources, twist the work in the same direction repeatedly (always counterclockwise as you work, for example) and the yarns tangle progressively. Every 10–15 minutes of working, drop your hook, hold the work up, and let it spin freely to untwist. Takes 5 seconds and prevents a frustrating knot session.
The wrong color shows through
If a carried color shows through the stitches of the active color on the outside of the work, you're catching it too frequently. Carry it loosely against the inside fabric and only trap it every 5–6 stitches rather than every 2–3.
The color jog is very visible
See the jog-hiding technique in the stripes section above. For projects where even that isn't sufficient, work joined rounds instead of spiral rounds: join each round with a slip stitch and chain 1 to start the next round. The visual jog disappears, though you need to be careful about the chain-1 counting as a stitch (it shouldn't in single crochet rounds).
FAQ: Color Changes in Amigurumi Crochet
How do I change colors in amigurumi crochet without it looking messy?
Always switch on the final yarn-over of the last stitch in the old color, not after completing it. Pull both yarn tails firmly to equalize tension at the join stitch. Weave in tails in two different directions for a secure, flat finish.
Should I cut the yarn between every color change or carry it?
Carry it if you'll need the color again within 4–6 rounds. Cut and rejoin if the gap is longer than 6 rounds — long floats inside stuffed pieces create tension problems and can be felt through the fabric.
Why does my stripe have a diagonal jog instead of a straight line?
Because amigurumi is worked in spirals, not flat joined rounds. The round "rises" by one stitch each time, which naturally creates a diagonal step. Use the jog-hiding technique (picking up the left leg of the stitch below at the transition) to minimize it.
Can I do color changes with any type of yarn?
Yes, but smooth single or 4-ply twist yarns (acrylic, cotton, linen) give the clearest color lines. Fuzzy, mohair, or bouclé yarns blur at color transitions and make it difficult to see your stitches for accurate counting.
How many colors can I use in one amigurumi project?
There's no technical limit, but managing more than 4–5 simultaneous color sections in a small piece gets chaotic. Most multi-color amigurumi use 2–3 main colors with 1–2 accent colors for details. Each additional active color means another yarn strand to track, carry, and weave in.
What is tapestry crochet in amigurumi?
Tapestry crochet is a technique where you carry all your colors throughout every round, crocheting over the unused yarns to hide them inside the stitches. You pick up whichever color you need on the last pull-through of each stitch. It creates a dense, slightly rigid fabric ideal for geometric patterns and amigurumi bodies that need to hold a defined shape.
Ready to put color change techniques to work on a real project? Browse the Beginner Crochet Kit collection for kits that include all the pre-measured yarn, tools, and step-by-step instructions you need to start your first colorful amigurumi today.


