
Amigurumi — the Japanese art of crocheting small, stuffed creatures — has exploded in popularity, and it's easy to see why. All you need is a hook, some yarn, and a little patience to create adorable characters you can gift, sell, or keep for yourself. If you've never picked up a crochet hook before, this guide will walk you through everything you need to know to crochet your very first amigurumi, from choosing supplies to finishing your project.
What Is Amigurumi, Exactly?
Amigurumi (a-mi-gu-ru-mi) comes from the Japanese words "ami" (crocheted or knitted) and "nuigurumi" (stuffed doll). Traditionally worked in single crochet stitches in a continuous spiral, amigurumi produces a tight, seamless fabric that's perfect for holding stuffing without gaps. Unlike blankets or garments, most amigurumi pieces are small — often just 4 to 8 inches tall — which makes them fast, satisfying projects even for total beginners.
Because each piece is worked in the round rather than back and forth in rows, amigurumi has its own small learning curve. But once you understand the basic shapes (spheres, cylinders, and cones), you can combine them to make almost any animal, food, or character you can imagine.
Essential Supplies for Beginner Amigurumi
One of the best things about amigurumi is that it doesn't require an expensive setup. Here's what you actually need:
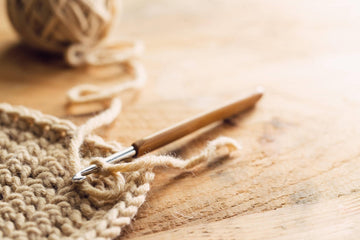
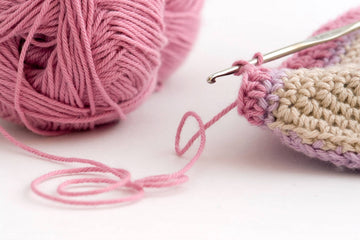
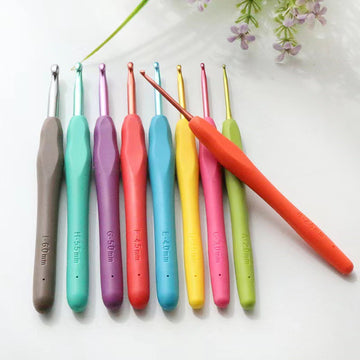
- Crochet hook: A size appropriate for worsted weight (medium) yarn, typically a 3.5mm–4mm (E/4 to G/6) hook.
- Yarn: Worsted weight cotton or acrylic yarn works best because it's sturdy and holds its shape. Cotton yarn in particular gives amigurumi that smooth, "toy-like" finish.
- Stuffing: Polyester fiberfill is the standard choice — it's washable, hypoallergenic, and holds its shape well.
- Stitch markers: Since amigurumi is worked in a continuous spiral with no visible round markers, a stitch marker is essential for tracking where each round begins.
- Yarn needle (tapestry needle): For sewing pieces together and weaving in ends.
- Safety eyes or embroidery thread: For giving your creation a face and personality.
- Scissors: A small, sharp pair for snipping yarn cleanly.
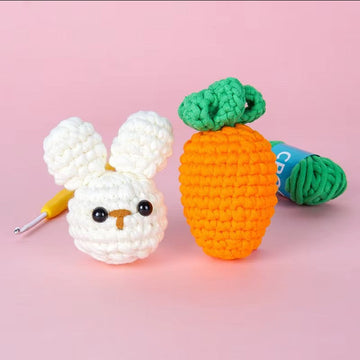
If gathering all of this individually feels overwhelming, a pre-packaged option is the easiest way to start. Our Beginner Crochet Kit collection bundles everything — hook, yarn, stuffing, safety eyes, and a printed pattern — into a single box, so you can skip the guesswork and start stitching the same day it arrives.

Understanding Basic Crochet Stitches for Amigurumi
You don't need to know dozens of stitches to make amigurumi. In fact, 90% of most patterns rely on just a handful of techniques:
1. Magic Ring (Magic Circle)
The magic ring is how almost every amigurumi piece begins. It creates an adjustable loop that can be pulled tight after your first round of stitches, leaving no hole at the center — unlike chaining and joining into a circle, which often leaves a visible gap.
2. Single Crochet (sc)
This is the workhorse stitch of amigurumi. Its tight, dense structure prevents stuffing from poking through and gives finished pieces a smooth, professional look.
3. Increase (inc)
An increase is simply two single crochet stitches worked into the same stitch. Increases are used to widen your piece — for example, when shaping the top of a head or the base of a body.
4. Decrease (dec or sc2tog)
A decrease combines two stitches into one, narrowing your work. Decreases are typically used to round off the top of a piece before stuffing and closing it.
5. Slip Stitch (sl st)
Used sparingly in amigurumi, usually to join pieces together or to finish off a round neatly.
Once you're comfortable with these five techniques, you can follow almost any beginner amigurumi pattern from start to finish.
Step-by-Step: Your First Amigurumi Project
Let's walk through the general process of making a simple round shape — the foundation for heads, bodies, and many animal parts.
Step 1: Start with a magic ring and 6 single crochet stitches
Pull the ring tight so the six stitches close into a small circle with no hole.
Step 2: Increase every stitch in round 2
Work two single crochets into each of the 6 stitches from round 1, giving you 12 stitches total. Your circle will start to flatten and grow.
Step 3: Continue increasing evenly
Most patterns increase by 6 stitches every round (for example: *1 sc, inc* repeated) until the piece reaches the desired diameter — this creates a smooth, flat circle that becomes the base of a sphere.
Step 4: Work even rounds
Once your circle reaches the right size, crochet several rounds without increasing or decreasing. This builds the "wall" of your sphere or cylinder shape.
Step 5: Stuff your piece
Before closing the top, stuff firmly but not so tight that the stitches stretch and gap. Use a chopstick or knitting needle to push stuffing into corners.
Step 6: Decrease to close
Reverse the increase pattern from Step 2–3, decreasing evenly until only a small opening remains. Cut the yarn, leaving a long tail, and thread it through the remaining stitches to cinch the hole shut.
Step 7: Assemble and add details
Sew arms, legs, ears, or other pieces onto the main body using your yarn needle. Attach safety eyes or embroider a face, and your amigurumi is complete!
Common Beginner Mistakes (and How to Avoid Them)
- Losing track of rounds: Always use a stitch marker. It sounds tedious at first, but it will save you from having to rip out rows of work.
- Stitches too loose: If your fabric looks gappy, size down your hook. Tighter stitches mean stuffing won't show through.
- Uneven tension: This improves naturally with practice — don't worry if your first project looks a little wonky. Every crocheter's first amigurumi is imperfect, and that's part of the charm.
- Understuffing: A saggy amigurumi is almost always understuffed. Pack it firmly for a rounder, more polished shape.
- Skipping the gauge/pattern notes: Beginner patterns usually specify yarn weight and hook size for a reason — substituting materials can throw off your project's final size.
Why Start With a Kit Instead of Buying Materials Separately
For your very first few projects, a kit removes the most common barrier to finishing: not having the right materials on hand. Kits are pre-matched — the yarn weight is paired with the correct hook size, the stuffing amount is calculated for the pattern, and the instructions are written specifically for the materials included. This eliminates a huge amount of trial and error.
Once you've completed a kit or two and feel confident with the basic stitches, you can branch out and buy yarn and hooks à la carte for your own pattern ideas. But starting with a kit dramatically increases the odds that your first project actually gets finished — and finishing your first amigurumi is the single best way to fall in love with the craft.
Browse our full range of Crochet Amigurumi Kits to find a character that excites you enough to pick up the hook tonight — everything from woodland animals to sea creatures and whimsical fantasy designs.


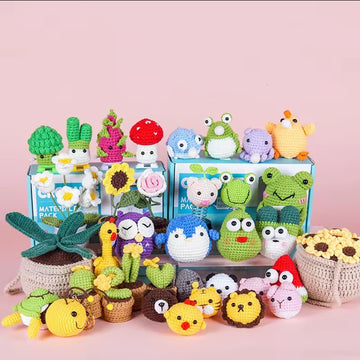
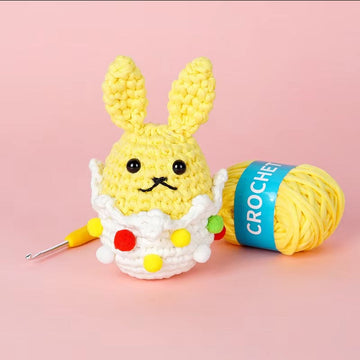
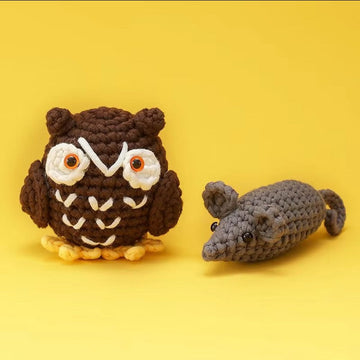
Beginner-Friendly Amigurumi Project Ideas
Not sure what to make first? Here are project types that are especially forgiving for new crocheters:
- Round animals (owls, penguins, bees) — simple sphere-based bodies with minimal shaping.
- Fruit and food shapes — great for practicing color changes without complex assembly.
- Small keychain-sized characters — quick to finish, which builds momentum and confidence.
- Simple bears or cats — teach you how to assemble multiple pieces (head, body, limbs, ears) into a single cohesive project.
Caring for Your Finished Amigurumi
Handmade crochet toys are generally low maintenance, but a few tips will keep them looking their best:
- Spot clean with a damp cloth and mild soap rather than machine washing, especially if safety eyes or embroidery details are involved.
- Keep finished pieces out of direct sunlight for long periods, as some yarn colors can fade over time.
- Store in a dry area — cotton and acrylic yarn are durable, but humidity can encourage mildew if pieces are packed away damp.
Choosing the Right Yarn for Amigurumi
Not all yarn behaves the same way in amigurumi, and picking the right fiber can make the difference between a crisp, professional-looking toy and a saggy, fuzzy one.
Cotton Yarn
Cotton is the gold standard for amigurumi. It has very little stretch, which helps stitches hold their shape crisply, and it produces a smooth surface that shows off stitch definition. Cotton is slightly less forgiving to work with because it doesn't give as much, but the payoff in finished appearance is significant.
Acrylic Yarn
Acrylic is soft, inexpensive, and comes in an enormous range of colors, which makes it appealing for beginners. It has more stretch than cotton, so stitches can look slightly less defined, but it's a completely reasonable choice, especially for practice pieces and larger projects where cost matters.
Yarn Weight
Most amigurumi patterns call for worsted weight (medium, category 4) yarn. Thinner yarns (like sport or fingering weight) create smaller, more detailed pieces but take considerably longer and require smaller hooks and more patience. Beginners should stick to worsted weight until they're comfortable with the basic technique.
Reading an Amigurumi Pattern: What All Those Abbreviations Mean
Amigurumi patterns are written in a shorthand that can look intimidating at first glance, but it follows a consistent logic. A typical line might read:
Round 3: *sc, inc* repeat 6 times (18 sts)
This translates to: single crochet in one stitch, then increase in the next stitch, and repeat that two-stitch sequence six times, ending the round with 18 stitches total. The number in parentheses at the end of a round is a stitch count — an essential checkpoint that tells you whether you're on track. If your count doesn't match, it's much easier to catch and fix the mistake immediately rather than several rounds later.
Common abbreviations you'll encounter include:
- ch — chain
- sc — single crochet
- inc — increase
- dec — decrease
- sl st — slip stitch
- st(s) — stitch(es)
- rnd — round
- MR — magic ring
- BLO / FLO — back loop only / front loop only (used for texture, like ribbing on a hat)
How Long Does It Really Take to Learn Amigurumi?
Most people can learn the core stitches (chain, single crochet, increase, decrease) in under an hour of focused practice. Where amigurumi differs from other beginner crafts is that the "learning" and the "making" happen simultaneously — your very first practice swatch can become the head of your first finished toy. Give yourself two or three short practice sessions before starting your first full pattern, and don't be discouraged if your tension looks uneven at first. Consistent tension is a physical habit that develops with repetition, not something you can shortcut by thinking about it harder.
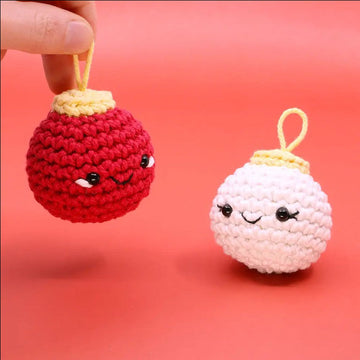
Amigurumi as a Gift and Small Business Idea
Because each piece is small and relatively quick to make once you've built up some speed, amigurumi is a popular way to create personal, handmade gifts — a crocheted animal that resembles a child's pet, a tiny replica of a favorite cartoon character, or a set of holiday ornaments. Many crocheters also turn a hobby into a small side business selling finished pieces at craft fairs or online marketplaces. Starting with well-photographed, well-tested kit patterns is a smart way to build a portfolio of finished work before designing your own patterns from scratch.
Building a Home Crochet Toolkit Beyond Your First Kit
Once you've finished a project or two, you may want to expand your toolkit gradually rather than buying everything at once:
- A hook set in multiple sizes — useful once you start following patterns that call for different yarn weights.
- Stitch markers in bulk — locking markers are reusable and cheap, and you'll use more than you expect once you start customizing patterns.
- A small storage case or pouch — keeps hooks, needles, and markers from getting lost between projects.
- A project bag — keeps yarn clean and tangle-free, especially helpful for amigurumi since many projects use multiple small skeins of different colors at once.
Our Beginner Crochet Kit collection is designed to give you this foundation in one purchase, with follow-up kits available once you're ready for your next character.
Amigurumi Shapes: The Building Blocks of Every Character
Nearly every amigurumi design, no matter how complex it looks, is built from just three basic shapes worked in different proportions:
- Spheres — used for heads, bodies, and round features like cheeks or bellies. Made by increasing to a midpoint, then decreasing symmetrically.
- Cylinders — used for arms, legs, and necks. Made by increasing to the desired width, then working even rounds without further shaping.
- Cones — used for snouts, ears, and tails. Made by starting narrow and increasing gradually and evenly over many rounds, or starting wide and decreasing down to a point.
Once you recognize these shapes inside a pattern, even complex-looking designs become much less intimidating — you're really just combining spheres, cylinders, and cones in different sizes and arrangements, then sewing them together.
Color Changes and Multi-Colored Amigurumi
Many beginner-friendly designs include at least one color change — for example, a different color for a belly patch, hat, or pair of shoes. The cleanest way to change colors in amigurumi is to switch yarns on the last pull-through of the final stitch in the old color, so the new color is already on your hook at the start of the next stitch. This avoids visible knots or jogs in the color line. Kits that include multiple colors of yarn pre-selected to match a pattern make this process much less stressful for a first attempt, since the color proportions have already been calculated for you.
Frequently Asked Questions
Is amigurumi hard to learn for a complete beginner?
No. Amigurumi is actually one of the more approachable entry points into crochet because it relies almost entirely on a single stitch (single crochet) combined with simple increases and decreases. Most beginners can complete a simple project within their first few hours of practice.
How long does it take to finish a beginner amigurumi project?
Small projects (4–6 inches) typically take anywhere from 3 to 8 hours of crocheting time for a beginner, often spread across several sittings.
What size hook should a beginner use for amigurumi?
Most beginner patterns call for a 3.5mm–4mm hook paired with worsted weight yarn. Using a hook one size smaller than the yarn label recommends is common in amigurumi, since tighter stitches prevent stuffing from showing through.
Do I need to know how to knit before learning to crochet amigurumi?
Not at all — crochet and knitting are entirely separate crafts with different tools and techniques. Amigurumi uses only a crochet hook, so no knitting experience is needed.
What's the difference between a beginner kit and buying supplies separately?
A kit bundles pre-matched materials (correct yarn amount, appropriately sized hook, stuffing, and a written pattern) into one package, removing guesswork. Buying separately gives more flexibility but requires more research to make sure your materials work together.
Ready to Start Your Amigurumi Journey?
The best way to learn is by doing. Pick a project that makes you smile, gather your materials, and give yourself permission to make an imperfect first attempt — every experienced crocheter started exactly where you are now. Explore our curated Beginner Crochet Kits to find an all-in-one starter set, or browse the full Amigurumi Kits collection for your next character. Happy hooking!