

Introduction: Why Crochet an Amigurumi Elephant?
Elephants are one of the most beloved amigurumi animals to crochet. Their rounded bodies, wide floppy ears, and distinctive trunk make them instantly recognizable and deeply satisfying to complete. If you've already made a bear or penguin, an elephant is a natural next project — it introduces a few new shaping challenges (those ears and trunk require more attention) while still relying entirely on single crochet stitches you already know.
This guide walks you through every part of crocheting an amigurumi elephant from start to finish: the magic ring, the body, the head, the trunk, the ears, and all four legs. You'll also find detailed tips on stuffing, assembly, and getting clean safety eye placement. At the end, there's a full FAQ section covering the questions beginners ask most often.
Estimated skill level: beginner to low-intermediate. Estimated completion time: 6–10 hours spread across two or three sessions. The finished elephant stands approximately 15–18 cm (6–7 inches) tall.
What You'll Need Before You Start
Getting your materials organized before casting on saves a lot of mid-project frustration. Here's exactly what you need for a standard amigurumi elephant about 15–18 cm tall:
Yarn
Use DK weight (weight #3) or worsted weight (weight #4) yarn in your main elephant color — grey is traditional, but lavender, dusty blue, and cream all look wonderful. You'll need approximately 100–150 grams of main color yarn. Optionally, choose a contrasting color for the inner ears (pale pink or ivory works well). Cotton or acrylic yarn works equally well for amigurumi; acrylic is typically more affordable and comes in more colors.
Crochet Hook
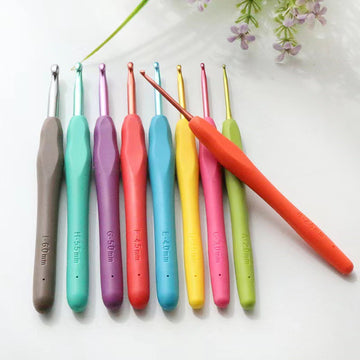
Use a hook 0.5–1 mm smaller than the yarn label recommends. For DK yarn, that typically means a 2.5 mm or 3.0 mm hook; for worsted, a 3.5 mm or 4.0 mm hook. The smaller hook gives you tighter stitches so the stuffing doesn't show through — this is especially important for the trunk, where loose stitches create a lumpy, uneven look.
Other Supplies
- Polyester fiberfill stuffing (one standard 100 g bag is more than enough for one elephant)
- Two black safety eyes, 9 mm or 12 mm diameter
- A blunt-tip yarn or tapestry needle for sewing parts together
- Stitch markers (at least 2 — one to mark the beginning of rounds, one to mark placement spots)
- Scissors
- Optional: wire armature or pipe cleaners if you want a poseable trunk
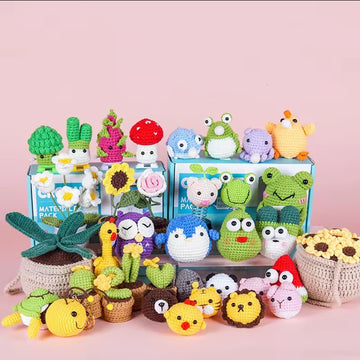
If you'd rather not source all of these individually, a Beginner Crochet Kit typically includes pre-measured yarn, a suitable hook, safety eyes, stuffing, and a needle — everything you need in one box, no guesswork required.
Understanding the Pattern Structure
Amigurumi elephants are worked in continuous rounds (no joining, no turning) using single crochet (sc) as the main stitch. You'll crochet each piece separately — body, head, trunk, two ears, four legs — and then sew them together at the end. This modular approach means you can take breaks between parts, which is helpful if you're newer to amigurumi.
Key Abbreviations Used in This Guide
- MR — Magic ring (adjustable ring)
- sc — Single crochet
- inc — Increase (2 sc in the same stitch)
- dec — Invisible decrease (insert hook through front loops of next 2 stitches together)
- st(s) — Stitch(es)
- Rnd — Round
- FO — Fasten off, leave a long tail for sewing
The Magic Ring: Your Starting Point for Every Piece
Every amigurumi piece starts with a magic ring (also called a magic circle or adjustable ring). This technique lets you pull the center of your first round completely closed, leaving no hole — which is critical for amigurumi because a hole at the tip of the trunk or top of the head looks sloppy and may let stuffing poke through.
To make a magic ring: wrap the yarn around two fingers to form a loop, insert your hook through the loop, catch the working yarn and pull it through, then chain 1. Work your first round of stitches into the ring. When the round is complete, pull the short tail to close the ring tightly.
If you find the magic ring tricky, you can substitute by chaining 2 and working your first round into the second chain from the hook — this leaves a very small hole that you can tighten with the tail later. Most experienced amigurumi makers prefer the magic ring because it gives a cleaner, tighter center.
Part 1: Crocheting the Body
The body is the largest piece and is worked from the bottom up. Begin with the magic ring, work your increases to build out the widest part of the belly, then decrease to close the top where the head will attach.
Body Instructions (worked in continuous rounds)
Rnd 1: MR, 6 sc into ring. Pull ring closed. (6 sts)
Rnd 2: Inc in each st around. (12 sts)
Rnd 3: *Sc 1, inc* — repeat 6 times. (18 sts)
Rnd 4: *Sc 2, inc* — repeat 6 times. (24 sts)
Rnd 5: *Sc 3, inc* — repeat 6 times. (30 sts)
Rnd 6: *Sc 4, inc* — repeat 6 times. (36 sts)
Rnd 7: *Sc 5, inc* — repeat 6 times. (42 sts)
Rnds 8–14: Sc in each st around. (42 sts) — 7 straight rounds for the body height
Rnd 15: *Sc 5, dec* — repeat 6 times. (36 sts)
Rnd 16: *Sc 4, dec* — repeat 6 times. (30 sts)
Rnd 17: *Sc 3, dec* — repeat 6 times. (24 sts)
At this point, begin stuffing the body firmly. Stuff more than you think you need — the body should feel solid and hold its shape when you press it. Elephants with under-stuffed bodies tend to lean or collapse at the neck during assembly.
Rnd 18: *Sc 2, dec* — repeat 6 times. (18 sts)
Rnd 19: *Sc 1, dec* — repeat 6 times. (12 sts)
Rnd 20: Dec around. (6 sts)
FO, leaving a short tail. Weave through the remaining 6 stitches and pull tight to close. Weave in the tail securely.
Part 2: Crocheting the Head
The head is worked the same way as the body but slightly larger, because an elephant's head is proportionally bigger relative to its body. Many amigurumi elephant patterns make the head and body about the same size, which gives a chubby, toy-like appearance that's very endearing.
Head Instructions
Rnd 1: MR, 6 sc. (6 sts)
Rnd 2: Inc in each st. (12 sts)
Rnd 3: *Sc 1, inc* × 6. (18 sts)
Rnd 4: *Sc 2, inc* × 6. (24 sts)
Rnd 5: *Sc 3, inc* × 6. (30 sts)
Rnd 6: *Sc 4, inc* × 6. (36 sts)
Rnd 7: *Sc 5, inc* × 6. (42 sts)
Rnd 8: *Sc 6, inc* × 6. (48 sts)
Rnds 9–15: Sc in each st. (48 sts) — 7 straight rounds
Rnd 16: *Sc 6, dec* × 6. (42 sts)
Rnd 17: *Sc 5, dec* × 6. (36 sts)
Now is the time to insert the safety eyes. Position them between rounds 11 and 12, approximately 10–12 stitches apart (about 5–6 stitches in from each side of the head). Use a stitch marker to experiment with placement before committing — once safety eyes are locked in with their washers, they're very difficult to remove without damaging the yarn.
After attaching safety eyes, continue decreasing:
Rnd 18: *Sc 4, dec* × 6. (30 sts)
Rnd 19: *Sc 3, dec* × 6. (24 sts)
Stuff the head very firmly now — it should feel quite solid when squeezed.
Rnd 20: *Sc 2, dec* × 6. (18 sts)
Rnd 21: *Sc 1, dec* × 6. (12 sts)
Rnd 22: Dec × 6. (6 sts)
FO, pull tight, weave in tail.
Part 3: Crocheting the Trunk
The trunk is what makes an elephant recognizable — and it's what beginners find most intimidating. The good news: it's worked in a simple tube shape, just like a very narrow cylinder. The challenge is keeping your tension consistent so the trunk doesn't look lumpy or lopsided.
Trunk Instructions
Rnd 1: MR, 6 sc. (6 sts) — do not pull ring completely tight; leave a slight opening at the tip for a more natural look
Rnds 2–4: Sc in each st. (6 sts) — 3 straight rounds at the narrow tip
Rnd 5: *Sc 2, inc* × 2. (8 sts)
Rnds 6–8: Sc in each st. (8 sts)
Rnd 9: *Sc 3, inc* × 2. (10 sts)
Rnds 10–12: Sc in each st. (10 sts)
Rnd 13: *Sc 4, inc* × 2. (12 sts)
Rnds 14–16: Sc in each st. (12 sts)
FO, leave a long tail of at least 30 cm (12 inches) for sewing the trunk onto the face.
Stuff the trunk lightly — it should be firm enough to hold a gentle curve but not so hard that it sticks straight out. Many makers insert a small piece of pipe cleaner or floral wire to let the trunk pose in different positions. If you do this, fold the wire ends over so they don't poke through the yarn. To achieve a natural downward curve, stuff slightly more material into the back (top) of the trunk and slightly less into the front (underside).
Part 4: Crocheting the Ears
Elephant ears are flat, wide, and slightly oval — completely different from the rounded cup-shaped ears of bears or cats. They're worked flat (back and forth in rows, not in continuous rounds) and then shaped slightly before attaching to the head.
Outer Ear Instructions (make 2, in main color)
Row 1: Ch 2, 6 sc in second ch from hook. Turn. (6 sts)
Row 2: Ch 1, inc in each st. Turn. (12 sts)
Row 3: Ch 1, *sc 1, inc* × 6. Turn. (18 sts)
Row 4: Ch 1, *sc 2, inc* × 6. Turn. (24 sts)
Row 5: Ch 1, *sc 3, inc* × 6. Turn. (30 sts)
Rows 6–8: Ch 1, sc in each st. Turn. (30 sts) — 3 straight rows
Row 9: Ch 1, *sc 3, dec* × 6. Turn. (24 sts)
Row 10: Ch 1, *sc 2, dec* × 6. Turn. (18 sts)
Do not fasten off. Work a single crochet border around the entire ear edge for a clean finish, then FO leaving a long sewing tail of at least 25 cm.
Inner Ear Instructions (optional, make 2, in contrast color)
Work Rows 1–7 of the outer ear pattern, then fasten off. Place the inner ear centered on the outer ear and whip stitch around the edges, leaving the straight top edge open. This gives the classic two-tone elephant ear look with a pale interior.
Shaping the Ears
Before attaching, fold the straight top edge of each ear slightly inward (about 5–8 mm) and tack with a few stitches. This creates the natural fold where the ear meets the head and gives the ears a slightly three-dimensional look instead of lying completely flat against the face.
Part 5: Crocheting the Legs
Amigurumi elephant legs are short, chunky cylinders — wider than penguin legs but more compact than giraffe legs. You'll make four identical pieces, which means you can chain-make them one after another to stay in a rhythm.
Leg Instructions (make 4)
Rnd 1: MR, 6 sc. (6 sts)
Rnd 2: Inc in each st. (12 sts)
Rnd 3: *Sc 1, inc* × 6. (18 sts)
Rnd 4: Through back loops only: sc in each st. (18 sts) — this creates a defined ridge at the base of the foot
Rnds 5–9: Sc in each st. (18 sts) — 5 straight rounds for the leg height
Rnd 10: *Sc 1, dec* × 6. (12 sts)
Stuff firmly. FO leaving a long tail for sewing.
Working round 4 through back loops only is a small but important detail — it creates a visible horizontal ridge that separates the foot from the leg, giving the elephant clearly defined hooves. Don't skip this step.
Assembling the Elephant: Step by Step
Assembly is where the project comes together — and where beginners often feel most nervous. Taking your time here makes the difference between an elephant that looks professionally finished and one that looks uneven or wobbly.
Step 1: Attach the Head to the Body
Hold the head and body together so the bottom of the head (where the closing stitches are) faces the top front of the body. Pin with stitch markers to test the position. The head should sit slightly forward on the body — not perfectly centered on top — to give the elephant a natural forward-facing pose. Once satisfied with placement, use your yarn needle and the long sewing tail to whip stitch around the entire joining circle. Pull firmly on each stitch to keep the join tight. When done, insert the needle into the body, pull the tail all the way through, and trim close.
Step 2: Attach the Trunk
Position the trunk on the lower center of the face, about 3–4 rounds below the safety eyes. The wide open end of the trunk should sit flush against the face fabric. Use your yarn needle to sew around the entire circumference of the trunk opening, stitching through both the trunk edge and the face fabric simultaneously. Make 2 full passes around for security, as the trunk takes a lot of handling during play. The trunk will naturally curve downward if attached this way.
Step 3: Attach the Ears
Position one ear on each side of the head, roughly aligning the top of the ear with the top of the safety eyes or slightly above. The folded top edge of the ear should be pressed flat against the side of the head. Sew from the inside face of the ear through the head fabric, making sure your stitches don't show on the outside surface of the ear. Sew around the full straight attachment edge, then secure and weave in the tail through the head to hide the end.
Step 4: Attach the Four Legs
Lay the body on a flat surface to find the four attachment points for the legs. The front two legs should sit at the front-lower sides of the body, roughly at the 10 o'clock and 2 o'clock positions when viewed from the front. The back two legs sit at the back-lower sides. All four legs must touch a flat surface evenly when the elephant is placed on a table. Before committing, pin the legs with stitch markers and check that the elephant sits stably without tipping. Sew each leg on firmly, going around the full circumference of the leg opening twice for durability.
Adding a Tail (Optional)
Cut six strands of yarn about 8 cm (3 inches) long. Thread them through the back center of the body using a yarn needle, pulling them halfway through so equal lengths hang out on both sides. Braid or twist the strands together, tie a knot at the end, and trim the tassel to a uniform length of about 3 cm.
Troubleshooting Common Problems
The trunk looks lumpy
Uneven tension is almost always the cause. Try crocheting the trunk in a single uninterrupted session — tension naturally shifts when you set a project down and pick it back up hours later. If the yarn shows gaps between stitches, go down another 0.5 mm in hook size and swatch a small test tube first.
The ears won't stay flat against the head
Sew through the center of the ear body (not just around the edge perimeter) with a few hidden tacking stitches to hold it flat against the head. This is especially helpful if you used a heavier yarn that causes the ears to want to pull away from the head.
The elephant tips over or falls forward
Either the body is under-stuffed or the legs aren't symmetrically positioned. Also, over-stuffing the head relative to the body creates top-heaviness that makes the elephant fall forward. Try repositioning the legs slightly further back and outward. If needed, carefully open a few stitches at the base of the body and add more fiberfill before closing back up.
Safety eyes look uneven after attaching
Always test safety eye placement with removable stitch markers or pins first, viewing the face from multiple angles and at a distance before pushing the washer onto the post. Once the plastic washer is locked on, the eye is essentially permanent without cutting yarn. Work in good natural lighting rather than under artificial light, which can distort your perception of symmetry.

Pro Tips to Make Your Elephant Look Its Best
Maintain consistent, firm tension throughout. Amigurumi lives and dies by even gauge. If your tension shifts between sessions, different parts will end up slightly different sizes and the assembled elephant will look mismatched. Try to crochet each individual piece in a single session.
Start stuffing earlier than you think. Don't wait until you have only 6 stitches left to add fiberfill — the opening becomes too small to get stuffing in properly. Start filling the body and head when they're about 60–70% closed. Add small amounts at a time and distribute evenly.
Block the flat ear pieces if needed. If your ears are curling or warping, lightly mist them with water and pin flat on a foam blocking board until completely dry. This is especially effective with cotton yarn and takes about 2–4 hours.
Embroider facial details for personality. A small embroidered smile curve in a contrast color thread, or simple eyebrow stitches above the safety eyes, can give your elephant a tremendous amount of character without requiring any additional crocheting.
Leave longer sewing tails than you think you need. When you FO each piece, leave at least 25–30 cm of yarn tail. You can always trim the excess after sewing, but running out of tail mid-seam and needing to add a new length is frustrating and creates a potential weak point.
Creative Variations to Try
Once you're comfortable with the basic elephant pattern, there are numerous creative directions to explore:
Baby elephant: Use fingering weight (weight #1) yarn with a 1.75 mm or 2.0 mm hook to make a miniature version approximately 8–10 cm tall. All the same rounds, just at a much smaller scale — perfect for a keychain or ornament.
Elephant family set: Make three elephants in graduating sizes using the same pattern but different yarn weights. Fingering weight for the smallest baby, DK weight for the medium adult, worsted weight for the larger adult. Display them together for a charming decorative set.
Circus elephant: Add a tiny crocheted hat by working a flat circle (the brim) and a small cylinder (the crown), then attaching them together and placing on the elephant's head at a jaunty angle. Stitch on a star or flower embellishment.
Seasonal variations: For holiday versions, add a tiny Santa hat in red and white, bunny ears for Easter, or use orange and black yarn for a Halloween pumpkin-colored elephant. The base pattern stays the same; only the colors and accessories change.
When you're ready for more complex multi-piece animal projects with accessories and detailed shaping, explore our Intermediate Crochet Kits — these include everything you need for more ambitious amigurumi designs.
Frequently Asked Questions
How long does it take to crochet an amigurumi elephant?
For a beginner working at a relaxed pace, plan for 6–10 hours total spread across multiple sessions. An experienced amigurumi maker working steadily can finish one in 3–5 hours. The trunk and ears are the most time-consuming pieces because of the shaping detail required.
What size crochet hook should I use for an amigurumi elephant?
For worsted weight (weight #4) yarn, use a 3.5 mm or 4.0 mm hook. For DK weight (weight #3) yarn, use a 2.5 mm or 3.0 mm hook. Choose whichever size gives you stitches tight enough that no stuffing shows through — hold your swatch up to light; if you can see white fiberfill, go down 0.5 mm.
How much yarn do I need for a crochet elephant amigurumi?
A 15–18 cm elephant uses approximately 100–150 grams of main color yarn and 10–20 grams of contrast color (for inner ears). A standard 200 g skein of DK yarn is more than enough for one complete elephant with yarn to spare.
Can I make an amigurumi elephant without safety eyes?
Yes. Embroider the eyes using black yarn or black embroidery floss — make a small circle of satin stitches or a French knot. Embroidered eyes are completely secure and are strongly recommended for toys intended for children under 3 years old, since plastic safety eyes can occasionally work loose over time and become a choking hazard.
How do I make the trunk stay curved?
Stuff the trunk so the back (top surface) is slightly more packed than the front (underside), which naturally encourages a downward curve. Alternatively, insert a bent pipe cleaner or chenille stem before closing the trunk tip, allowing the trunk to be repositioned freely. When attaching the trunk to the face, angle the base of the trunk slightly downward to reinforce the curve.
What is the best stuffing material for amigurumi?
Polyester fiberfill (also sold as polyfill, toy stuffing, or pillow stuffing) is the standard choice for amigurumi. It's machine washable, hypoallergenic, lightweight, and holds its shape well over years of use. Avoid using old tights, cotton batting (which compacts over time), or pellets (which become a hazard if a seam opens) for pieces intended for children.
Is crocheting an amigurumi elephant good for absolute beginners?
The elephant is best suited to someone who has completed 1–2 simpler amigurumi projects first, such as a ball, a basic bear, or a simple round animal shape. The trunk and flat ears introduce shaping techniques that can feel confusing if you've never worked continuous amigurumi rounds before. Master the magic ring and basic increases/decreases on a simpler project first, then tackle the elephant as your third or fourth amigurumi.
How do I prevent gaps between stitches in amigurumi?
Use a hook at least 0.5 mm smaller than the yarn label recommends, maintain firm and even tension, and use the invisible decrease technique (working through front loops only of the next two stitches) rather than the standard sc2tog decrease. The invisible decrease creates a much flatter, gap-free fabric than the traditional method.

Your Elephant Awaits
Crocheting your first amigurumi elephant is one of those projects where the assembled result genuinely surprises you — it looks far more complex and impressive than the individual rounds suggest while you're working through them. The key is to go slowly on the trunk, stuff every piece firmly, and take your time with the assembly stage.
If you want all your materials in one place without hunting down individual supplies, our Beginner Crochet Kit collection includes everything you need to get started — yarn, hook, safety eyes, stuffing, and needle all in one carefully curated box. No guesswork, no separate orders, just open the box and start crocheting your elephant today.


