

Introduction: Why a Parrot?
Among all the amigurumi animals beginners ask about, the parrot keeps coming up — and it's easy to understand why. Parrots are colorful, expressive, and just a little bit dramatic, which makes them endlessly fun to crochet. A finished amigurumi parrot perched on a bookshelf or clipped to a bag with a keychain ring becomes an instant conversation starter. Better still, parrots are genuinely manageable for anyone who already knows how to work the magic ring, single crochet, and basic increases and decreases. If you can make a round ball shape, you already have the foundation for this project.
This step-by-step guide walks you through crocheting a classic amigurumi parrot from beak to tail. We'll cover the exact stitch counts for each body part, how to create the distinctive rounded head, how to shape the curved beak, how to add wings and a tail that lie flat and look polished, and how to assemble everything so the finished bird looks proportional and sturdy. We'll also address the most common beginner stumbling blocks — things like keeping color changes clean, making the beak look like a beak rather than a bump, and getting the tail angle right.
Whether you're working from a Beginner Crochet Kit that already includes the right yarn colors, or sourcing your own materials, this guide gives you every number and technique you need to finish confidently.
What You'll Need: Materials and Tools
Before you cast on a single stitch, gathering the right materials makes the process much smoother. Here's a specific rundown of what an amigurumi parrot requires.
Yarn
Amigurumi works best in DK weight (also labeled "light worsted" or weight 3) or worsted weight yarn. For a parrot, you'll want at least four colors: a main body color (typically bright green, red, or blue depending on the parrot species you're modeling), a contrasting color for the wing tips or chest, a yellow or orange for the beak, and black or dark gray for the eyes if you're using yarn eyes instead of safety eyes. Small amounts of each secondary color are enough — you're likely to use under 10 grams of each accent color.
Acrylic yarn is the most forgiving choice for beginners because it holds its shape, washes easily, and is available in vivid colors that make a parrot look vibrant. Avoid yarns with long fibers or a halo (like mohair) because they make it very hard to count stitches, which is critical in amigurumi.
Hook Size
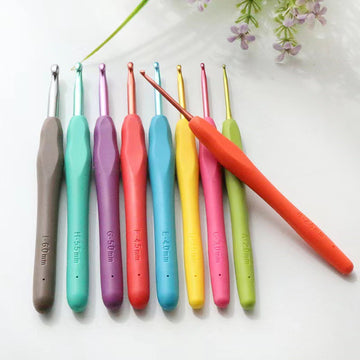
Use a hook one or two sizes smaller than the yarn label recommends. If your yarn calls for a 4.0 mm hook, use a 3.0 mm or 3.5 mm instead. This creates tighter stitches that hold the fiberfill stuffing inside without any gaps showing through. A tighter gauge is the single most important technical requirement of amigurumi, and getting the hook size right from the start saves a lot of frustration.
Other Supplies
You'll need polyester fiberfill stuffing, two safety eyes (6 mm to 9 mm work well for a medium parrot; use a locking washer appropriate to the eye post size), a tapestry needle for sewing parts together and weaving in ends, scissors, and stitch markers. Locking stitch markers are preferable to simple loop markers — they stay in place even when you set your work down mid-round.
For safety eyes: if the finished toy is intended for children under 3 years old, skip plastic safety eyes entirely and embroider the eyes with black yarn instead. Plastic safety eyes can become a choking hazard even with their locking washers if enough force is applied.

Understanding the Parrot's Shape Before You Start
A well-proportioned amigurumi parrot has a large, rounded head (about 40 to 50% of the total visual mass), a slightly smaller oval body, two small flat wings that angle back, a short rounded tail that points downward, two tiny feet, and a short curved beak. The beak is what most distinguishes the parrot from a generic bird — it's hooked, not pointy. We'll achieve this by crocheting a small half-sphere and then shaping it slightly before attaching it.
The key to a good finished look is consistent tension throughout and stuffing each piece firmly before closing. Under-stuffed amigurumi goes floppy and loses its shape over time.
Step 1: Crochet the Head
The head is the most important piece because it's the first thing people notice. Start with your main body color yarn.
Rounds 1 through 6: Building the Head Sphere
Round 1: Make a magic ring. Work 6 single crochet (sc) into the ring. Pull the tail to close the ring snugly. Place a stitch marker in the first stitch of the round. (6 stitches)
Round 2: Increase in every stitch: 2 sc in each stitch around. (12 stitches)
Round 3: *Sc in next stitch, 2 sc in next stitch* — repeat around. (18 stitches)
Round 4: *Sc in next 2 stitches, 2 sc in next stitch* — repeat around. (24 stitches)
Round 5: *Sc in next 3 stitches, 2 sc in next stitch* — repeat around. (30 stitches)
Round 6: *Sc in next 4 stitches, 2 sc in next stitch* — repeat around. (36 stitches)
Rounds 7 through 12: Straight Rounds
Sc in each stitch around for 6 rounds, no increases or decreases. (36 stitches per round) At the end of round 12, insert the safety eyes between rounds 8 and 9, spacing them about 8 to 10 stitches apart. Press the locking washers on firmly from the inside. Once washers are attached, they cannot be moved without damaging the yarn — so double-check the position before locking.
Rounds 13 through 17: Closing the Head
Round 13: *Sc in next 4 stitches, invisible decrease (invdec) over next 2 stitches* — repeat around. (30 stitches) The invisible decrease (inserting the hook through the front loops only of two consecutive stitches before drawing up a loop) leaves a smoother surface than sc2tog in visible amigurumi rounds.
Round 14: *Sc in next 3 stitches, invdec* — repeat around. (24 stitches)
Round 15: *Sc in next 2 stitches, invdec* — repeat around. (18 stitches) Begin stuffing the head firmly at this point. Push fiberfill in small amounts, working it toward the top and sides so there are no hollow spots. The head should feel like a firm stress ball.
Round 16: *Sc in next stitch, invdec* — repeat around. (12 stitches)
Round 17: Invdec around: invdec in every pair of stitches. (6 stitches) Cut yarn leaving a 6-inch tail. Thread tail through remaining 6 stitches with a tapestry needle, pull tight to close the hole, and weave in the end. Set head aside.
Step 2: Crochet the Body
The body uses the same construction but ends up slightly smaller and more oval-shaped by using one fewer increase round.
Round 1: Magic ring, 6 sc. (6 stitches)
Round 2: 2 sc in each stitch. (12 stitches)
Round 3: *Sc in 1, 2 sc in next* — repeat. (18 stitches)
Round 4: *Sc in 2, 2 sc in next* — repeat. (24 stitches)
Round 5: *Sc in 3, 2 sc in next* — repeat. (30 stitches)
Rounds 6–10: Sc in each stitch around for 5 rounds. (30 stitches per round)
Round 11: *Sc in 3, invdec* — repeat around. (24 stitches)
Round 12: *Sc in 2, invdec* — repeat around. (18 stitches) Stuff the body firmly now, before the opening gets too small.
Round 13: *Sc in 1, invdec* — repeat around. (12 stitches)
Round 14: Invdec around. (6 stitches)
Close and weave in the end. Set body aside.
Step 3: Crochet the Wings (Make Two)
The wings are flat pieces worked in rows rather than rounds, which creates an oval paddle shape. Use the main color for the base and a contrasting color for the wing tips if you want that flight-feather effect.
Row 1: Chain 8. Starting in the second chain from the hook, sc in each chain across. (7 stitches)
Row 2: Chain 1, turn. 2 sc in first stitch, sc in next 5 stitches, 2 sc in last stitch. (9 stitches)
Row 3: Chain 1, turn. Sc in each stitch across. (9 stitches)
Row 4: Chain 1, turn. Invdec over first 2 stitches, sc in next 5 stitches, invdec over last 2 stitches. (7 stitches)
Row 5: Chain 1, turn. Invdec over first 2, sc in next 3, invdec over last 2. (5 stitches)
Row 6: Chain 1, turn. Invdec over first 2, sc in next 1, invdec over last 2. (3 stitches)
Fasten off, leaving a long tail for sewing. For a two-tone wing, join the contrast color at Row 4 and work the remaining rows in that color. Make two wings total.
Step 4: Crochet the Tail
The tail is a simple flat oval. Use the main color, or introduce a splash of contrast to mimic the long tail feathers seen on macaws or Alexandrine parakeets.
Round 1: Chain 6. Starting in the second chain from the hook, sc in next 4 chains, 3 sc in last chain. Working back along the other side of the chain: sc in next 3 chains, 2 sc in first chain. (12 stitches)
Round 2: 2 sc in first stitch, sc in next 4, 2 sc in each of next 2, sc in next 3, 2 sc in last stitch. (16 stitches)
Rounds 3–4: Sc in each stitch around. (16 stitches)
Fasten off, leaving a long tail for sewing. Do not stuff the tail — it should lie flat.
Step 5: Crochet the Beak
The beak is what sets a parrot apart from any other bird amigurumi. Use yellow, orange, or a mix of both for classic parrot coloring.
Round 1: Magic ring, 6 sc. (6 stitches)
Round 2: 2 sc in each stitch. (12 stitches)
Round 3: *Sc in 1, 2 sc in next* — repeat around. (18 stitches)
Rounds 4–5: Sc in each stitch around. (18 stitches)
Fasten off, leaving a long tail. Do not stuff the beak. Pinch the opening flat before sewing — this gives it that slightly curved look that resembles a real hooked beak rather than a ball. When attaching, only sew through the bottom portion of the beak to the face so the top curves slightly outward.
Step 6: Crochet the Feet (Make Two)
Parrot feet have three toes. We'll make two simple legs with a small toe cluster at the bottom.
Leg: Magic ring, 4 sc. Work 6 rounds of 4 sc without increasing. Fasten off leaving a long tail. Do not stuff — the legs should be flexible and poseable.
Toe cluster: At the base of each leg, use the yarn tail to attach three short chains (3 to 4 stitches each) fanning out in front, left, and right directions. This creates the three-toed perching look that makes a parrot distinctly a parrot.
Step 7: Assembly — Building Your Parrot
Assembly order matters in amigurumi. Work from the bottom up: feet first, then tail, then body, then wings, then head, then beak last.
Attaching the Feet
Pin the legs to the bottom of the body, one on each side, angling slightly forward and outward the way a real perching bird grips a branch. Use the tapestry needle and the long tail from each leg to sew through the body stitches in a circle, going around the top of each leg at least three full times before securing and weaving in the end. Pull firmly — the legs need to bear the weight of the whole figure if the parrot is posed standing.
Attaching the Tail
The tail attaches to the back-bottom of the body, pointing downward at roughly a 45-degree angle. Pin it in place and sew around the entire perimeter of the tail attachment edge before fastening off. A full perimeter seam (rather than just a few stitches) keeps the tail from flopping sideways over time.
Attaching the Wings
Lay the wings against the upper sides of the body so the wider end is toward the body and the pointed end faces backward and slightly downward — this is the natural resting wing position for a parrot. Pin both wings and adjust until the parrot looks symmetrical when viewed from the front. Sew each wing down along its flat attachment edge only, leaving the back portion unsewn so the wing retains a slight three-dimensional lift.
Joining Head to Body
Place the head on top of the body. The closing seam should face downward into the body so it is hidden. Sew the head to the body by going back and forth between head stitches and body stitches in a circular path, using a mattress stitch for the least visible seam. Go around the neck join twice for security.
Attaching the Beak
Center the beak on the front of the head, roughly between rounds 8 and 11, just below and between the safety eyes. Sew only the bottom and sides of the beak to the face; leave the top edge free so it appears to curve upward. This subtle detail is what makes the face read as parrot rather than generic bird.
Step 8: Finishing Touches That Make the Difference
Cheek Patches
Many parrots — macaws, conures, lovebirds — have distinctive round cheek patches in white or pale yellow. Use a tapestry needle threaded with contrasting yarn to embroider a small circle of satin stitches on each cheek, right next to where the beak meets the face.
Eye Rings
If your parrot has a pale ring around each eye (common in wild parakeets), use white or pale yellow yarn to embroider 4 to 5 small straight stitches in a circle around each safety eye before attaching the head to the body.
Weaving in Ends
Weave every yarn tail at least 3 cm deep into the interior of the closest body part, changing direction once midway to lock the tail. Clip the remaining end close to the surface. If a tail is accessible through an open piece before assembly, thread it through to the stuffed interior so it is completely hidden.
Keychain Option
To make a parrot keychain, before closing the final round at the top of the head, insert the hook of a metal split ring through the last open stitches. Use a yarn tail to sew the stitches closed around the ring post. This creates a strong attachment point that distributes pulling force across multiple stitches rather than a single knot.
Troubleshooting Common Parrot Problems
The Beak Looks Like a Nose, Not a Beak
This usually happens when the beak is attached fully flat against the face without any pinching or angling. Try stuffing a pea-sized amount of fiberfill into the beak, pinching the opening flat, and sewing it so the bottom is flush with the face but the top curves outward 2 to 3 mm. That small outward angle creates the hook shape that identifies a parrot.
The Wings Droop Instead of Holding Their Shape
Wings that droop forward under gravity usually need an additional anchor point. Sew a small horizontal tack stitch midway along each wing to anchor the back portion slightly. This prevents the wing from rotating forward and keeps it in the natural resting position.
Color Changes Look Untidy
The "jog" — the staircase step that appears at color joins when working in the round — is a universal challenge. To minimize it: when completing the last stitch of a round in color A, use color B for the yarn-over of that final stitch. Then at the beginning of the next round, pick up the stitch normally. This technique removes most of the visible color step without any additional sewing.
The Head Wobbles and Won't Stay Straight
If the neck join feels loose after assembly, use a long needle to run a thread through the center of the head, down through the neck, and into the body stuffing — then knot it at each end under the surface. This internal "pillar" fixes the head position permanently without any visible stitching on the outside.

Parrot Variations to Try Next
Macaw
Use a bright red body color with blue wings and a yellow-green upper back. Add a longer, more pointed tail by extending the oval tail pattern by two additional plain rounds. The cheek patches on a macaw are very prominent — make them large, flat, and white.
Cockatiel
Work the body in pale gray or white. Add an orange cheek circle and a prominent yellow head crest: crochet a chain of 8, attach it to the top of the head, and let the chain stand upright. Stiffen it with a tiny piece of craft wire inside the chain if needed.
Lovebird
A lovebird is smaller overall — reduce every round by one increase row (stopping the head at 30 stitches rather than 36) — with a bold orange-red face patch and bright green body. Use 4 mm safety eyes instead of 6 mm or 9 mm for the smaller scale.
Budgerigar (Budgie)
Work the body in light green with yellow on the head and black-and-yellow wing markings created with simple embroidery lines. Add a small blue cheek patch and use just rounds 1 through 3 of the beak pattern above for a smaller, rounder budgie beak.
Displaying and Caring for Your Amigurumi Parrot
Amigurumi made from acrylic yarn can be hand-washed in cool water with gentle soap, then pressed between two towels to remove excess water and allowed to air dry flat. Avoid wringing — twisting the fabric damages yarn fibers and can deform the stuffing inside. Store your parrot away from prolonged direct sunlight; UV exposure gradually fades even colorfast acrylic yarn over months of exposure.
For display, amigurumi parrots look best posed on a small wooden dowel or pencil placed between their feet — this recreates the perched-on-a-branch look that makes parrots so recognizable. If you sewed the feet with enough security, the figure will balance on the dowel without tipping. A small piece of museum putty under the base of the dowel keeps the whole arrangement stable on a shelf.
Getting Started with the Right Kit
If sourcing individual yarn colors, a hook, safety eyes, and fiberfill separately feels like a barrier, a pre-bundled amigurumi kit removes all that friction. Good kits include pre-measured yarn in each required color, a matched hook, safety eyes, stuffing, and a pattern — everything calibrated to work together. If this is your first amigurumi project, starting with a simpler shape from a Beginner Crochet Kit builds the muscle memory you need before attempting a multi-part figure like the parrot. Once you've finished one or two simpler shapes, the parrot assembly will feel completely manageable.
Frequently Asked Questions About Crocheting an Amigurumi Parrot
How long does it take to crochet an amigurumi parrot?
For a beginner working at a comfortable pace, expect 6 to 10 hours spread across multiple sessions. The head and assembly take the longest. An experienced crocheter who knows the magic ring and invisible decrease well can finish the entire parrot in 3 to 4 hours.
What size will the finished parrot be?
Following this pattern with DK weight yarn and a 3.0 mm hook, the finished parrot stands approximately 15 to 18 cm (6 to 7 inches) tall. Using worsted weight yarn and a 3.5 mm hook produces a parrot closer to 20 to 22 cm (8 to 9 inches).
Can I use acrylic yarn for an amigurumi parrot?
Yes — acrylic is the most common and practical choice for amigurumi. It's washable, holds color well, and maintains its shape after stuffing. Avoid fuzzy or hairy yarns (like mohair blends) because they make it very difficult to count stitches and see where your hook is going.
What size safety eyes should I use?
For a medium parrot made in DK weight yarn, 6 mm safety eyes look natural and proportional. For a larger worsted-weight version, 9 mm eyes fit better. For toys intended for children under 3, skip safety eyes entirely and embroider the eyes with black yarn to eliminate the choking hazard.
How do I make the beak look curved like a real parrot's?
Pinch the beak flat before attaching it, and sew only the bottom and sides to the face while letting the top edge curve outward. Adding a small pea-sized amount of stuffing inside the beak piece before sewing helps hold the curved shape over time.
Can this pattern be scaled down for a keychain?
Yes. Reduce every part by one increase round and use fingering weight yarn (weight 1) with a 2.0 mm hook. The finished keychain parrot will be approximately 7 to 8 cm tall. Insert a split ring at the top of the head before closing the final round for a clean attachment point.
Is this pattern good for beginners?
This pattern suits beginners who have already completed one or two simple amigurumi shapes and know the magic ring, single crochet, increases, and decreases. If those techniques are still new, practice them on a simple ball first, then come back to the parrot. Most people find the parrot achievable after one or two warm-up projects.
What do I do if I run out of yarn mid-project?
Join new yarn at the beginning of a round whenever possible, not mid-round, to keep the join invisible. Leave at least a 10 cm tail on both the old and new yarn and weave both tails into the interior of the piece in different directions so neither can work loose over time.
Conclusion: Your Finished Parrot Awaits
The amigurumi parrot is one of those projects that looks impressive from the outside but is built on the same basic rounds you already know. The key details that make it unmistakably a parrot — the hooked beak attachment, the flat wing construction, and the bold color combinations — are all within a beginner's reach once the foundational stitches are solid. Take your time on the head, stuff everything firmly, and pay attention to the small finishing details like cheek patches and eye rings. The result will be a colorful, charismatic figure that holds its shape for years and earns compliments every time someone picks it up.


