
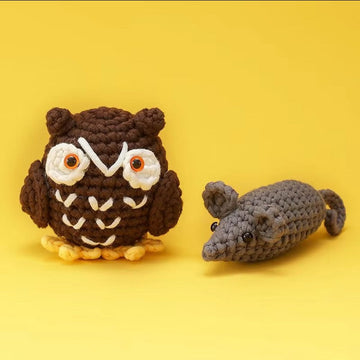

If you have ever placed your finished amigurumi next to a photo from the pattern designer and wondered why yours looks slightly looser, rounder-holed, or more tilted, the answer often comes down to a single, tiny movement you make hundreds of times per project: how you wrap the yarn on your hook. The difference between yarn under (YU) and yarn over (YO) is measured in millimeters, but across the 800 to 2,000 stitches in a typical stuffed animal, it changes the fabric's density, the shape of the stitches, the amount of stuffing that shows through, and even how much yarn your project consumes.
Most beginner tutorials never mention this choice at all — they teach yarn over because it is the standard for blankets, garments, and almost everything else in crochet. But in the amigurumi world, yarn under has quietly become the preferred technique of many professional toy designers, and once you understand why, you can make a deliberate choice instead of an accidental one. This guide explains exactly what each technique is, how the resulting stitches differ (with specific measurements and numbers), when each one wins, how to switch without ruining your tension, and how to troubleshoot the most common problems along the way.
What Is Yarn Over (YO)? The Standard Technique
Yarn over is the movement taught in virtually every learn-to-crochet book: when you insert your hook into a stitch and reach for the working yarn, you bring the yarn over the top of the hook from back to front, so the yarn crosses the hook's throat before you pull it through. You do this twice per single crochet stitch — once to pull up a loop, and once to pull through both loops on the hook.
Because the yarn travels over the hook, each wrap uses a slightly longer path of yarn. The resulting single crochet stitch has the classic "V" appearance on its face, sits fairly upright, and produces a fabric with a small amount of natural openness between stitches. For flat work — scarves, dishcloths, sweater panels — this openness is a feature. It gives the fabric drape and flexibility.
Yarn Over Stitch Anatomy
A yarn-over single crochet has three visible characteristics that matter for amigurumi:
- The V sits at a lean. Standard YO single crochet stitches lean visibly to the right (for right-handed crocheters working in continuous spirals), producing the familiar diagonal "swirl" up the side of an amigurumi body.
- Slightly taller stitch. A YO single crochet is marginally taller than its YU counterpart — typically about 10 to 15 percent taller at the same tension — because the longer yarn path adds height to the loop structure.
- More space between stitches. The openness that gives blankets drape becomes a liability in a stuffed toy: white polyester stuffing peeks through the gaps, especially with dark yarn.
What Is Yarn Under (YU)? The Amigurumi Insider's Technique
Yarn under reverses the wrapping direction: instead of bringing the yarn over the top of the hook, you scoop the hook under the yarn, catching it from below. The yarn path is shorter and the loop that forms on your hook is smaller and tighter. Everything else about the stitch — where you insert the hook, how many loops you pull through — stays exactly the same.
In practice, most amigurumi crocheters who use yarn under only apply it to the first step of the single crochet (pulling up the loop) and still yarn over for the final pull-through, because a full double-yarn-under stitch can become too tight to work into on the next round. This hybrid is sometimes called the "half yarn under" method, and it captures most of the benefits with fewer downsides.
Yarn Under Stitch Anatomy
- The stitch forms an X, not a V. Yarn-under single crochet twists the loop as it forms, so the face of the stitch shows a crossed "X" shape. Rows of X stitches stack almost vertically, dramatically reducing the spiral lean.
- Shorter, denser stitch. YU stitches are roughly 10 to 20 percent shorter than YO stitches at identical tension. A sphere pattern worked in YU comes out noticeably smaller and firmer than the same pattern in YO.
- Tighter fabric with smaller gaps. The compact twisted loop closes up the holes between stitches, which means less stuffing show-through and a cleaner, more professional surface.
- Less yarn consumed. Because each wrap uses a shorter yarn path, YU projects typically use 5 to 10 percent less yarn than the same pattern in YO — a meaningful saving on large plush projects that consume 300+ grams.

Side-by-Side Comparison: The Numbers That Matter
Here is how the two techniques compare on the factors amigurumi makers actually care about. These figures are based on typical results with medium (worsted/#4) acrylic yarn and a 3.5 mm hook, the most common amigurumi setup:
- Stitch height: YO single crochet ≈ 4.5–5 mm tall; YU single crochet ≈ 4–4.5 mm tall. Over a 30-round doll body, that difference adds up to roughly 1.5–2 cm of height.
- Gauge shift: Crocheters who switch from YO to YU commonly find their gauge tightens by about half a hook size. If your YO gauge was 26 stitches × 28 rounds per 10 cm, expect something closer to 27–28 stitches × 31–33 rounds with YU.
- Spiral lean: YO spirals visibly travel — a color change or stitch column can migrate 15–30 degrees around the body over 20 rounds. YU columns stack within a few degrees of vertical, which is why colorwork amigurumi (striped sweaters on dolls, patterned animals) looks dramatically straighter in YU.
- Yarn usage: A 25 cm teddy bear that consumes about 120 g of yarn in YO will typically need 108–114 g in YU.
- Working speed: Most crocheters report YU feels slightly faster once mastered, because the scooping motion is shorter — but expect a slowdown of a week or two while your muscle memory rebuilds.
When Yarn Under Wins for Amigurumi
1. Dark or Light-Contrast Yarn Over White Stuffing
The single most common complaint from beginner amigurumi makers is stuffing showing through the fabric. With navy, black, or forest green yarn over white fiberfill, every gap glows. Yarn under's tighter stitch structure closes those gaps at the source, often making the difference between needing to switch to a smaller hook and being able to keep the comfortable hook size you already use. If gaps are your recurring frustration, trying YU before dropping a full hook size is usually the better first move, because it preserves fabric flexibility while fixing the show-through.
2. Colorwork and Stripes
Because YU stitches stack vertically, stripes stay level and tapestry-crochet motifs (hearts on a bear's tummy, letters on a doll's sweater) come out crisp instead of skewed. Designers who publish patterns with charted colorwork frequently note that their samples were worked in yarn under specifically to keep the chart aligned. If you have ever finished a striped amigurumi and noticed the jog wandering diagonally around the body, YU will fix roughly two-thirds of that visual drift on its own.
3. Pieces That Need Structure
Amigurumi that must stand — dinosaurs on two legs, dolls, tall figures — benefit from denser fabric that resists stuffing pressure. YU fabric deforms less under firm stuffing, holds cylindrical shapes with less wobble, and keeps its shape better after months of play. Toy makers who sell their work often standardize on YU for exactly this durability reason.
4. The X-Stitch Aesthetic
Some makers simply prefer the look. The X-shaped stitch face reads as a tidy woven texture, and in product photography it photographs cleaner than the leaning V. If you have admired an amigurumi photo and couldn't figure out why the stitches looked different from yours, there is a good chance you were looking at yarn under fabric.
When Yarn Over Is Still the Right Choice
Yarn under is not a universal upgrade, and there are several situations where the standard technique genuinely serves you better:
- You are brand new to crochet. If you are still building consistent tension, learn YO first. Every tutorial, video, and beginner kit assumes it, and switching techniques mid-learning creates confusion. Master the basics with a well-structured starter set — the kits in our Beginner Crochet Kit collection are designed around standard yarn-over technique, with patterns tested at YO gauge.
- You already crochet very tightly. YU tightens fabric further. If your YO stitches are already so snug that inserting the hook is a struggle, YU will make every round a fight and can cause hand strain. Tight crocheters often get better results staying with YO or moving up a hook size before experimenting.
- Pieces that need stretch or drape. Clothing for dolls, blankets, appliqués that must curve — the openness of YO fabric is an asset here. YU fabric is stiff by design.
- Working into tight stitches repeatedly. Full YU (both wraps) creates stitches that can be genuinely difficult to work into on the following round, especially in invisible decreases. This is why the hybrid half-YU method is the most popular compromise.
- Matching an existing project. If you made a bear's head in YO last month, do not switch to YU for the body. The gauge difference (up to 15 percent in row height) will produce mismatched pieces.
How to Switch from Yarn Over to Yarn Under (Without Ruining Your Tension)
Changing a movement you have performed tens of thousands of times takes deliberate practice. Here is a structured one-week plan that works for most crocheters:
Day 1–2: Isolated Practice Swatches
Chain 16 and work flat rows of single crochet using yarn under for the first pull-up only, yarn over for the final pull-through. Go slowly — aim for accuracy, not speed. Expect your hands to feel clumsy; the scooping motion recruits slightly different wrist mechanics. Work at least three 15-row swatches before moving on. Compare your first and third swatch: most people can see their consistency improve within 45 minutes of total practice.
Day 3–4: Work in the Round
Amigurumi lives in continuous spirals, and YU behaves differently in rounds than in flat rows. Make a basic sphere: magic ring with 6 single crochet, increase to 36 stitches over 6 rounds, work 6 even rounds, decrease back down. Stuff it before closing. This single practice ball teaches you YU increases, even tension in the round, and YU decreases — and gives you a direct object to compare against any YO sphere you have made before.
Day 5–7: A Small Real Project
Choose a small, forgiving project — a simple whale, a round octopus, anything under 10 cm without color changes. Complete it start to finish in YU. By the end, the motion will be settling into muscle memory. A compact project from our Crochet Amigurumi Kits collection works well here because kit patterns include exact stitch counts per round, so you can verify your work is on track while your hands adjust.
Check Your Gauge Before Starting Anything Big
After the transition week, make a 20-stitch, 20-round gauge swatch in the round and measure it. Record your stitches and rounds per 10 cm. If a pattern gives finished dimensions and your new YU gauge is more than 10 percent tighter than the pattern's stated gauge, go up half a hook size (for example from 3.5 mm to 3.75 mm, or 3.5 mm to 4 mm if half sizes aren't available) to compensate.
Troubleshooting Yarn Under Problems
"My stitches are so tight I can't insert my hook"
This is the number one complaint, and it has three fixes in order of preference: first, make sure you are only yarn-undering the first wrap, not both. Second, consciously pull each loop up an extra millimeter before completing the stitch — YU loops naturally form small, and slightly exaggerating the pull-up compensates. Third, go up a hook size. A 4 mm hook with YU often produces fabric similar in density to a 3.5 mm hook with YO.
"My fabric twists or biases"
Some twist is inherent — YU stitches are themselves twisted loops. But excessive spiraling usually means your tension is uneven between the pull-up and pull-through. Slow down and standardize: same scoop angle, same pull distance, every stitch. The bias also relaxes significantly once the piece is stuffed, so judge the final result, not the empty fabric tube.
"My decreases look bulky"
Invisible decreases (working through front loops only of two stitches) can feel cramped in YU fabric. Use your hook tip to open each front loop before inserting, and consider yarn-overing the final pull-through of decrease stitches even if you otherwise work full YU. The slight extra looseness in the decrease disappears visually but makes the next round far easier to work.
"My animal came out smaller than the pattern photo"
Expected — YU fabric is denser and shorter. A pattern designed at YO gauge will finish roughly 5 to 15 percent smaller in YU at the same hook size. If final size matters (for example, matching a gift box or making a pair of animals the same height), either go up half a hook size or add rounds: roughly one extra even round for every 8 to 10 rounds the pattern specifies.

Does Yarn Under Work for Taller Stitches?
Mostly no — and it is worth understanding why. Half double crochet, double crochet, and taller stitches begin with a yarn over before you insert the hook. Substituting a yarn under at that stage causes the initial wrap to slide and unwind as you complete the stitch, producing loose, unstable loops. Amigurumi is overwhelmingly single crochet, so this rarely matters, but if your pattern includes half double crochet details (ears, muzzles, shell textures), work those stitches with standard yarn overs and return to YU for the single crochet body. Mixing techniques within a project is completely fine as long as each stitch type is consistent with itself.
What About Hook Style and Yarn Choice?
Your equipment affects how easy yarn under feels:
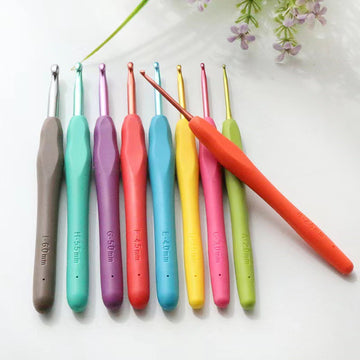
- Inline hooks (the head is in line with the shaft, with a deeper throat) grip the small YU loops more securely and are widely preferred by yarn-under crocheters. If your current tapered hook keeps dropping the yarn during the scoop, an inline style is worth testing.
- Smooth, tightly plied yarns — standard acrylics and cottons — behave best with YU. Splitty single-ply yarns, chenilles, and velvets are harder to scoop cleanly because the hook tends to pierce the strand; with those yarns many crocheters revert to YO even if they normally prefer YU.
- Ergonomic handles matter more with YU. Because the fabric is tighter, insertion forces are higher. A cushioned-grip hook reduces the extra load on your thumb and index finger over a long session.
Frequently Asked Questions
What is the difference between yarn under and yarn over in crochet?
Yarn over wraps the yarn over the top of the hook, producing a taller, looser, V-shaped stitch. Yarn under scoops the hook beneath the yarn, producing a shorter, tighter, X-shaped stitch. In amigurumi, yarn under creates denser fabric with smaller gaps, straighter stitch columns, and uses about 5–10 percent less yarn, while yarn over produces softer, more flexible fabric and is the standard technique taught to beginners.
Is yarn under better for amigurumi?
Yarn under is better for amigurumi when you want tighter fabric that hides stuffing, vertical stitch columns for clean colorwork, and firmer structure — which is why many professional toy designers use it. It is not better for absolute beginners still learning tension, for crocheters who already work very tightly, or for pieces that need stretch. Many makers use a hybrid: yarn under for the first wrap and yarn over for the pull-through.
Does yarn under use less yarn?
Yes. Because the yarn takes a shorter path around the hook, yarn under typically uses 5 to 10 percent less yarn than yarn over for the same stitch count. On a large amigurumi consuming 300 g of yarn, that can save 15–30 g — sometimes the difference between needing one skein or two.
Why do my yarn under stitches look like an X?
The yarn under motion twists the loop as it forms, so the two legs of the stitch cross on the fabric's surface, creating an X instead of the open V made by yarn over. This is normal and is actually the visual signature of the technique — the crossed structure is also what closes the gaps between stitches.
Will switching to yarn under change my gauge?
Yes, expect your gauge to tighten by roughly half a hook size worth. Stitches become 10–20 percent shorter and slightly narrower, so a pattern worked in yarn under at the same hook size finishes about 5–15 percent smaller. Always make a fresh gauge swatch after switching, and go up half a hook size if you need to match a pattern's stated dimensions.
Can I use yarn under for double crochet?
Not reliably. Taller stitches start with a wrap before hook insertion, and a yarn under at that stage slips and unwinds, creating unstable stitches. Use yarn under only for single crochet (and slip stitches), and work half double or double crochet sections with standard yarn overs.
The Bottom Line: Make It a Choice, Not an Accident
Neither technique is "correct." Yarn over is the versatile default that every crocheter should learn first; yarn under is a specialized refinement that solves specific amigurumi problems — stuffing show-through, leaning spirals, floppy structure — at the cost of tighter working fabric and a short retraining period. The best amigurumi makers know both and deploy each deliberately: YO for a doll's drapey dress, YU for the doll's firm body; YO while teaching a friend, YU for the shop-quality bear they are selling.
If you are ready to put the technique to the test, start with a small project where the difference is easy to see — something round, in a dark color, worked once in each style. The comparison will teach you more in two evenings than any article can. And if you want patterns with exact stitch counts, matched yarn, and the right hook already in the box, a complete kit removes every variable except the one you are testing: your yarn wrap. That is the fastest way to feel the difference for yourself — and to decide which camp you belong to.


