

Introduction
Learning to crochet amigurumi is one of the most rewarding crafts you can pick up, but there is one hurdle that stops many beginners before they even start: reading crochet patterns. If you have ever looked at a printed amigurumi pattern and felt like you were staring at a foreign language, you are not alone. Abbreviations like sc, inc, dec, and fo can be intimidating at first glance, and the moment you see a crochet chart with its maze of symbols, the overwhelm can feel very real.
The good news is that reading amigurumi patterns is a skill, not a talent. Anyone can learn it with a little patience and the right guidance. In this comprehensive guide, we will break down every element you need to understand: from common crochet abbreviations and numeric instructions to symbol charts and pattern repeats. By the end, you will be able to pick up any amigurumi pattern with confidence and know exactly what the designer is asking you to do. If you are just getting started, our Beginner Crochet Kit collection includes everything you need to practice these skills with real projects.
Why Learning to Read Patterns Matters
Many beginners rely entirely on video tutorials, which are excellent for visual learners. However, video tutorials have limitations. They take longer to follow, require internet access, and do not always show every stitch from the ideal angle. Written patterns, on the other hand, are portable, searchable, and allow you to work at your own pace. Once you can read a pattern, you unlock thousands of free and paid designs from independent designers and pattern books around the world.
More importantly, understanding pattern structure helps you troubleshoot mistakes. When you know that "Rnd 5: (sc, inc) x 6 [18]" means you are working six repeats of one single crochet followed by one increase, resulting in 18 stitches total, you can count your stitches as you go and catch errors immediately. This is the difference between a frustrating project and a smooth, enjoyable one.

Common Crochet Abbreviations in Amigurumi
Amigurumi patterns use a standardized set of abbreviations, most of which are derived from US crochet terminology. Below is a table of the most common abbreviations you will encounter, with explanations and stitch counts where relevant.
Basic Stitch Abbreviations
sc — single crochet. This is the foundational stitch of nearly all amigurumi. You insert your hook, yarn over, pull up a loop, yarn over again, and pull through both loops on the hook. Each sc counts as one stitch.
hdc — half double crochet. Taller than a single crochet but shorter than a double crochet. Occasionally used in amigurumi for accessories or looser textures.
dc — double crochet. Taller still, rarely used in standard amigurumi but common in larger plush designs or amigurumi with drape.
sl st — slip stitch. Used to join rounds, move across stitches without adding height, or finish off a piece. Does not count as a stitch in most amigurumi patterns.
ch — chain. The starting loop or foundation chain. In amigurumi, chains are often used for starting rows, creating gaps between limbs, or forming decorative elements.
Shaping Abbreviations
inc — increase. Work two single crochet stitches into the same stitch. This expands the piece and creates rounded shapes. In pattern notation, you may see it written as "2 sc in next st."
dec — decrease. Work two stitches together into one. The standard method is "sc2tog" or single crochet two together: insert hook, pull up a loop, insert hook in next stitch, pull up a loop, yarn over, pull through all three loops. The invisible decrease is preferred for amigurumi because it leaves less of a gap.
inv dec — invisible decrease. A technique where you insert the hook into the front loop only of the next stitch, then the front loop only of the following stitch, yarn over, pull through two loops, yarn over, and pull through the remaining two loops. This creates a much cleaner, less visible decrease line.
fo — fasten off. Cut the yarn, leaving a tail, and pull the loop through to secure it. Typically used when finishing a piece or changing colors.
mr — magic ring (also called magic circle or adjustable ring). The starting method for most amigurumi worked in the round. It creates a tightly closed center with no hole. If you need a refresher, our Beginner Crochet Kit collection includes projects that use the magic ring extensively.
Pattern Structure Abbreviations
rnd or r — round. Amigurumi is almost always worked in continuous rounds, not joined rounds, so you do not typically slip stitch to join at the end of each round unless the pattern specifies.
st — stitch. The basic unit of crochet.
sts — stitches. Plural.
rep — repeat. Indicates that a sequence of stitches should be worked multiple times.
tog — together. As in "sc2tog," meaning single crochet two stitches together.
pm — place marker. Indicates where to put a stitch marker to track the beginning of a round or a specific position.
sm — slip marker. Move the marker from the previous round to the current round as you pass it.
BLO — back loop only. Work the stitch into the back loop of the stitch below, leaving the front loop unworked. Creates a ridge or fold line.
FLO — front loop only. Work into the front loop only, leaving the back loop free. Useful for creating subtle texture changes or attachment points.
How Pattern Rounds Are Written
Amigurumi patterns are built round by round, and each round tells you exactly how many stitches you should have at the end. This stitch count is usually written in square brackets at the end of the round. Here is a typical example and how to decode it:
Example Pattern Excerpt
Rnd 1: 6 sc in mr [6]
Rnd 2: inc x 6 [12]
Rnd 3: (sc, inc) x 6 [18]
Rnd 4: sc, inc, (2 sc, inc) x 5, sc [24]
Rnd 5: (3 sc, inc) x 6 [30]
Decoding Each Round
Rnd 1: 6 sc in mr [6] — Make a magic ring and work 6 single crochet stitches into it. Pull the ring tight. You now have 6 stitches. This is the standard starting point for most amigurumi heads and bodies.
Rnd 2: inc x 6 [12] — Work an increase into every stitch around. That means 2 sc in each of the 6 stitches, giving you 12 stitches total. The "x 6" tells you to repeat the increase 6 times, once in each stitch.
Rnd 3: (sc, inc) x 6 [18] — Work one single crochet, then one increase. Repeat this sequence 6 times around. Each repeat adds 3 stitches (1 + 2), and 6 repeats x 3 stitches = 18 stitches total. Notice the pattern: the number of plain single crochets between increases goes up by one each round.
Rnd 4: sc, inc, (2 sc, inc) x 5, sc [24] — This is slightly more complex. You start with 1 single crochet, then 1 increase. Then you repeat the sequence of 2 single crochets followed by 1 increase, five times. You end with 1 single crochet. The pattern is designed to distribute increases evenly around the round. For practical purposes, just follow the instructions exactly as written and count your stitches at the end.
Rnd 5: (3 sc, inc) x 6 [30] — Work 3 single crochets, then 1 increase. Repeat 6 times. Each repeat is 5 stitches (3 sc + 2 sc in the inc), and 6 x 5 = 30. Correct.
Understanding Parentheses, Asterisks, and Brackets
Crochet patterns use specific punctuation to organize instructions. Misreading these can lead to major mistakes, so it is worth understanding exactly what each symbol means.
Parentheses ( )
Parentheses group a sequence of stitches that should be worked together or repeated as a unit. For example, "(sc, inc) x 6" means you work the sequence inside the parentheses one time, then repeat that same sequence five more times, for a total of six repetitions.
Parentheses can also indicate stitches worked into the same space. For example, "(sc, hdc, dc) in next ch" means all three stitches go into the same chain space.
Asterisks *
Asterisks mark the beginning and end of a repeat section. For example: "*sc, inc* rep 6 times" means you work sc, inc, then repeat from the asterisk six times total. Some patterns use "*" to start and "**" or "rep from *" to end the repeat.
Square Brackets [ ]
In amigurumi patterns, square brackets almost always contain the final stitch count for that round. This is your verification number. If you finish a round and do not have the number inside the brackets, something went wrong and you should frog back (undo your work) to find the mistake.
Curly Braces { }
Less common in amigurumi, but sometimes used in complex patterns to indicate a special instruction or note. Always read the pattern key if curly braces appear.
How to Read Crochet Symbol Charts
Some amigurumi patterns, especially those from Japanese or European designers, include symbol charts instead of written instructions. These charts use a standardized set of symbols that represent each stitch. Learning to read them is extremely valuable because symbol charts are language-independent and often show the shape of the piece more clearly than text.
Common Symbol Chart Symbols
+ or X — single crochet. The most common symbol, usually a cross or X mark.
T — half double crochet. Looks like a T with a crossbar.
T with one diagonal line — double crochet. The number of diagonal lines indicates the stitch height.
• (dot) — slip stitch. A small filled dot.
○ (open oval or chain symbol) — chain stitch. Usually appears at the start of a row.
↶ or curved arrow — indicates the direction of work or where to join.
▼ (inverted triangle or V) — decrease. Sometimes shown as two stitches merging into one.
△ (triangle or inverted V) — increase. Sometimes shown as one stitch splitting into two.
How to Follow a Chart
Symbol charts for amigurumi worked in the round are usually read from the center outward, following the spiral. The center ring is shown as a small circle, and each subsequent round is a larger circle around it. Arrows indicate the direction of work, typically clockwise for right-handed crocheters and counterclockwise for left-handed crocheters.
When reading a flat chart (for pieces worked in rows), read right-side rows from right to left and wrong-side rows from left to right. The row number is usually marked on the side.
Special Instructions and Pattern Notes
Most amigurumi patterns include a section before the actual instructions that lists special notes, yarn requirements, hook size, gauge, and finished dimensions. Do not skip this section. It often contains critical information like:
Continuous rounds vs joined rounds: Most amigurumi uses continuous rounds, meaning you do not slip stitch to join at the end of each round. You simply continue working in a spiral. The pattern should specify this.
Stuffing as you go: Some patterns tell you to stuff the piece before closing it completely. Others have you sew pieces together first, then stuff. Following these instructions in order prevents frustration.
Yarn weight and hook size: These affect the finished size of your amigurumi. Using a heavier yarn with the same hook will make a larger, looser piece. Using a thinner yarn will make a smaller, tighter piece.
Gauge: While gauge is less critical in amigurumi than in garments (since exact fit does not matter), it still affects the size and density of your toy. If your stitches are too loose, the stuffing will show through.
Troubleshooting Common Pattern Reading Mistakes
Even experienced crocheters misread patterns occasionally. Here are the most common mistakes and how to avoid them.
Mistake 1: Missing the "x 6" or Repeat Count
Beginners often read "(sc, inc) x 6" as "sc, inc, then move on" without realizing the "x 6" means they need to repeat the sequence six times total. This results in a drastically wrong stitch count. Always look for the multiplication sign or "rep" instruction.
Mistake 2: Confusing Rounds with Rows
Amigurumi is worked in the round, not in rows. If you accidentally turn your work at the end of a round and start crocheting back the other way, you will create a flat piece with a seam instead of a seamless tube. Unless the pattern explicitly says "turn," do not turn your work.
Mistake 3: Forgetting to Move the Stitch Marker
In continuous rounds, it is easy to lose track of where the round begins. A stitch marker is essential. If you forget to move it up each round, your stitch counts will drift and your shape will distort. Our Accessories collection includes stitch markers and other tools to keep your projects on track.
Mistake 4: Misreading Increase and Decrease Placement
In some patterns, increases and decreases are clustered in specific areas to create shaping (for example, at the top of a head to create a dome). If you distribute them evenly instead of following the pattern, your shape will be wrong. Always follow the exact placement given.
Mistake 5: Not Checking the Stitch Count
The stitch count in square brackets is your best friend. Count your stitches at the end of every round, especially when learning. It takes an extra 10 seconds and saves you from discovering a mistake 10 rounds later.
How to Keep Track of Complex Patterns
As you advance, you will encounter patterns with color changes, multiple pieces, and complex assembly instructions. Here are strategies to stay organized.
Use a row counter: A digital row counter or a simple tally on paper helps you remember which round you are on. Some crocheters use apps with pattern PDF readers that highlight the current row.
Highlight or check off completed rows: Print the pattern and physically mark each round as you finish it. For PDF patterns, use a PDF reader with annotation tools.
Use stitch markers for more than just the start: If a pattern has increases at specific points, place markers at those positions so you do not have to count from the beginning each time.
Keep a notebook: Write down modifications, yarn colors used, and any notes about the pattern. This is invaluable if you want to make the same piece again or troubleshoot a mistake.
Pattern Reading Practice: A Simple Amigurumi Ball
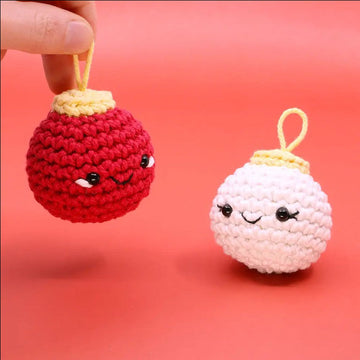
Here is a simple pattern you can use to practice your new skills. Make a small amigurumi ball using only the techniques we have covered.
Rnd 1: 6 sc in mr [6]
Rnd 2: inc x 6 [12]
Rnd 3: (sc, inc) x 6 [18]
Rnd 4: (2 sc, inc) x 6 [24]
Rnd 5-8: sc in each st around [24] (4 rounds total)
Rnd 9: (2 sc, dec) x 6 [18]
Rnd 10: (sc, dec) x 6 [12]
Rnd 11: dec x 6 [6]
Fo, leaving a tail. Stuff the ball firmly, then sew the opening closed.
This simple ball uses the magic ring, increases, plain rounds, and decreases. It is the foundation of almost every amigurumi design. Once you can read and execute this pattern without confusion, you are ready for more complex projects. You can find kits that include this exact project in our Crochet Amigurumi Kits collection.
How to Choose Your First Real Amigurumi Pattern
When you are ready to move beyond practice balls, look for patterns labeled "beginner" or "easy." These usually have simple shapes, minimal color changes, and clear instructions. Avoid patterns with complex shaping, wire armatures, or intricate colorwork until you have completed at least three or four simple projects.
Look for patterns that include step-by-step photos, especially for assembly. Good designers show you how to position the ears, sew on the limbs, and attach safety eyes. This visual guidance is incredibly helpful when you are still learning to read written instructions.
Consider starting with a kit that includes the pattern, yarn, and hook. This eliminates the guesswork of matching yarn to hook size and ensures you have the right materials. Our Beginner Crochet Kit collection is curated specifically for new crocheters who want everything in one package.
FAQ: Reading Amigurumi Patterns
Q: What is the difference between US and UK crochet terms?
A: US and UK terms use different names for the same stitches. A US single crochet (sc) is called a double crochet (dc) in UK patterns. A US double crochet (dc) is called a treble crochet (tr) in UK patterns. Most amigurumi patterns use US terms, but always check the pattern notes to confirm.
Q: What does it mean when a pattern says "work in front loop only" or "back loop only"?
A: Normally, you insert your hook under both loops of the V-shaped top of a stitch. Working in the front loop only (FLO) or back loop only (BLO) means you insert the hook under only one of those loops. FLO creates a subtle ridge on the back, while BLO creates a ridge on the front. These techniques are used for shaping, creating folds, or adding texture.
Q: How do I know if a pattern uses continuous rounds or joined rounds?
A: The pattern should specify this in the notes section. If it says "work in continuous rounds" or "work in a spiral," you do not slip stitch to join at the end of each round. If it says "join with sl st," you do. Most amigurumi uses continuous rounds to avoid a visible seam.
Q: What if my stitch count does not match the pattern at the end of a round?
A: Stop immediately and frog (undo) back to the beginning of the round. Count each round as you work to catch the mistake early. The most common causes are missing an increase, working an increase in the wrong stitch, or miscounting the starting chain.
Q: Are symbol charts harder to read than written patterns?
A: Not once you learn the symbols. Many crocheters actually find charts easier because they show the shape of the piece visually. The learning curve is similar to learning written abbreviations. Start with simple charts and work your way up to complex ones.
Q: Can I modify a pattern to make the amigurumi bigger or smaller?
A: Yes, but it requires understanding how the pattern scales. Using thicker yarn and a larger hook will make a bigger piece. Using thinner yarn and a smaller hook will make a smaller piece. You can also add or remove increase rounds, but this changes the proportions and may require recalculating the decrease rounds as well.
Q: What is a "pattern repeat" and how do I count it?
A: A pattern repeat is a sequence of stitches that is worked multiple times. For example, "(sc, inc) x 6" has a repeat of "sc, inc" and you do it 6 times. Count each complete sequence as one repeat. If you lose count, you can count the total stitches and divide by the stitches per repeat to figure out how many you have done.
Conclusion
Reading amigurumi patterns is a foundational skill that unlocks the full world of crochet design. Once you understand abbreviations, round structures, symbols, and repeat notation, you can follow any pattern with confidence. The key is to go slowly, count your stitches, and use the verification numbers in square brackets as your safety net.
Remember that every expert crocheter was once a beginner who struggled with their first pattern. The difference is simply practice. Start with simple projects, verify your stitch counts, and do not be afraid to frog back and try again. Before long, reading crochet patterns will feel as natural as reading a recipe. And when you are ready to put your skills to use, explore our Crochet Amigurumi Kits collection for projects designed specifically for beginners who are ready to grow their skills.


