
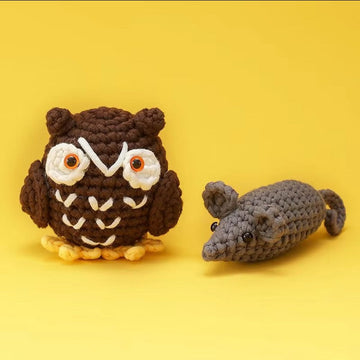
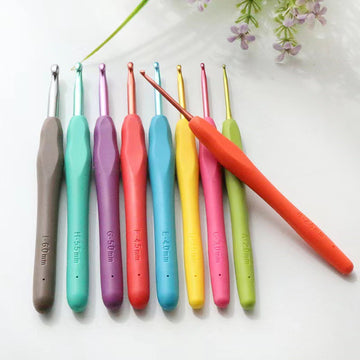

You finished the bear. The stitches are tight, the face is embroidered, the ears are symmetrical — and then you look at it sitting naked on your desk and think, it needs a little sweater. That instinct is right. A 5 g scarf or a 12-stitch hat is the cheapest, fastest way to turn a generic amigurumi animal into a character with a personality, a season, and a story.
The problem is that almost every amigurumi pattern stops at assembly. Kits give you the animal; nobody tells you how to dress it. This guide fills that gap. You will learn how to measure a finished amigurumi properly, how to calculate stitch counts for garments that actually fit (instead of guessing and frogging four times), and how to crochet seven specific accessories — scarf, hat, beanie with a pom-pom, sweater, cape, bag, and bow — with real numbers you can adapt to any toy between 12 cm and 30 cm tall.
Why Dress an Amigurumi at All?
There are four practical reasons, and none of them is just decoration.
1. Accessories hide flaws. An uneven color change at the neckline disappears under a scarf. A slightly lumpy chest from over-stuffing is smoothed by a sweater. A head seam that sits 2 mm off-center vanishes under a hat brim. Experienced makers use clothing strategically, the same way a stylist uses a jacket.
2. Clothes are the cheapest way to multiply a pattern. One bear pattern plus four outfits is four gifts. A bear in a red scarf is a Christmas bear. The same bear in a graduation cap is a graduation gift. You do not need to buy or learn a new pattern — you need 8 g of yarn and 25 minutes.
3. Accessories teach flat crochet. Amigurumi is almost entirely worked in continuous spirals. Garments force you into rows, turning chains, back-and-forth work, and edging — skills you need for blankets, coasters, and clothing later. Making a doll scarf is a genuinely low-risk way to learn the double crochet stitch.
4. Removable clothes add play value. For a child, a toy that can be dressed and undressed is a toy with more replay value. It also lets you wash the outfit separately, which matters more than people expect with a toy that gets carried around.
Step One: Measure Your Amigurumi Correctly
Almost every failed doll garment starts with a bad measurement. Amigurumi is stuffed and slightly springy, so a tape measure pulled tight gives you a number 5–10% smaller than reality. Use these rules:
- Rest the tape, do not pull it. Wrap it so it lies on the surface without compressing the stuffing.
- Measure four places: head circumference at the widest point (usually just above the eyes), neck circumference, chest circumference under the arms, and body height from neck to bottom.
- Write it down in centimetres and millimetres. "About 20 something" is how you end up with a hat that slides off.
Typical measurements for common kit sizes, so you know what range you are working in:
- Small amigurumi (12–15 cm tall): head circumference roughly 18–22 cm, chest 14–17 cm.
- Standard kit amigurumi (18–22 cm tall): head circumference roughly 24–28 cm, chest 18–22 cm.
- Large amigurumi (25–30 cm tall): head circumference roughly 30–36 cm, chest 24–30 cm.
Most kits from a Beginner Crochet Kit collection land in that middle band, which is why the sample numbers in this guide are written for a 20 cm toy and then given as adaptable formulas.
The Stitch Math That Makes Garments Fit
You only need one calculation, and it works for hats, sweaters, and cuffs alike:
Stitches needed = (target circumference in cm ÷ 10) × stitches per 10 cm in your gauge.
To get your stitches per 10 cm, crochet a flat swatch about 15 stitches wide and 10 rows tall in the stitch you plan to use, then measure the middle 10 cm and count. With worsted-weight (aran, size 4) yarn and a 3.0 mm hook worked in single crochet, most crocheters get 22–26 stitches per 10 cm. With a 3.5 mm hook, expect 20–23.
Worked example: your bear's head measures 26 cm around. Your gauge is 24 sc per 10 cm. That is (26 ÷ 10) × 24 = 62.4 stitches. Round to 62, then subtract about 8% for negative ease so the hat grips instead of sliding: roughly 57 stitches. Round to a number divisible by 6 for easier crown shaping: 54 stitches.
Negative ease is the single most important concept in doll clothing. Hats, cuffs, and anything meant to stay put should be 5–10% smaller than the measurement. Sweaters and capes that go on and off should be 0–5% larger.

Project 1: The Five-Minute Scarf
This is the ideal first accessory: no shaping, no fit issues, and it works on any animal with a neck.
Materials: about 4–6 g of worsted-weight yarn, 3.0–3.5 mm hook.
- Chain 4 for a narrow scarf (roughly 1.5 cm wide) or chain 6 for a chunkier one.
- Single crochet in the second chain from the hook and in each chain across (3 or 5 stitches).
- Chain 1, turn, single crochet in each stitch across. Repeat until the scarf measures 1.6 times your toy's chest circumference. For a 20 cm chest, that is roughly 32 cm — long enough to wrap once and hang.
- Fasten off, weave in ends, and add fringe if you want: cut 6 cm strands, fold in half, pull through the end stitches with your hook, trim even.
Variations that cost nothing: work in half double crochet for a softer drape; change color every 4 rows for stripes; work through the back loop only on every row for a ribbed, chunky-knit look that photographs beautifully.
Project 2: The Basic Beanie (Worked Top-Down)
A hat is a flat circle that stops increasing and becomes a tube. That is the entire concept. Here is the version sized for a head circumference of 26 cm using the 54-stitch target we calculated above.
- Round 1: magic ring, 6 sc into the ring (6).
- Round 2: 2 sc in each stitch (12).
- Round 3: [1 sc, inc] repeat (18).
- Round 4: [2 sc, inc] repeat (24).
- Round 5: [3 sc, inc] repeat (30).
- Round 6: [4 sc, inc] repeat (36).
- Round 7: [5 sc, inc] repeat (42).
- Round 8: [6 sc, inc] repeat (48).
- Round 9: [7 sc, inc] repeat (54).
- Rounds 10–16: sc in each stitch around (54). Stop increasing here — this is the "brim depth" section.
- Fasten off, weave in the tail.
How to adapt it: keep increasing by 6 stitches per round until the flat circle's diameter equals your head circumference ÷ 3.14, then work straight. For a 26 cm head, the circle should measure about 8.3 cm across before you stop increasing. Measure with a ruler, not by eye.
To add a folded brim, work 4 extra straight rounds and fold them up. To add ribbing, after the last straight round, work 4 rounds of half double crochet in the back loop only — it creates a subtle ridge that grips the head.
Pom-pom: wrap yarn 60 times around two fingers, tie tightly through the middle with a 20 cm strand, cut both loops, trim into a sphere, and sew on with the tie tails. Sixty wraps of worsted yarn produces a pom-pom about 3 cm across — the right proportion for a 20 cm toy.
Hats for Animals with Ears
Ears are the reason doll hats fail. Three solutions, in order of difficulty:
- Cut-through openings: when you reach the round where the ears sit, chain 4 and skip 4 stitches on each side to create two holes. Ears slot through.
- Ear flaps instead of a full brim: stop the hat above the ear line and add two 6-stitch flaps that tie under the chin. Works for bunnies and elephants.
- Sew the hat on at an angle, tilted back behind the ears. Two or three tacking stitches with matching thread hold it invisibly and permanently.
Project 3: The Simple Sweater (Two Rectangles, No Shaping)
Beginners assume doll sweaters require shaping. They do not. The easiest reliable sweater is a tube with two armholes.
Sizing: chest circumference plus 1 cm of positive ease. For a 20 cm chest at 24 sc per 10 cm, that is about 50 stitches.
- Chain 50, join with a slip stitch into the first chain, being careful not to twist.
- Work 5 rounds of single crochet (50).
- Armhole round: sc 6, chain 8, skip 8 stitches, sc 22, chain 8, skip 8 stitches, sc 6. You now have two 8-stitch gaps for the arms.
- Work 4–6 more rounds of single crochet over all stitches and chains, until the sweater reaches the bottom of the body.
- Optional sleeves: join yarn at an armhole, work 12–16 sc around the opening, then 4–6 rounds straight.
- Optional collar: join at the top edge, work 1 round of sc, then 2 rounds of hdc in back loop only for a ribbed neckline.
Getting it over the head. Most amigurumi heads are wider than their chests, which is why a closed tube sometimes will not fit. Two fixes: work the sweater as a flat rectangle instead of a tube and add three small buttons or a single ribbon tie down the back, or make the neckline 6 stitches wider and add a drawstring chain to cinch it.
Project 4: The Cape (The Most Forgiving Garment)
A cape has no fit requirements at all, which makes it the best choice when you are gifting to someone whose toy you cannot measure.
- Chain 26 (or any number roughly equal to the neck circumference plus 40%).
- Row 1: hdc in the third chain from the hook and each chain across.
- Row 2 onward: chain 2, turn, and work 2 hdc in every 4th stitch to flare the cape outward. Repeat for 8–12 rows until it reaches the length you like.
- Edge the whole piece with a round of single crochet, and chain 20 at each top corner for ties.
A cape in metallic or variegated yarn instantly turns a plain animal into a wizard, superhero, or royal character — which is exactly the kind of themed gift that gets photographed and shared.
Project 5: Bows, Collars, and Tiny Bags
Bow (2 minutes): chain 12, sc in the second chain and across (11), chain 1, turn, sc across, fasten off leaving a long tail. Pinch the middle of the rectangle, wrap the tail tightly 5–6 times, secure, and sew to the head or neck.
Collar with a bell: chain enough to fit the neck plus 2, sc across, add a slip-stitch loop and a small button at the ends, and sew a 6 mm bell to the front. Ideal for cats and dogs.
Tiny satchel: magic ring, 6 sc, then increase to 18 stitches over three rounds, work 4 rounds straight, then work 6 sc for a flap and chain 40 for the strap. Finished size is about 3 cm — perfect for a 20 cm toy holding a tiny acorn or a folded paper note.
Choosing Yarn for Doll Clothes
Garment yarn follows different rules than amigurumi body yarn.
- Go one weight lighter than the body. If the toy is made in worsted (size 4), make clothes in DK (size 3) or sport (size 2). A garment in the same weight as the body looks bulky and stiff, like a coat two sizes too big.
- Use a hook 0.5 mm larger than you would for amigurumi. Clothing should drape, not stand up on its own. Tight stitching is correct for a body that must hide stuffing; it is wrong for a scarf.
- Cotton for structure, acrylic for softness, wool blends for realistic drape. Mercerized cotton gives crisp, defined stitches that photograph well. Acrylic is more forgiving and cheaper for experiments.
- Avoid velvet and chenille for small garments. The pile hides stitch definition entirely, so a 12-stitch hat just looks like a fuzzy blob.
Leftovers are perfect here. A 10 g scrap makes a scarf and a hat with yarn to spare, so the small remainders from finished kits become your accessory stash. If you build projects from an amigurumi crochet kits range regularly, you will accumulate exactly the right multi-color scrap collection within a few projects.
Sew-On vs Removable: How to Decide
This decision changes the construction, so make it before you start.
Sew clothes on permanently when: the toy is for a child under 3 (removable pieces are choking and strangulation hazards, and a 30 cm scarf on a toy given to a toddler is genuinely unsafe); the garment is part of the character's identity, such as a chef's hat; or you want the cleanest possible photograph with no gaping.
Make them removable when: the recipient is 5 or older and will enjoy dressing the toy; you want seasonal versatility; or you plan to sell outfit sets separately.
For removable clothes intended for children, keep all ties under 15 cm, avoid loose cords entirely for under-3s, and use sewn-on buttons only above age 3 — or replace buttons with crocheted loops and a chain-stitch toggle made from yarn.

Seven Common Mistakes and Their Fixes
- The hat is too shallow. Fix: add 2–3 more straight rounds. A hat should cover the top third of the head, not perch on it.
- The sweater will not go over the head. Fix: convert to an open-back design with ties. Do not try to stretch it — you will distort the stitches permanently.
- The scarf curls. Fix: single crochet curls slightly at the edges. Add one row of slip stitch or reverse single crochet along both long sides, or switch to half double crochet.
- Colors clash. Fix: pick accessory colors from the toy's existing palette — a brown bear with a cream muzzle looks best in a cream-and-rust scarf, not a neon one. When in doubt, use a color already present on the toy.
- The garment looks stiff and bulky. Fix: lighter yarn and a larger hook. Nine times out of ten, bulkiness is a materials problem, not a technique problem.
- Ties keep coming undone. Fix: make ties 2 cm longer than you think, and work them as slip-stitch chains rather than plain chains — they are less slippery.
- The proportions look wrong. Fix: measure the pom-pom, brim, and bow against the head width. A good rule is that a pom-pom should be 20–25% of the head's diameter, and a bow should be no wider than the head is tall.
Building a Seasonal Wardrobe from One Toy
If you want maximum value from a single finished animal, make these five pieces over five short sessions. Total yarn cost is under 30 g.
- Spring: a pastel bow and a flower brooch (magic ring, 5 chain-3 petals).
- Summer: a tiny sun hat — the same beanie pattern, but keep increasing for 3 extra rounds after the crown to create a wide flat brim.
- Autumn: a rust-colored ribbed scarf worked in back-loop-only half double crochet.
- Winter: a white beanie with a pom-pom plus matching 8-stitch mittens on a 30 cm cord.
- Party: a cone hat — magic ring, 6 sc, increase 3 stitches per round for 8 rounds, add a pom-pom on top.
Photograph the same toy in all five outfits and you have a five-image gift listing, a social media series, or simply a very charming shelf that changes with the seasons. Crocheters who want more finished animals to dress often work through a crochet kit bundle so they end up with a small cast of characters rather than one lonely bear.

Frequently Asked Questions
How much yarn do I need to make clothes for an amigurumi?
Very little. A doll scarf uses 4–6 g of worsted-weight yarn, a beanie uses 6–10 g, and a simple sweater for a 20 cm toy uses 15–20 g. A standard 100 g skein is enough for roughly 10 hats or 5 sweaters, which is why leftover yarn from finished kits is the ideal source.
What size hook should I use for amigurumi clothes?
Use a hook 0.5 mm larger than the one you used for the toy's body. If the amigurumi was made with a 3.0 mm hook, use 3.5 mm for clothing. Amigurumi bodies need tight stitches to hide stuffing; clothing needs looser stitches so the fabric drapes instead of standing rigid.
How do I calculate the stitch count for a doll hat?
Measure the head circumference with the tape resting (not pulled), divide by 10, multiply by your stitches per 10 cm, then subtract 5–10% for negative ease so the hat grips. For a 26 cm head at a gauge of 24 sc per 10 cm, that gives about 57 stitches, which you round to 54 so it divides evenly by 6 for crown shaping.
Can I make amigurumi clothes without a pattern?
Yes. Every basic doll garment is one of three shapes: a flat rectangle (scarf, cape, blanket), a flat circle that becomes a tube (hat, sweater body), or a small tube (sleeves, legs, bags). Once you can measure the toy and calculate stitches per centimetre, you can improvise all of them without written instructions.
Are removable clothes safe for babies and toddlers?
No. For children under 3, all clothing should be sewn on permanently, with no loose ties, cords longer than 15 cm, buttons, beads, or small removable pieces. Removable outfits are appropriate from around age 5, when dressing the toy becomes part of the play rather than a hazard.
What yarn works best for amigurumi clothing?
DK or sport-weight yarn in cotton or a smooth acrylic. Cotton gives crisp stitch definition and holds shape well for structured items like hats and bags; smooth acrylic is softer and more forgiving for sweaters and scarves. Avoid velvet, chenille, and heavily fuzzy yarns, because the pile obscures stitch definition on pieces this small.
How long does it take to make a doll outfit?
A scarf takes about 10 minutes, a bow takes 2–3 minutes, a beanie takes 20–30 minutes, and a simple sweater with sleeves takes 60–90 minutes for a beginner. A full seasonal wardrobe of five pieces is realistically a weekend project.
Should I make the clothes before or after stuffing the toy?
Always after. A stuffed amigurumi is 10–20% larger than an unstuffed one, and its final proportions depend on how firmly you packed it. Measuring an unstuffed body guarantees clothing that is too small.
Start With One Scarf
If you take one thing away, make it this: dressing amigurumi is not an advanced skill. It is rectangles and circles with a measuring tape. The scarf takes ten minutes and uses yarn you already have in a bag somewhere, and it will teach you turning chains, edge finishing, and proportion judgment — the three things that make every later garment easier.
Measure your finished toy tonight, write the four numbers on a sticky note, and keep that note in your project bag. Once you know your amigurumi's head, neck, chest, and body measurements, every outfit in this guide becomes a fifteen-minute project instead of a guessing game.


