
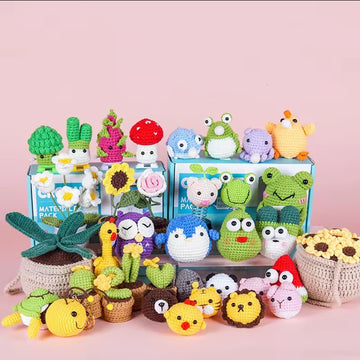
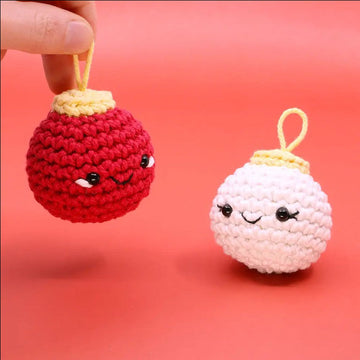
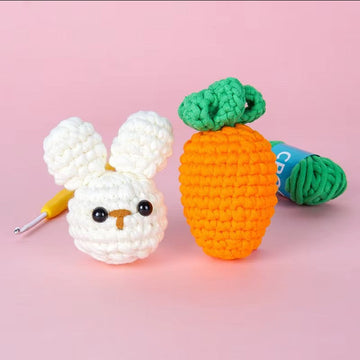
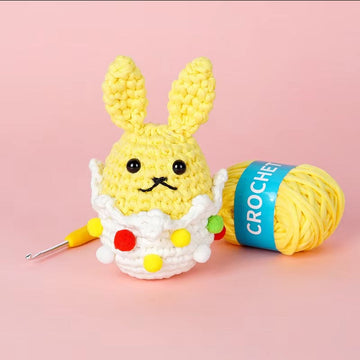
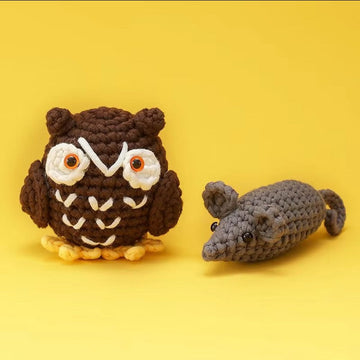
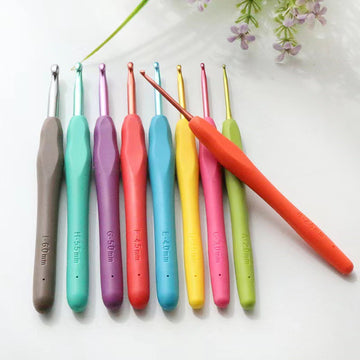

You spent eleven hours on that dragon. Every scale is even, the wings are symmetrical, the eyes sit perfectly. Then you photograph it on your kitchen table at 9 p.m. under a ceiling light, and the picture looks like a lumpy yellow blob on a laminate background. The craft was excellent. The photo destroyed it.
This is the most common gap between what crocheters make and what other people see. Whether you are listing on Etsy, posting to Instagram, sending a photo to the person you made the toy for, or just keeping a record of your finished projects, the photograph is the finished product for everyone who is not holding the toy. The good news is that amigurumi is one of the easiest subjects in photography: it does not move, it does not blink, and it fits on a windowsill. You do not need a camera that costs more than your yarn stash.
This guide covers exactly how to photograph crochet toys well with a phone, including the specific settings, distances, times of day, and background choices that make the difference — plus what to do differently for selling versus social media.
Why Amigurumi Is Hard to Photograph (and Why That's Fixable)
Crochet toys present four specific technical problems. Understanding them tells you exactly what to fix.
Problem 1: Yarn absorbs light. Fiber surfaces scatter light instead of reflecting it cleanly, so amigurumi photographs 10–20% darker than it looks to your eye. This is why so many crochet photos look muddy. The fix is more light, not more editing.
Problem 2: Texture disappears in flat light. The whole appeal of amigurumi is the visible stitch structure — those neat rows of V-shaped single crochet. Direct front-on light flattens them into a smooth blur. Texture only shows when light comes from the side, creating micro-shadows in each stitch.
Problem 3: Toys are small, so depth of field is shallow. Get your phone 10 cm from a bear's nose and the ears go soft and blurry. Anything you shoot closer than about 20 cm will have parts out of focus.
Problem 4: Amigurumi has no natural "stand". Most toys tip forward, backward, or sideways, and a toy leaning at 15 degrees reads as "sloppy" even when the crochet is perfect.
Every technique below solves one of these four problems.
Light: The One Thing That Matters Most
If you change nothing else, change your light. It accounts for roughly 80% of the difference between an amateur crochet photo and a professional one.
Use a Window, Not a Lamp
Place your toy on a surface 30–60 cm from a window, with the window to the side of the toy rather than behind you. Side light rakes across the surface and makes every stitch visible as a tiny highlight-and-shadow pair. That is what makes crochet look like crochet in a photograph.
Best times: mid-morning (roughly 9–11 a.m.) or mid-afternoon (2–4 p.m.) on an overcast or lightly clouded day. Overcast light is the single best free lighting setup that exists — the whole sky becomes a giant softbox.
Worst light: direct midday sun through a window (harsh shadows and blown-out highlights), any overhead ceiling light (creates unflattering shadows under the eyes and muzzle), and mixed light from a window plus a warm lamp at the same time, which produces color casts that are almost impossible to correct.
Fill the Shadows with a Piece of Paper
With side light, the shadow side of the toy goes too dark. The fix costs nothing: stand a sheet of white A4 paper, a piece of white foam board, or even a folded white towel on the opposite side of the toy, about 20–30 cm away, angled to bounce light back. This one trick reduces the difference between the bright and dark sides dramatically and is what most product photos are actually doing.
For a stronger effect on dark-colored amigurumi, use aluminum foil crumpled and flattened over cardboard instead of paper — it bounces more light and is useful for black, navy, or dark-brown toys, which are the hardest to photograph.
If You Must Shoot at Night
Turn off every overhead light. Use one desk lamp with a daylight-balanced LED bulb (look for 5000–5500K on the packaging), position it to the side at roughly 45 degrees, and diffuse it with a sheet of baking parchment or a thin white pillowcase held 15 cm in front of the bulb. Never use your phone's built-in flash — it flattens texture and creates a hard shadow outline behind the toy.

Background: Simple Beats Clever
The background's only job is to not compete with the toy. Amigurumi is already colorful and busy with texture.
- Plain white or off-white: the standard for selling. Use a large sheet of white paper curved up the wall behind the toy so there is no visible horizon line. A 50 × 70 cm sheet of poster paper costs very little and works for any toy under 25 cm.
- Warm neutral (cream, oatmeal, light grey): the best all-purpose choice for social media. Softer than white and it makes pastel yarns look richer.
- Natural wood: excellent for cozy, handmade branding. Light oak works better than dark walnut, which absorbs too much light.
- Fabric: a linen tea towel or a chunky knit blanket adds texture without pattern. Iron it first — wrinkles read as carelessness.
What to avoid: patterned surfaces, cluttered shelves, anything with visible crumbs or pet hair (both show up brutally at close range), and busy backgrounds in the same color family as the toy. A brown bear on a brown table disappears.
The Color Contrast Rule
Choose a background that contrasts with the toy in brightness, not just hue. A pale cream cat on a white background looks washed out no matter how good the light is. Photograph light toys on medium-toned backgrounds (soft grey, warm tan, sage) and dark toys on light backgrounds. This is the fastest way to make a photo look intentional.
Phone Camera Settings That Actually Matter
You do not need a "real camera". Modern phone cameras resolve stitch detail perfectly well at normal viewing sizes. You do need to override a few automatic behaviors.
- Clean the lens. Genuinely. A fingerprint smear costs you more sharpness than any setting. Wipe with a soft cloth before every session.
- Tap to focus on the face or eyes. Never let autofocus decide. Tap directly on the eye area and confirm the focus box appears there.
- Lock exposure and pull it down slightly. On most phones, tap and hold to lock, then slide the brightness control down by about 10%. Phones habitually overexpose light-colored yarn, and once highlights are blown out the stitch texture is gone permanently.
- Turn on the grid. Place the toy's face on or near a grid intersection rather than dead center for a more natural composition.
- Shoot from 25–40 cm away, then crop. This keeps the whole toy in focus and avoids the lens distortion that makes noses look huge.
- Use the 2x lens if your phone has one. A slightly longer focal length flatters small subjects and reduces distortion. Avoid digital zoom beyond your phone's optical range.
- Turn off beauty filters, HDR-heavy modes, and portrait mode for product shots. Portrait mode's artificial blur often cuts into ears, whiskers, and yarn fuzz, producing obvious digital artifacts.
- Brace the phone. Lean your elbows on the table or prop the phone against a mug. Camera shake at close range is the second most common cause of soft photos after dirty lenses.
Posing and Propping the Toy
An amigurumi that stands straight and looks slightly toward the camera reads as confident and well-made. Here is how to get there.
Fix the lean. Wedge a small folded piece of card, a coin, or a lump of museum putty behind or under the toy, hidden from the camera angle. For toys that tip forward, a few grams of poly pellets in the base solve the problem permanently — but for photography, a hidden prop is faster.
Choose the angle deliberately. Three angles cover almost every need:
- Eye level, straight on: the "portrait". Best for showing the face, and the shot people connect with emotionally. Get the phone down to the toy's height — this usually means kneeling or putting the toy on a stack of books.
- Three-quarter view (rotated 30–45 degrees): the most flattering general-purpose angle, because it shows the front and the side profile at once, revealing the toy's actual three-dimensional shape.
- Top-down flat lay: best for groups, kit contents, and progress shots. Shoot directly overhead with the toy and a few props arranged on a neutral surface.
Props: two maximum. A tiny book, a wooden hook, a sprig of eucalyptus, a mug. The rule is that a prop should support the story (cozy, handmade, gift) without pulling the eye. If a viewer looks at the prop before the toy, remove it.
Include a scale reference for selling. Buyers consistently misjudge amigurumi size. One photo with the toy held in a hand, next to a standard coffee mug, or beside a ruler prevents the single most common complaint in handmade toy sales: "it was much smaller than I expected."
The Five-Shot Set Every Finished Project Deserves
Whether you are selling or not, take these five photos in one 15-minute session while the light is good. If you sell, this is the minimum viable listing set.
- The hero shot: three-quarter angle, eye level, clean background, whole toy in frame with breathing room around it. This is your thumbnail.
- The face close-up: fills roughly 60% of the frame, focused precisely on the eyes. This is the shot that sells the personality.
- The detail shot: a tight crop on the best-crafted area — the stitch texture on the back, the color change, the embroidered nose, the tiny paws. Side light is essential here.
- The scale shot: the toy held in a hand or next to a familiar object.
- The context shot: the toy in a lived-in setting — on a shelf, beside a plant, on a bed. This helps buyers imagine owning it.
If you are documenting a kit build, add a sixth: the flat lay of all components before you start. Progress photos from a crochet amigurumi kits project consistently perform well on social platforms, because people are drawn to the before-and-after transformation more than the finished object alone.

Editing: Do Less Than You Think
Editing should correct the photo, not transform it. Five adjustments, in this order, handle 95% of crochet photos. Every phone's built-in editor has all of them.
- Straighten and crop. A crooked horizon or table edge is the fastest tell of an amateur photo. Crop to a square (1:1) for grids, 4:5 for feeds, and leave the composition slightly loose so you can re-crop later.
- Exposure/brightness: +5 to +15. Lift the overall image slightly, because yarn photographs dark. Stop before white areas turn pure white.
- White balance. If the photo looks yellow (indoor light) or blue (shade), nudge the temperature slider until the white background looks genuinely white. Getting this right matters enormously for sellers — the wrong yarn color in a photo is the number one cause of returns in handmade goods.
- Contrast: +5 to +10. A small lift makes stitch definition pop. Too much and you lose detail in shadows.
- Sharpness/structure: +10 maximum. A light touch enhances stitch texture. Heavy sharpening creates ugly halos around the toy's outline.
Never do these: heavy saturation boosts (they make yarn colors inaccurate and disappointed buyers leave reviews about it), vignettes, film-grain filters on product photos, or any filter that changes hue. If a photo needs rescuing with a filter, reshoot it — it takes less time than you think.
Different Goals, Different Photos
If You Are Selling
Consistency is the actual differentiator. Use the same background, same light direction, and same distance for every listing so your shop grid looks like a coherent brand rather than a collection of random snapshots. Practically, that means: pick one background material, mark the toy's position on the table with a small piece of tape, and shoot at the same time of day.
Also: photograph on a plain white background for at least the first image, include the scale shot within the first three images, and show any imperfections honestly. Marketplaces reward accurate listings with fewer returns and better reviews.
If You Are Posting to Social Media
Emotion beats accuracy here. Context shots, hands holding the toy, in-progress work with the hook still attached, and a face-forward "portrait" all outperform clinical white-background product photos. Vertical 4:5 or 9:16 crops occupy more screen space on phones. And the caption matters as much as the image — say how long it took, what yarn you used, and what went wrong. Specifics get comments; "finished my bear!" does not.
If You Are Recording for Yourself
Take one hero shot and one detail shot per finished project, and keep them in a single album. After a year you will have a genuinely useful visual record of how your tension, symmetry, and face embroidery improved — which is far more motivating than you would expect. Many makers who work steadily through crochet kit bundles find the photo archive becomes their real progress tracker.

Ten-Minute Setup You Can Rebuild Anywhere
Here is a complete kit that costs almost nothing and packs into a drawer:
- One 50 × 70 cm sheet of white poster paper (background and bounce)
- One sheet of mid-grey or oatmeal card (alternate background for light toys)
- A piece of white foam board or a spare cutting board wrapped in white paper (reflector)
- A small stack of books (to raise the toy to window height)
- Museum putty or blu-tack (to stop leaning)
- A lint roller (this is not optional — fiber and dust are visible at close range)
Setup time once you have the pieces: under three minutes. Shoot time for a five-image set: about twelve minutes. That is a fifteen-minute investment on a project that took ten hours.
Frequently Asked Questions
What is the best lighting for photographing crochet toys?
Soft, indirect natural daylight from the side. Place the toy 30–60 cm from a window with the light coming from the left or right, ideally on an overcast day or mid-morning. Side lighting creates small shadows inside each stitch, which is what makes crochet texture visible. Avoid direct sun, overhead ceiling lights, and camera flash.
Do I need a real camera to photograph amigurumi for Etsy?
No. A phone from the last five years produces images far beyond what marketplace listings require. Light quality, background choice, and focus accuracy matter more than the camera. Spend your effort on a window, a white paper background, and a reflector rather than on equipment.
Why do my crochet photos look dull or muddy?
Three usual causes: not enough light (yarn absorbs light and photographs 10–20% darker than it looks), flat front-on lighting that erases stitch texture, and a wrong white balance from mixing daylight and warm indoor bulbs. Move next to a window, put the light to the side, turn off other lamps, and raise the exposure slightly in editing.
What background should I use for amigurumi photos?
Plain white paper for selling, and a warm neutral like cream, oatmeal, or light grey for social media. Choose a background that contrasts in brightness with the toy — dark toys on light backgrounds, pale toys on mid-toned backgrounds. Avoid patterns, clutter, and any surface in the same color family as the toy.
How close should I hold the phone to the toy?
Between 25 and 40 cm for a full-body shot, then crop in afterward. Shooting closer than about 20 cm causes lens distortion (oversized noses) and shallow depth of field that leaves ears or limbs out of focus. If your phone has a 2x lens, use it and step back slightly.
How many photos should an Etsy amigurumi listing have?
At least five: a hero shot on a clean background, a face close-up, a detail shot showing stitch quality, a scale shot showing size next to a hand or common object, and a context shot in a home setting. The scale photo is the one most sellers skip and the one that prevents the most complaints about size.
Should I use portrait mode for amigurumi photos?
Generally no. Portrait mode's artificial background blur often misjudges the edges of ears, whiskers, and fuzzy yarn, creating visible digital artifacts. Get real background separation instead by placing the toy 40–60 cm in front of the backdrop and shooting at a slightly longer focal length.
How do I photograph dark-colored amigurumi?
Add more bounced light and shoot against a lighter background. Use crumpled aluminum foil over cardboard as a stronger reflector on the shadow side, raise exposure slightly during the shoot rather than only in editing, and add a touch of contrast afterward. Black and dark navy yarn absorb the most light and always need more than you expect.
Shoot the Next One in Good Light
The gap between a photo that undersells your work and one that does it justice is not talent or equipment. It is a window, a sheet of white paper, and the discipline to shoot in daylight instead of at 11 p.m. when you tie off the last stitch.
Next time you finish a project, resist the urge to photograph it immediately. Wait for the morning, set up next to a window with the light coming from the side, prop a white sheet on the shadow side, and take the five shots. It will take fifteen minutes, and it will be the first time the photo looks as good as the toy in your hands. If you are just getting started and want projects worth photographing, the Beginner Crochet Kit collection is a practical place to build a small cast of characters to practice on.


