
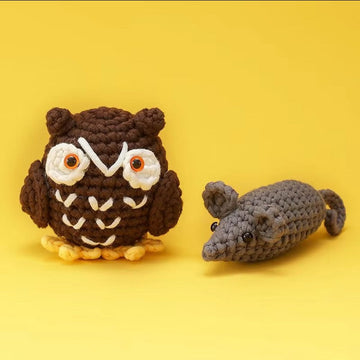

Every amigurumi crocheter reaches the same crossroads eventually. You have finished a stack of kits and published patterns, your single crochet is even, your invisible decreases actually look invisible — and one day you think: what if I made something that doesn’t exist yet? Maybe it is your daughter’s imaginary friend, your dog in yarn form, or a mash-up creature no designer has published. Designing your own amigurumi is the moment crochet stops being a craft you follow and becomes one you author.
The good news: amigurumi design is far more learnable than most crocheters assume. Unlike garment design, you do not need to fit a human body, grade sizes, or master drape. Amigurumi is built from a small vocabulary of geometric primitives — spheres, cylinders, cones, and flat pieces — combined and modified. Learn the math behind those four shapes (it is genuinely simple arithmetic) and you can build almost anything. This guide walks you through the entire process, from shape formulas to prototyping to writing a pattern another person could follow.

The Prerequisite Skills (An Honest Checklist)
Before designing, you should be able to do the following without looking anything up:
- Work a magic ring and single crochet in a continuous spiral
- Increase and decrease (invisible decrease preferred) anywhere in a round
- Read your own stitches well enough to count rounds after the fact
- Stuff, close, and assemble a multi-piece project cleanly
If any of those feel shaky, spend a bit more time with structured projects first — working through two or three designs from our Crochet Amigurumi Kits collection builds exactly the muscle memory design work depends on, because every finished pattern you follow is also a dissection lesson in how someone else solved a shaping problem. Reading patterns critically — asking “why did the designer increase here?” — is the cheapest design education available.
The Core Insight: Amigurumi Is Geometry in Yarn
Strip away the eyes and ears, and nearly every amigurumi is a combination of four primitive shapes:
- Spheres — heads, round bodies, cheeks, paw pads
- Cylinders (tubes) — limbs, necks, snouts, tails
- Cones — horns, beaks, carrot bodies, witch hats
- Flat circles and ovals — ears, bases, wings, muzzles
Each primitive has a standard “recipe” built on one fundamental fact of crochet geometry: to keep a piece of single crochet flat or smoothly curved, you increase by roughly 6 stitches per round. That number comes from the ratio of a circle’s circumference to its radius — as your circle grows one stitch-height taller in radius, its circumference grows by about 2π (≈6.28) stitch-widths. Six increases per round approximates that growth. Everything in amigurumi design flows from this one number.
The Four Shape Recipes Every Designer Uses
Recipe 1: The Flat Circle
Start with 6 single crochet in a magic ring. Each round, add 6 increases, distributed evenly:
- Round 1: 6 sc in magic ring (6 stitches)
- Round 2: increase in every stitch (12)
- Round 3: [1 sc, inc] × 6 (18)
- Round 4: [2 sc, inc] × 6 (24)
- Round 5: [3 sc, inc] × 6 (30) … and so on.
Continue until the circle reaches your target diameter. This is the foundation of everything else.
Recipe 2: The Sphere
A sphere is a flat circle that grows, holds steady, then shrinks symmetrically. The classic proportion rule: increase rounds ≈ ¼ of total rounds, straight rounds ≈ ½, decrease rounds ≈ ¼. For a ball with a maximum circumference of 36 stitches:
- Rounds 1–6: increase from 6 to 36 stitches (6 rounds)
- Rounds 7–18: work even on 36 stitches (12 rounds)
- Rounds 19–24: decrease from 36 back to 6 (6 rounds)
Adjust the straight-section length to tune the shape: fewer straight rounds gives a flattened sphere (a hamster body), more gives an egg (a classic penguin body).
Recipe 3: The Cylinder
Work a flat circle to the diameter you want, then simply stop increasing. Every round worked even from that point extends the tube. A 12-stitch tube makes a slim arm; an 18-stitch tube makes a chunky leg. For a closed-top cylinder (like a standing body), begin with the flat circle; for an open tube (like a sleeve-style limb attached flat), you can start from a chain joined in a round.
Recipe 4: The Cone
Increase more slowly than 6 per round. Increasing by 3 per round gives a gentle, wide cone; increasing 6 every other round gives a steep, narrow spike. The slower the increase rate relative to the flat-circle rate, the pointier the cone. A unicorn horn might increase 1–2 stitches per round; a bell shape might alternate flat-rate and slow-rate sections.

The Design Process, Step by Step
Step 1: Sketch First, Even If You “Can’t Draw”
Your sketch is an engineering diagram. Draw your character from the front and the side using only circles, ovals, tubes, and triangles — deliberately ugly is fine. Then annotate: which primitive is each part? Roughly how big is each part relative to the head? Amigurumi proportion runs on head-multiples: a classic cute (chibi) proportion is a body 1–1.5 heads tall, limbs about one head long, ears ¼–½ head. Bigger head relative to body reads as younger and cuter — this single dial controls most of the “adorable” in amigurumi.
Step 2: Convert Sizes to Stitch Counts
Make a small gauge swatch — or simply use your last finished project. Measure: how many stitches per 2.5 cm (1 inch), and how many rounds per 2.5 cm? With worsted acrylic and a 3.5–4.0 mm hook, most crocheters get roughly 4.5–5 stitches and 5–5.5 rounds per inch. Now the arithmetic: if the head should be 7.5 cm (3″) in diameter, its maximum circumference is 7.5 × 3.14 ≈ 23.5 cm ≈ 9.3″ ≈ 42–46 stitches — call it 42 or 48 to stay divisible by 6. Divisibility by 6 keeps your increase and decrease rounds clean.
Step 3: Prototype in Cheap Yarn, Take Notes Obsessively
Crochet a first draft in inexpensive, light-colored yarn (dark yarn hides stitches; expensive yarn makes you reluctant to frog). The iron rule of prototyping: write down every round as you crochet it, not afterward. Use any shorthand you like — “R7: 6×(4sc, inc) = 36” — but never trust memory. A shape you improvised and cannot reproduce is not a design; it is an accident.
Step 4: Evaluate Stuffed, Not Flat
Crochet fabric lies. A head that looks right empty can turn lumpy or bulging once stuffed, because stuffing pressure rounds out every curve and exaggerates any abrupt increase clustering. Stuff each prototype piece firmly, pin pieces together with locking stitch markers or sewing pins, and judge the silhouette from arm’s length. Common first-draft diagnoses:
- Visible corners on a “sphere”: your increases are stacked in vertical columns. Stagger them — offset the increase positions each round so they spiral instead of aligning.
- Egg where you wanted a ball: too many straight rounds; remove one or two.
- Muffin-top bulge: a sudden increase rate change; smooth the transition with an intermediate round.
- Limbs look skinny once attached: extremely common. Add 6 stitches of circumference and re-judge.
Step 5: Iterate — Two or Three Drafts Is Normal
Professional designers rarely nail a shape on the first try. Expect draft one to reveal proportion problems, draft two to fix shaping details, and draft three to be the keeper. Each iteration is fast — an amigurumi head is an evening of crochet — and each teaches you something reusable about how increase placement translates to 3D form.
Assembly Design: The Part Beginners Underestimate
Where you attach parts changes a character’s personality as much as the parts themselves. Ears attached high and close together read alert and young; low and wide reads droopy and calm. Eyes placed below the horizontal midline of the head — typically between the increase-end round and 2–3 rounds below center — is the single most reliable cuteness rule in amigurumi; eyes above the midline instantly age a character. Before sewing anything, pin every piece and photograph the toy from three angles. Photos reveal asymmetry your eyes gloss over.
Also decide your construction philosophy early:
- Sewn construction (separate pieces, whipstitched) gives maximum shape control and is easier to design, but every seam is a potential weak point and alignment error.
- Continuous construction (limbs joined as you crochet, or worked outward from the body) is harder to design but produces sturdier, seam-minimal toys. Many designers prototype sewn, then convert the final pattern to continuous joins where possible.

Writing a Pattern Someone Else Can Follow
A design in your notebook becomes a pattern when a stranger can reproduce it. The conventions below are the de facto industry standard (US terms):
- State the essentials up front: yarn weight and approximate yardage, hook size, finished dimensions, gauge if it matters, and required notions (safety eye size, stuffing amount).
- Number every round and give a stitch count: “Rnd 5: [3 sc, inc] × 6 (30)”. The count in parentheses is the crocheter’s checkpoint — never omit it.
- Use standard abbreviations (sc, inc, dec, ch, sl st, MR) and define them in a key anyway.
- Write assembly instructions with landmarks: “sew ears between rounds 4 and 7, spaced 8 stitches apart” beats “attach ears to head” every time.
- Note stuffing timing inside the pattern flow (“stuff firmly before continuing”), because once a piece is closed, it is too late.
Test Before You Share
Even if you never plan to sell the pattern, have at least one other crocheter (or future-you, three weeks later) work it cold, without you explaining anything. Testers catch the round you renumbered but forgot to fix, the mirrored limb you never wrote, the assembly step that lives only in your head. In the professional pattern world, 2–4 testers per design is typical, and testing takes 2–4 weeks — budget the same patience for your own work.
Common Beginner Design Mistakes (and Their Fixes)
Designing too ambitiously the first time
A dragon with wings, spikes, four posed legs, and color changes is a tenth design, not a first. Start by modifying a shape you know: give a standard bear different ears and a muzzle to make a fox. Modification teaches the cause-and-effect of shaping with a safety net underneath.
Ignoring divisibility
Working with stitch counts that are not divisible by your increase number (usually 6) makes rounds awkward to write and follow. Round your target circumferences to the nearest multiple of 6 — the size difference is invisible; the pattern clarity is not.
Forgetting the yarn tail budget
Any piece that will be sewn on needs a long tail — 30–45 cm — left at fasten-off. Note this in your own draft, because re-attaching yarn for sewing creates extra ends and weaker seams.
Not recording hook and yarn on the draft
A pattern reads as a set of ratios, but its finished size depends entirely on materials. Write the exact yarn and hook on page one of every prototype note. Six months later, you will not remember.
Treating the first ugly draft as failure
The lumpy first prototype is not a failed toy; it is a successful measurement instrument. Its entire job was to tell you what to change. Designers who internalize this iterate cheerfully; designers who do not, quit after draft one.
From Hobby Design to Selling Patterns (A Realistic Note)
Once you have a few original designs, selling the patterns (as PDFs) is a genuinely viable micro-business with better economics than selling finished toys: a pattern is written once and sold infinitely, with typical indie amigurumi patterns priced between $4 and $8 on major platforms. What you cannot do is copy: another designer’s pattern, even heavily modified, is not yours to sell, and most published patterns explicitly license personal use only. Design from primitives and your own sketches and this never becomes a problem. Note that you generally can sell finished items made from patterns that permit it, but pattern text and photos are always the designer’s copyright.
A 30-Day Path from Kit Follower to First Original Design
- Week 1: Crochet the four primitives as standalone practice pieces: one flat circle, one sphere, one cylinder, one cone. Write your own round-by-round notes for each.
- Week 2: Modify an existing simple pattern — change ear shape, body length, or limb proportions — and document what each change did to the silhouette.
- Week 3: Sketch an original simple character (one sphere + one modified sphere + four small tubes is plenty). Convert to stitch counts, crochet draft one, and diagnose it stuffed.
- Week 4: Crochet draft two with corrections, finalize your written pattern, and make a second copy from your own written pattern only — the ultimate self-test.
If you want your practice materials matched and ready — yarn, hooks, stuffing, safety eyes in one box — a bundle from our Crochet Kit Bundles collection covers several projects’ worth of supplies, which conveniently doubles as prototype material once the included designs are done.
Frequently Asked Questions
How do you design your own amigurumi pattern?
Sketch the character as simple shapes (spheres, cylinders, cones, flat circles), convert each shape’s target size to stitch counts using your gauge, crochet a prototype in cheap yarn while writing down every round, evaluate the stuffed result, and iterate. Most designs take 2–3 drafts. Finally, write the pattern in standard round-by-round notation with stitch counts and have someone test it.
What is the basic math behind amigurumi shapes?
Crochet circles stay flat when you add about 6 increases per round, because a circle’s circumference grows by roughly 2π (≈6.28) stitch-widths for each round of added radius. Increase slower than 6 per round and the fabric curls into a cone; stop increasing and it becomes a tube; increase, work even, then decrease symmetrically and it becomes a sphere.
How many rounds does it take to make a sphere?
A useful rule: about ¼ of the rounds increasing, ½ working even, and ¼ decreasing. A 36-stitch-circumference ball is typically 6 increase rounds (6→36 stitches), about 12 straight rounds, and 6 decrease rounds — roughly 24 rounds total. Shorten the straight section for a flatter ball, lengthen it for an egg shape.
Where should I place the eyes on an amigurumi?
Slightly below the horizontal midline of the head — usually 2–3 rounds below the widest point — and spaced 6–8 stitches apart for a standard-size head. Low-set, wide-spaced eyes read as young and cute; eyes above the midline make a character look older. Always test placement with pins or by inserting safety eyes before fixing the backings.
Can I sell amigurumi patterns I design myself?
Yes. Patterns you design from scratch are your intellectual property, and indie amigurumi patterns typically sell for $4–$8 as PDFs. You cannot sell patterns derived from someone else’s published design, even with modifications. Have 2–4 testers verify your pattern before selling, and include materials, gauge, round-by-round instructions with stitch counts, and assembly landmarks.
What should my first original amigurumi design be?
Something built from one or two spheres and a few short tubes — a round bird, a simple blob creature, or a ball-bodied animal with tiny limbs. Avoid wings, posed limbs, and color changes on a first design. Even better, start by modifying a pattern you have already made, changing one feature at a time to learn cause and effect safely.
Final Thoughts
Amigurumi design looks like magic from the outside, but it is a learnable system: four shape recipes, one increase rule, honest prototyping, and disciplined notes. The distance between “I follow patterns” and “I write them” is measured in a handful of evenings and one deliberately ugly first draft. Sketch something small this week, convert it to stitch counts, and crochet the draft. The moment you hold a creature that exists nowhere else in the world — because you invented it — is one of the best feelings this craft has to offer.


