

Why Embroider Faces on Your Amigurumi?
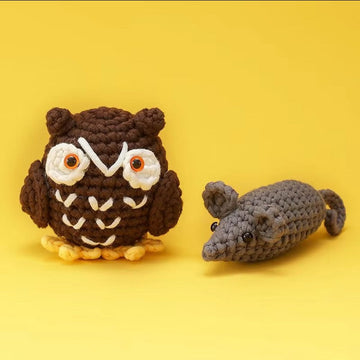
When you finish crocheting an amigurumi animal, the face is what brings it to life. A well-executed embroidered face can transform a simple crochet sphere into a character with personality — sleepy, cheerful, mischievous, or serene. While safety eyes are popular and convenient, embroidery offers creative freedom that plastic components simply cannot match. You can customize eye shape, size, color, and expression in infinite combinations without being limited by what's available in your supply drawer.
Embroidery is also the safest choice for amigurumi intended for babies and toddlers. Safety eyes, despite their name, can become choking hazards if they loosen over time. The U.S. Consumer Product Safety Commission recommends that toys for children under 3 avoid small detachable parts entirely. Embroidered faces eliminate this risk completely — there is nothing to pull off, chew off, or swallow.
For beginners working with a Beginner Crochet Kit, embroidery is often more forgiving than inserting safety eyes. If you place an eye too high or too low, you can simply pull out the thread and try again — no permanent holes in your work. This makes embroidery an ideal first face-making technique while you build confidence in amigurumi assembly.
In this guide, we will walk through every aspect of embroidering faces on amigurumi: the best tools and threads to use, how to plan facial placement, step-by-step techniques for different facial features, troubleshooting common problems, and answers to the most frequently asked questions. Whether you are making your very first amigurumi from a Crochet Amigurumi Kit or you are an experienced crocheter looking to refine your face embroidery skills, this guide covers everything you need.

Essential Tools and Materials for Amigurumi Face Embroidery
Embroidery Needles
The right needle makes a significant difference in how smoothly your embroidery goes. For amigurumi face work, you need needles that are sharp enough to pierce through tight crochet stitches but have eyes large enough to thread with yarn or embroidery floss.
Tapestry needles (sizes 13-18): These have blunt tips and large eyes, making them ideal for weaving in ends but less suitable for detailed embroidery where you need to pierce through the center of stitches. Size 13 (2.25mm diameter) works well for worsted-weight yarn, while size 18 (1.25mm) suits finer thread work.
Chenille needles (sizes 18-22): These have sharp points and large eyes, combining the best of both worlds for amigurumi embroidery. The sharp point lets you position stitches precisely, while the large eye accommodates yarn or multiple strands of floss. A size 20 chenille needle is the workhorse for most amigurumi face embroidery.
Embroidery/crewel needles (sizes 5-8): When working with embroidery floss for fine details like eyelashes or whiskers, a crewel needle with a sharp point and medium eye gives you the control you need.
Thread and Yarn Choices
Your choice of thread material dramatically affects how the finished face looks. Each option has distinct advantages:
Embroidery floss (cotton, 6-strand): This is the most versatile option for amigurumi faces. You can separate the strands to adjust thickness — use all 6 strands for bold eyes on a large amigurumi, or 2-3 strands for delicate features on a small project. Cotton floss has a slight sheen that catches light beautifully, making eyes look alive. DMC and Anchor are the most reliable brands, with DMC offering over 500 colors.
Worsted-weight acrylic yarn (split to fewer plies): If you want the embroidered face to match the texture of the crochet body exactly, use the same yarn you crocheted with. Split a 4-ply worsted yarn into 2 plies for embroidery. This creates a cohesive, fuzzy look that blends seamlessly with the amigurumi surface.
Cotton crochet thread (size 10 or 20): For miniature amigurumi (under 4 inches tall), standard embroidery floss may still be too thick. Cotton crochet thread gives you the fine control needed for tiny faces. Aunt Lydia's Classic 10 is a widely available option with good color selection.
Wool tapestry yarn: For a soft, matte finish on larger amigurumi, wool tapestry yarn (like Appleton or Paternayan) provides excellent coverage and a natural look. It is especially good for embroidering noses and mouths on animal amigurumi.
Additional Helpful Tools
Water-soluble fabric marker or chalk pencil: Before you commit to stitching, sketch the face placement on your amigurumi. A water-soluble marker (test on scrap yarn first) lets you draw directly on the crochet surface and remove marks with a damp cloth afterward. Tailor's chalk is a safe alternative that brushes off easily.
Straight pins with colored heads: Use pins to mark eye placement, nose position, and mouth corners before stitching. Step back and look at the face from different angles. Adjust until the expression feels right, then embroider with confidence.
Needle threader: Threading yarn through a small needle eye can be frustrating. A wire needle threader (the kind with a diamond-shaped wire loop) saves time and reduces eye strain.
Small sharp scissors: Embroidery scissors with fine tips let you snip threads close to the surface without accidentally cutting your crochet stitches.
Planning Face Placement: Getting the Expression Right
The Golden Rules of Facial Proportion on Amigurumi
Before you pick up a needle, understanding basic facial proportion will prevent the most common beginner mistake: features that look unbalanced or oddly positioned. Here are the guidelines that professional amigurumi designers use:
Eye placement: On a round amigurumi head, eyes should sit roughly halfway between the top of the head and the bottom of the chin. Many beginners place eyes too high, which can make the amigurumi look surprised or alien. The center of each eye should be about 5-7 stitches apart on a typical medium-sized head (roughly 30-42 stitches in circumference). For reference, if the head has 36 stitches around, placing eyes between rounds 6-8 from the top and 5-6 stitches apart from center creates a natural, friendly expression.
Nose placement: The nose sits below the eyes, typically centered between them and positioned about 2-3 rounds below the eye line. On most amigurumi, the nose is smaller than the eyes — roughly half to two-thirds the width of a single eye. A nose that is too large or too low can dominate the face and change the character entirely.
Mouth placement: The mouth sits below the nose, usually 1-2 rounds down. The width of the mouth should not exceed the distance between the inner edges of the eyes. A small, simple mouth (a straight line, a tiny V, or a subtle curve) often looks more charming on amigurumi than an elaborate one.
Ear and accessory positioning: If your amigurumi has ears, horns, or other head accessories, place them after the face is complete so you can adjust symmetry. Asymmetrical ear placement is one of the most noticeable flaws in finished amigurumi.
Creating a Placement Template
For consistent results, especially when making multiple amigurumi of the same pattern, create a simple placement template:
- Count the total rounds of the head piece (e.g., 15 rounds from magic ring to close).
- Mark the vertical center line by counting stitches from the magic ring starting point.
- Identify the horizontal eye line: typically around round 7-9 on a 15-round head.
- Pin markers at the proposed eye, nose, and mouth positions.
- Photograph the pinned face from straight on. Look at the photo — camera distance reveals asymmetry that your eyes may miss up close.
- Adjust pins as needed, then begin stitching.
Step-by-Step Techniques for Embroidering Amigurumi Eyes
Technique 1: The Simple Satin Stitch Eye
The satin stitch eye is the most common embroidered eye style for amigurumi. It creates a smooth, filled oval that looks clean and professional. This technique works well for sleepy or closed-eye expressions, or as the base for more complex eye designs.
Step 1: Thread your needle with embroidery floss (use all 6 strands for a bold eye on worsted-weight amigurumi, or 3-4 strands for a subtler look). Knot the end.
Step 2: Insert the needle from inside the head (or from a spot that will be hidden, like under where an ear will attach) and bring it out at one end of where you want the eye to be.
Step 3: Insert the needle at the opposite end of the eye shape and pull through to the back. This creates your first straight stitch defining the eye's length.
Step 4: Bring the needle up right next to the starting point of your first stitch, on the same side. Insert it right next to the ending point on the opposite side. Continue placing parallel stitches side by side, each one touching the previous stitch, until the entire eye shape is filled.
Step 5: For a polished look, outline the satin stitch eye with a backstitch in a slightly darker shade. This defines the eye shape and hides any small gaps at the edges.
Pro tip: To prevent satin stitches from sinking into the crochet fabric, work each stitch over a small piece of waste yarn laid across the eye area. Remove the waste yarn after stitching — this creates a slightly raised surface that stands out from the crochet texture.
Technique 2: The French Knot Eye
French knots create small, raised dots that work beautifully for tiny eyes on miniature amigurumi or as eye highlights on larger embroidered eyes. They add a dimensional, bead-like quality that catches light.
Step 1: Bring the threaded needle up at the exact center of where you want the eye.
Step 2: Hold the needle horizontally, close to the fabric surface. Wrap the thread around the needle 2-3 times (more wraps = larger knot). Keep the wraps snug but not tight.
Step 3: While holding the wrapped thread against the needle with your thumb, insert the needle back down very close to (but not exactly in) the same hole it came up through.
Step 4: Gently pull the thread through from the back until the knot forms on the surface. Do not yank — let the knot settle naturally.
Step 5: For eyes, make two French knots of equal size side by side. For a highlight effect on larger embroidered eyes, add a tiny single-wrap French knot in white or light gray at the upper corner of each eye.
Technique 3: The Backstitch Eye Outline
Backstitching creates a continuous line that is perfect for outlining eye shapes, creating eyelashes, or making expressive eyebrows. The backstitch gives you precise control over curves and angles.
Step 1: Bring the needle up at the starting point of your line.
Step 2: Insert the needle one stitch-length ahead and bring it up again one stitch-length beyond that insertion point.
Step 3: Pull through. You now have a stitch on the surface and the needle is positioned to continue.
Step 4: Insert the needle back into the end of the previous stitch (this is the "back" in backstitch) and come up one stitch-length ahead. Repeat along your entire design line.
For curved eyes: Keep each backstitch segment short (2-3mm) when following a curve. Longer stitches on curves create a jagged, angular look. Shorter stitches produce a smooth arc.
Technique 4: The Lazy Daisy / Detached Chain Stitch Eye
For sleepy, closed-eye expressions, the lazy daisy stitch creates a perfect curved eyelid shape with a delicate lash line. This is one of the most charming expressions for amigurumi and is surprisingly easy to execute.
Step 1: Bring the needle up at the inner corner of where you want the eye.
Step 2: Insert the needle back down very close to the same spot (creating a tiny loop on the surface), but do not pull all the way through. Leave a loop on the surface the length of your desired eye curve.
Step 3: Bring the needle up at the outer corner of the eye, passing it through the loop on the surface.
Step 4: Insert the needle just beyond the outer corner to anchor the loop in place. The result is a delicate curved line resembling a closed eyelid.
Step 5: Add 2-3 tiny straight stitches extending downward from the outer corner for eyelashes. This small detail transforms the expression from "closed eye" to "peacefully sleeping."
Technique 5: The Whipped Backstitch for Bold Outlines
When you want a thick, rope-like outline (ideal for cartoon-style amigurumi faces), the whipped backstitch delivers bold, continuous lines with excellent coverage.
Step 1: First, work a line of backstitch along your desired outline.
Step 2: Thread a new needle (or use the same thread). Starting at one end, bring the needle up next to the first backstitch.
Step 3: Pass the needle under each backstitch, working from the same side each time, without piercing the crochet fabric. The thread wraps around each backstitch like a spiral.
Step 4: Continue whipping until you reach the end of the line. The result is a raised, corded outline that adds significant dimension to the face.

Embroidering Noses: Styles for Different Animals
Triangle Nose (Cats, Foxes, Bears)
The triangle nose is the classic animal nose shape. To embroider one:
- Mark three points on the face: the top center of the nose and the two bottom corners. The triangle should be roughly as wide as the distance between the inner edges of the eyes.
- Start at the top point, stitch down to the left bottom corner, then across to the right bottom corner, then back up to the top point. This outlines your triangle.
- Fill the triangle with horizontal satin stitches from left to right, working from the top down.
- Add a vertical line from the bottom center of the nose down for 2-3 rounds to create the mouth line (the "Y" connection typical of cat and bear faces).
For a more dimensional nose, use a padded satin stitch: first fill the triangle with a layer of split stitches (which create a slightly raised surface), then cover with satin stitches perpendicular to the padding layer.
Oval/Round Nose (Dogs, Bears, Bunnies)
A round or oval nose creates a softer, friendlier look suitable for dogs and teddy bears:
- Mark the center point of the nose. Work concentric circles of chain stitch or satin stitch radiating outward from the center.
- For an oval nose, stretch the shape horizontally — work 3-4 stitches wide and 2-3 stitches tall.
- Add a vertical line down from the nose bottom and optionally a horizontal line at the bottom of the vertical line (creating an anchor shape) for a classic dog-nose-and-mouth combination.
Button Nose (Bunnies, Lambs)
The button nose is essentially a small, tight Y-shape stitched in a contrasting color (usually pink for bunnies):
- Work a small horizontal satin stitch (3-4 stitches wide) at the nose position.
- From the center of this horizontal stitch, work a vertical line downward 2-3 rounds.
- Split the bottom of the vertical line into a tiny inverted V for the mouth.
Embroidering Mouths: From Simple Smiles to Open Mouths
The Simple Smile (Backstitch Curve)
A gentle smile curve is the most universally appealing mouth for amigurumi. Use a single strand of embroidery floss or split yarn:
- Mark the center and endpoints of the smile with pins.
- Work a backstitch along the curve from one endpoint, through the center, to the other endpoint.
- For a more pronounced smile, stitch the curve twice with the second pass offset by half a stitch width, creating a slightly thicker line.
- Add tiny backstitch dimples at the outer corners of the smile for extra charm.
The Open Mouth
For amigurumi that need to look like they are talking, singing, or showing surprise, an open mouth adds character:
- Outline an oval or circle shape at the mouth position using backstitch.
- Fill the interior with vertical satin stitches in a dark color (dark red, dark brown, or black).
- For a tongue, fill the bottom third of the oval with pink satin stitches.
- Outline the entire mouth shape with a darker shade for definition.
The Straight-Line Mouth (Neutral Expression)
A simple horizontal straight stitch creates a neutral, calm expression:
- Work a backstitch across the marked mouth line, about 4-6 stitches wide on a typical amigurumi.
- For a slightly pensive look, angle the ends of the line upward by 1 stitch on each side.
- For a slight frown (useful for grumpy characters), angle the ends downward.
Adding Eyebrows, Cheeks, and Other Expression Details
Eyebrows
Eyebrows are the most underutilized expression tool in amigurumi embroidery. Just 2-4 stitches per eyebrow can completely change the character's mood:
- Happy/surprised: Arched eyebrows placed 2-3 rounds above the eyes, curving upward at the outer ends.
- Concerned/worried: Eyebrows angled upward at the inner ends (toward the center of the face).
- Angry/determined: Straight eyebrows angled downward toward the center, placed close to the eyes.
- Sleepy/relaxed: Straight or slightly drooping eyebrows placed at normal distance above the eyes.
Use a single strand of embroidery floss in a color one shade darker than the head yarn for subtle eyebrows, or match the eye color for bolder expressions.
Cheek Blush
Blush adds warmth and cuteness to amigurumi faces. You have two embroidery approaches:
Stitched blush: Work 3-5 tiny straight stitches radiating outward from a center point below and to the outside of each eye. Use pink or peach embroidery floss. The stitches should be small (1-2mm each) and loosely packed for a soft, diffused look.
Alternative — fabric blush: While this guide focuses on embroidery, many amigurumi makers also use actual blush makeup (powder blush applied with a cotton swab) or fabric markers for cheeks. This is faster than embroidery and creates a softer look, but it is not permanent and may fade with washing.
Common Problems and How to Fix Them
Problem: Thread Keeps Snagging on Crochet Stitches
Solution: This is the most common frustration for beginners. Crochet stitches have a natural texture that grabs at embroidery thread. Three fixes: (1) Use a needle with a polished, smooth surface — John James or Clover needles have noticeably smoother finishes than budget alternatives. (2) Run your thread through a thread conditioner like Thread Magic or beeswax before stitching. (3) Enter and exit the fabric at the gaps between stitches rather than piercing through the center of stitches whenever possible.
Problem: Eyes Look Uneven or Asymmetrical
Solution: Count stitches obsessively. Mark both eye positions with pins, then count the number of stitches from the center line to each eye. They should be identical. Count the number of rounds from the top of the head to each eye — also identical. If one eye still looks higher after stitching, you can often compensate by adjusting the eyebrow or adding a slightly larger highlight to the lower eye to balance the visual weight.
Problem: Satin Stitches Sink Into the Fabric
Solution: This happens when your tension is too tight or your stitches are too long. Keep individual satin stitches no longer than 5-6mm on worsted-weight amigurumi. For larger filled areas, break the shape into smaller sections and stitch each section separately. The waste yarn padding technique described earlier is also very effective for this problem.
Problem: Knots Show Through to the Front
Solution: Never start with a knot on the surface. Instead, start your thread from inside the amigurumi head (before closing) or from a spot that will later be covered by an ear, hair, or accessory. If you must start on an exposed area, use an away-waste-knot: make a knot about 2 inches from your starting point on the thread, insert the needle from the front to the back at your starting point, work your stitches, then later snip off the knot and weave the tail in on the back.
Problem: Thread Keeps Breaking
Solution: Embroidery floss and yarn have a limited number of passes through fabric before they fray and break. If you are repeatedly pulling out and redoing stitches, you are weakening the thread. Cut a fresh length of thread after 3-4 redo attempts. Also, check that your needle eye is not cutting the thread — some budget needles have sharp edges inside the eye that slice thread under tension.
Designing Your Own Face Expressions
Expression Reference Library
Building a mental library of expressions will help you design faces that communicate exactly the mood you want:
- Happy/cheerful: Wide-set eyes with upward-curving outer corners, arched eyebrows, broad smile with dimples.
- Sleepy/calm: Lazy daisy closed eyes with small lashes, neutral or slightly smiling mouth, relaxed eyebrows.
- Curious: Round eyes with prominent highlights (white French knots at 11 o'clock position), slightly raised eyebrows, small "o" shaped mouth.
- Shy: Eyes looking to one side (pupils shifted toward the outer edges), blush on cheeks, small closed-mouth smile.
- Mischievous: One eye slightly larger than the other, asymmetrical eyebrows (one raised), lopsided smirk.
- Surprised: Large round eyes with small pupils, high arched eyebrows, open round mouth.
- Grumpy (cute grumpy): Eyes close together, straight brows angled down toward center, straight-line mouth or slight frown.
Practice Exercise: The Expression Sampler
Before embroidering on your finished amigurumi, practice on a crochet swatch. Crochet a flat square of single crochet (about 15 stitches by 10 rows) using the same yarn and hook you used for your amigurumi. Embroider different eye styles, noses, and mouths on this swatch until you find the combination you like. This 15-minute investment prevents hours of frustration unpicking stitches from a finished project.
FAQ: Embroidering Faces on Amigurumi
Can I embroider a face after the amigurumi is fully assembled?
Yes, and in fact many experienced amigurumi makers prefer to embroider faces after assembly. Working on a finished piece lets you see the full proportions and adjust placement accordingly. The key is to use a curved needle if you need to reach tight spaces, and to plan your thread path so starting and ending points are hidden under attached parts like ears or limbs. If the head is already stuffed and closed, you can still embroider from the outside — just be careful to catch only the surface stitches and not pull stuffing through.
What is the best thread for embroidering on dark-colored yarn?
On dark yarn (black, navy, dark brown), standard embroidery floss may not show up well. Use one of these approaches: (1) Pearl cotton (size 5 or 8) — it is thicker and has a higher sheen than stranded floss, so it catches light better on dark backgrounds. (2) Use white or very light-colored thread for eyes on dark amigurumi — the contrast creates a striking look. (3) For subtle expressions on dark yarn, metallic embroidery floss (like DMC Light Effects) adds just enough shimmer to be visible without being harsh.
How do I make embroidered eyes look shiny like real eyes?
The secret to shiny-looking embroidered eyes is the highlight. After completing the main eye shape, add a tiny white French knot (single wrap) or a 2-3 stitch white straight stitch at the upper-left or upper-right corner of each eye. Both eyes should have the highlight in the same position (both upper-left, for example). This simulates the reflection of a light source and instantly makes flat embroidery look dimensional and alive. For an even more realistic effect, add a second, smaller highlight on the opposite lower corner of the eye.
Can I combine embroidered faces with safety eyes?
Absolutely. Many amigurumi designers use safety eyes for the main eye shape and then embroider details around them: eyebrows, eyelashes, under-eye lines, or even a embroidered "eyelid" that partially covers the top of the safety eye for a sleepy expression. This hybrid approach gives you the dimensional quality of safety eyes with the expressive flexibility of embroidery. When combining both techniques, insert the safety eyes first, then embroider around them.
How long does it take to embroider a face on amigurumi?
For a beginner, expect to spend 20-45 minutes on a simple face (two satin stitch eyes, a triangle nose, and a smile). More complex faces with detailed eyebrows, blush, and multi-color eyes may take 45-90 minutes. The time decreases significantly with practice — experienced makers can embroider a complete face in 10-15 minutes. The most time-consuming part for everyone, regardless of experience, is the initial placement and adjustment phase. Taking 5 extra minutes to pin and re-pin until the face looks right is always time well spent.
What if I make a mistake — can I undo embroidery on crochet?
Yes, embroidery on crochet is very forgiving. To remove stitches, use a seam ripper or the tip of your embroidery scissors to carefully cut the surface threads. Work from the front, cutting only the stitches you want to remove. Use tweezers to pull out the cut thread pieces. Be careful not to cut the underlying crochet stitches — work slowly and keep the cutting tool parallel to the fabric surface. After removing the embroidery, the crochet stitches may look slightly stretched, but they will relax back to their original shape within a few hours or after a light steaming.
Do I need to wash my amigurumi before embroidering the face?
It is not necessary to wash before embroidering, but blocking or steaming the pieces before face embroidery is recommended. Crochet pieces fresh off the hook often have curling edges and uneven stitch tension. Steaming or lightly blocking the head piece flattens the surface and evens out the stitches, giving you a smoother canvas for embroidery. If you do wash or steam, make sure the piece is completely dry before embroidering — wet or damp yarn is more prone to snagging and can distort your stitch placement as it dries.
Recommended Beginner-Friendly Amigurumi Kits for Practicing Face Embroidery
If you are new to amigurumi face embroidery, starting with a complete kit eliminates the guesswork of choosing the right yarn, hook, and pattern. WooHobby's Beginner Crochet Kit collection includes everything you need — pre-measured yarn, the correct hook size, stitch markers, stuffing, and a detailed pattern — so you can focus entirely on learning techniques like face embroidery without worrying about supplies.
For those ready to tackle more expressive projects, the Crochet Amigurumi Kits collection offers a wide range of animal designs, each providing a different canvas for practicing face embroidery. Start with animals that have simple faces (like a basic bear or bunny with just eyes and a nose) before moving on to designs with eyebrows, whiskers, and more complex expressions.

Final Tips for Beautiful Embroidered Amigurumi Faces
- Good lighting is non-negotiable. Embroidery on crochet requires seeing the gaps between stitches clearly. A daylight-temperature desk lamp (5000-6500K) makes an enormous difference in stitch accuracy.
- Take breaks. Hand fatigue leads to sloppy stitches. After 20-30 minutes of detailed embroidery, rest your hands for 5 minutes.
- Document your work. Photograph each finished face and note what you like and what you would change. Over time, this builds a personal reference library that helps you improve faster than any tutorial can.
- Thread length matters. Cut embroidery floss no longer than 18 inches (45 cm). Longer threads tangle more, fray faster, and are harder to pull through cleanly.
- The back does not need to be pretty. Unlike display embroidery, the back of amigurumi face embroidery will be hidden inside the head or under attached parts. Focus your attention on the front — that is all anyone will see.
Embroidering faces on amigurumi is a skill that rewards practice. Your first few faces may not look exactly like the picture in your mind, and that is completely normal. Every amigurumi maker started with crooked smiles and uneven eyes. The techniques in this guide give you the foundation — the rest comes from picking up your needle and giving your creations the faces they deserve.


