
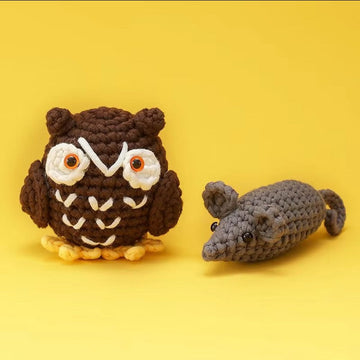

What Are Safety Eyes in Amigurumi?
Safety eyes are small plastic eyes designed specifically for crocheted and knitted stuffed toys. They consist of two parts: the eye itself (a colored dome or ball with a short post extending from the back) and a separate washer (a flat disc or ring with teeth). You push the post through your crochet fabric from the outside, then press the washer onto the post from the inside. The washer's teeth grip the post and lock permanently in place — once clicked on, the eye cannot be removed without cutting through the fabric or breaking the plastic. This locking mechanism is what gives them the "safety" name.
Safety eyes are the standard choice for amigurumi toys intended for older children, teenagers, and adults. They create a polished, professional-looking finish and give handmade stuffed animals that bright, alive quality that makes them so appealing. However, they require careful consideration when making toys for babies and toddlers under three years old, where the locking mechanism still presents a potential choking hazard if the eye is somehow pried free.
This complete guide covers everything you need to know about using safety eyes in amigurumi: sizing, style options, correct installation technique, common mistakes, age safety guidelines, and alternatives for when safety eyes are not appropriate.

Safety Eye Sizes: Which Size Do You Need?
Safety eyes come in a wide range of sizes, typically measured in millimeters (the diameter of the eye dome). The most common sizes used in amigurumi range from 6 mm to 18 mm, with a few specialty sizes outside that range for very small or very large projects. Here is a practical breakdown:
6 mm Safety Eyes
Used for very small amigurumi: mini figures worked in fingering weight yarn, keychain-sized toys (finished size 5–8 cm), and miniature food or accessory pieces. Six-millimeter eyes look like tiny bright dots but are correct in proportion for these small pieces. At this size, be especially careful during installation — the posts are short and the washers are small enough to be easy to lose.
9 mm Safety Eyes
The most popular general-purpose size in amigurumi. Nine-millimeter eyes work well for toys in the 10–18 cm finished size range worked in DK or worsted weight yarn. This is the right size for a standard amigurumi bear, bunny, cat, or owl made following most beginner patterns. They are large enough to read clearly as eyes at normal viewing distance while remaining proportional.
12 mm Safety Eyes
Ideal for larger worsted or bulky weight projects in the 18–25 cm range. Twelve-millimeter eyes also give a slightly more wide-eyed, cartoonish look compared to 9 mm, which some makers prefer even on smaller pieces for an exaggerated, graphic character design.
15 mm Safety Eyes
Used for large amigurumi: oversized animals, floor cushion characters, or decorative pieces where the toy is 25 cm or larger. These eyes are immediately striking and visible from across a room. They are less common in beginner patterns and more typically seen in designer or showpiece amigurumi.
18 mm and Larger
Specialty large eyes for jumbo or giant amigurumi. At this size, some makers switch to button eyes or custom painted resin eyes instead, which offer more design options for large-scale pieces.
A useful rule of thumb: the safety eye diameter should be approximately 15–20% of the head's width at its widest point. If you have a finished head that is roughly 8 cm across, a 12–15 mm eye is proportional. If the head is 5 cm across, a 6–9 mm eye is right.
Safety Eye Styles: Beyond the Basic Black
Basic safety eyes come in black, which works for almost any amigurumi character. The opaque black creates a crisp, clear pupil-like appearance that reads well across a wide range of yarn colors and character types. But the world of safety eyes extends well beyond plain black.
Colored Eyes
Colored safety eyes — blue, green, brown, amber, red, yellow — are popular for animals where eye color adds character. A brown bear with amber eyes looks more realistic than one with flat black eyes. A fantasy dragon or cat with green or yellow eyes has a distinctly different personality from the same design with black eyes. Colored eyes are the same construction as black, just with a tinted dome.
Holographic and Shimmer Eyes
Holographic safety eyes have a foil insert under the dome that catches light and creates a subtle sparkle or rainbow effect. These are particularly popular for magical creatures: unicorns, dragons, mermaids, and other fantastical amigurumi characters. They add visual interest without looking garish.
Animal-Specific Eye Shapes
Beyond round eyes, safety eyes are manufactured in oval, cat-slit, fish, and other animal-specific pupil shapes. Cat-eye safety eyes have a vertical oval pupil that gives feline characters an immediately recognizable look. These specialty shapes are available from dedicated amigurumi supply shops and online sellers, though they are less commonly stocked at general craft stores.
Slit-Pupil and Realistic Eyes
Some amigurumi designers use multi-layered realistic eyes for highly detailed projects. These typically consist of a printed paper or acetate iris layer sandwiched under a clear dome lens. The results can be remarkably lifelike. These are more advanced and are usually assembled by the maker rather than purchased pre-made, though some suppliers sell assembled realistic amigurumi eyes.
Washer Styles
The standard washer is a flat plastic disc. Some safety eyes come with loop washers instead, which allow the eye to swivel slightly in the socket — useful if you want to precisely orient an oval or shaped pupil after installation. Lock washers (with tightly gripping teeth) are the most common and provide the most secure hold.

How to Install Safety Eyes: Step-by-Step
Correct installation is the most important safety eye skill to master. An improperly installed eye will either not lock (can fall out, becoming a hazard) or will be crooked, which is surprisingly obvious on a finished toy even when the error seems minor.
Step 1: Finish to the Right Point
Safety eyes must be installed while the amigurumi piece is still open — before you close and stuff it, or at minimum while the opening is still large enough to reach inside. For a head piece, this means installing the eyes after you have finished the widest rounds of the head (the equator) and before you start the decreasing rounds that close the top. The standard timing is: work through the widest point of the head, count back about 3–4 rows from the widest part, mark the eye position, and install before continuing your decreases.
Step 2: Mark the Eye Position
Before installing, place the eyes (without washers) in the fabric and look at the face straight on. Adjust their position — higher or lower, closer together or further apart — until the expression looks right to you. The most common eye placement for a cute, friendly amigurumi expression is: eyes positioned between the widest part of the head and 2 rows above the widest part, approximately 6–10 stitches apart. Eyes placed below the widest point of the head tend to look droopy or sad. Eyes too far apart look surprised or vacant. Eyes too close together look confused or stressed. Take your time experimenting with placement before you click the washers on — once locked, the eyes cannot be moved.
Use a stitch marker, locking pin, or the eyes themselves (held against the fabric without the washer) to test and confirm the position. Some makers photograph the front of the head with the eyes held in place, step back from the photo, and look at it fresh before committing.
Step 3: Push the Post Through the Fabric
From the outside (right side) of the fabric, push the post of the safety eye through the stitch. The post goes through a single stitch rather than between stitches — push it through the center of a stitch, not through the gap between two stitches. This makes the lock more secure because there is more fabric around the post. The eye dome should sit flat and flush against the fabric surface. If it sits at an angle, gently adjust by pulling the post from the inside and repositioning.
Step 4: Press On the Washer
Reach inside the piece and pick up the washer. Orient the washer so the teeth or ridged side faces the eye post (toward the fabric). Press the washer firmly onto the post, pushing down toward the fabric until you feel or hear a distinct click. Continue pushing — the washer should sit within 1–2 mm of the fabric backing. Pull the eye firmly from the outside and push from the inside. A properly locked washer will not budge. If you can rotate or slide the washer on the post, it has not fully engaged — keep pressing until it locks completely.
If the washer seems extremely difficult to press on, the yarn threads are bunching on the post and adding resistance. Use a thin blunt tool (like the back end of a crochet hook) to gently push the washer past the fabric resistance until the teeth engage.
Step 5: Verify Before Continuing
Once both eyes are installed and locked, pull each one firmly from the outside to confirm they are secure. Then look straight at the face again. If one eye seems slightly off but is already locked, you cannot fix it without cutting the fabric — this is why the test placement step is so important. Minor asymmetry (one eye slightly higher than the other) is difficult to notice in the final finished toy, but significant misalignment is hard to overlook. Many experienced amigurumi makers install eyes dozens of times before becoming fully comfortable with precise placement, so be patient with yourself on the first few projects.
Eye Placement for Different Character Types
The same pair of 9 mm black safety eyes creates a completely different expression depending on placement. Understanding the relationship between eye position and expression allows you to intentionally design character personality rather than hoping for a happy accident.
Classic Cute (Kawaii) Expression
Eyes positioned high on the head (near the widest point) and relatively close together. This high placement means the bottom half of the head has more empty space below the eyes, which tricks the eye into reading the head as larger and rounder — the baby-face proportion effect that makes amigurumi look endearing. Eyes 8–10 stitches apart. Nose embroidered directly below and between the eyes, close to the eye level.
Realistic or Neutral Expression
Eyes positioned at the midpoint of the head (between the crown and the base). Eyes 12–14 stitches apart. Nose centered below. This placement gives a less cartoon-like and more anatomically plausible look, appropriate for realistic animal designs.
Sleepy or Gentle Expression
Eyes positioned slightly below the midpoint of the head, with a small embroidered curved line above each eye to suggest closed or half-closed eyelids. This technique does not change the eye placement itself but uses embroidery to alter the perceived expression.
Expressive or Character-Specific
Asymmetric eye placement (one eye slightly higher or more forward-tilted than the other) creates an inquisitive, tilted-head look without actually tilting the entire head. Wide eye spacing (14+ stitches apart) creates an owlish or shocked look. Very close eye spacing (6 stitches apart) creates a cross-eyed or intensely focused look often used for comedic characters.
Safety Eyes for Babies and Young Children: Critical Guidelines
This section is the most important part of this guide if you are making amigurumi toys as gifts for children under three years old.
Despite the name "safety eyes," plastic safety eyes are NOT safe for babies and children under 36 months. The Consumer Product Safety Commission (CPSC) in the United States and equivalent regulatory bodies in the EU, UK, and other markets classify toys with small detachable parts as inappropriate for children under 3 because of choking and ingestion risks. Plastic safety eye washers, and in rare cases the eye itself if somehow pried free, fall into the category of small parts under regulatory definitions (a small part is any piece that can fit entirely into a test cylinder with an inner diameter of 31.7 mm and a depth of 57.1 mm).
For toys given to children under 3 years old, always embroider eyes using yarn or embroidery floss. The embroidered eyes should be worked in multiple passes, anchored at the back of the head with secure knots, and the yarn tails trimmed and woven in completely. A properly embroidered eye cannot be removed by a child without destroying the toy itself — which is a significant safety improvement over even well-locked plastic eyes.
Some makers use buttons as eyes. Buttons with shank attachments are just as hazardous as safety eyes for very young children and should be treated identically — appropriate only for toys intended for older children (3+) and adults. For babies, always embroider.
Even for toys made for children aged 3 and older, inspect the safety eyes periodically. If the washer ever appears loose, retired the toy from active play. Keep safety eyes and washers (which are sold in bags and often quite small) away from children during the crafting process — a bag of unmounted 6 mm safety eyes or their washers is a significant choking hazard on its own.
Alternatives to Safety Eyes
There are several situations where you might want or need an alternative to standard plastic safety eyes: toys for babies, toy safety regulations in your country, personal preference for a different aesthetic, or simply running out of safety eyes mid-project.
Embroidered Yarn Eyes
Using a tapestry needle and black (or colored) yarn, embroider the eyes directly onto the finished fabric. Common embroidered eye styles include: satin stitch oval (several parallel stitches filling an oval shape, creating a solid-color eye), French knot (a single textured dot, beautiful for tiny eyes), and cross stitch with outline (a simple cross shape inside an embroidered outline oval). Embroidered eyes are the safest option for baby toys, offer maximum design flexibility, and can be made in any size and shape.
Felt Eyes
Cut small circles of black felt (or layered felt for a pupil-and-iris effect), and sew them onto the finished toy. Felt eyes look clean and graphic. They are not appropriate for baby toys either (the felt can be torn off), but they are a good alternative to safety eyes for older children and adult display pieces. Use a very sharp needle and small, tight stitches to secure felt eyes so they do not peel at the edges over time.
Button Eyes
Two-hole or four-hole buttons sewn securely to the face. Button eyes give amigurumi a charming, vintage, Velveteen Rabbit quality. Use flat-back buttons for the cleanest look; shank buttons sit away from the fabric and can look disproportionately large. As noted above, buttons are not appropriate for toys given to children under 3.
Resin Eyes
Hand-poured resin eyes are a popular choice among advanced amigurumi designers who want realistic or highly customized eyes. They can incorporate printed iris designs, glitter, or hand-painted details. Resin eyes are typically purchased from independent makers on craft marketplaces. They are heavier than plastic safety eyes and should be accounted for in the toy's weight and balance.
Sourcing Safety Eyes
Safety eyes are available at most large craft stores in the US, UK, and Australia — typically in the doll-making or toy supplies section. They are sold in small packets (often 10–20 pairs per pack) in a single size. Larger craft stores may stock 6 mm, 9 mm, 12 mm, and 15 mm black eyes. Specialty sizes, colored eyes, and shaped eyes are best sourced from dedicated amigurumi supply shops or online marketplaces.
When purchasing online, verify that the eyes you are buying are genuine safety eyes with locking washers — some inexpensive listings sell "toy eyes" that have only friction-fit (not locking) washers, which are not appropriate for toys. Look for descriptions specifying "locking washer" or check product reviews from other amigurumi makers.
If you would prefer to skip the supply sourcing process entirely, many crochet amigurumi kits include pre-selected and pre-sized safety eyes matched to the specific pattern and yarn weight included in the kit. This removes one more decision from the process and ensures the eye size is correct for the finished project. Browse our Crochet Amigurumi Kits to find projects where everything — yarn, hook, eyes, stuffing, and instructions — is already matched for you.
Safety Eye Tips from Experienced Amigurumi Makers
Beyond the technical installation process, here are practical insights that most amigurumi guides do not mention:
Photograph before committing. Take a photo of your piece with the eyes held in place (before locking the washer) and look at the photo rather than the toy itself. The slight distance of looking at a photo makes positioning errors much more obvious than scrutinizing the toy up close.
Keep a sizing reference. Build a small card with swatches of fabric at your usual tension and test-install different eye sizes on it. You can lay your in-progress piece against the card to get a quick visual reference for which eye size will look best before you open the packet.
Use needle-nose pliers for difficult washers. On very small safety eyes (6 mm), pressing the washer on by hand can be painful and imprecise. Small needle-nose pliers (jewelry pliers with smooth jaws) can be used to press the washer flush. Wrap the jaws with a thin strip of tape to avoid scratching the plastic.
Match eye size to hook size. As a very rough guide: 2 mm hook → 6 mm eyes, 3.5 mm hook → 9 mm eyes, 5 mm hook → 12 mm eyes. This relationship breaks down if your finished amigurumi is unusually small or large for the hook size, but it is a useful starting point when you do not have the finished piece in front of you at the craft store.
Store opened safety eyes carefully. Safety eyes and especially their washers are small and easy to lose. Keep opened packets in small zip-lock bags or repurposed tackle boxes with individual compartments sorted by size. An average amigurumi project uses 2 eyes plus 2 washers. Keep the extras from each packet so you always have spare washers — dropping and losing a washer on carpet is extremely common.
Frequently Asked Questions About Safety Eyes in Amigurumi
Can safety eyes fall out once the washer is locked?
A properly installed safety eye with a fully clicked washer is extremely difficult to remove without intentionally damaging the toy. In normal play and handling by older children or adults, they stay permanently in place. However, no plastic fastener is truly impossible to defeat by a determined person or under extreme force. This is why the age-3-and-under guideline exists — even a well-locked eye represents a risk that is not worth taking with infants and toddlers.
What size safety eyes should I buy as a beginner?
Buy a pack of 9 mm black safety eyes as your starting point. The 9 mm size works for the vast majority of beginner amigurumi patterns made in worsted or DK weight yarn, and black eyes suit nearly every design. Once you have completed a few projects and developed your preferences, you can expand to 6 mm (for small pieces) and 12 mm (for larger or wide-eyed characters).
Can I reuse safety eyes from an old project?
You can remove the eye dome and post from damaged fabric, but you cannot reuse the washer — once locked, the washer's teeth are deformed and will not grip a second time. If you want to salvage eyes from a discarded project, you will need new washers. Many suppliers sell replacement washers separately. Alternatively, safety eyes are inexpensive enough that reuse is rarely worth the effort.
How do I prevent safety eyes from being crooked?
Crooked eyes almost always result from pushing the post through the fabric at an angle rather than straight through. When inserting the post, hold the eye at a 90-degree angle to the fabric surface and push in a single smooth motion. If you push at an angle, the post enters the fabric diagonally and the eye dome cannot sit flush. Looking at the inside of the piece before locking the washer also helps — the post should be perfectly perpendicular to the fabric.
Should the eyes be placed before or after stuffing?
Always before stuffing — or at minimum, before closing the piece and definitely before adding significant stuffing. The reason is practical: you need to reach inside the piece to lock the washer. Once the piece is stuffed, your fingers cannot fit inside to lock the washer correctly, and you risk pushing the stuffing around and distorting the shape trying to force access.
My safety eye dome cracked when I pressed on the washer — is this normal?
No, this is not normal and indicates either a very forceful installation or a manufacturing defect in the eye. Do not use a cracked eye on a toy — remove it (by carefully cutting the fabric around the post from the inside) and replace it with a new, undamaged eye. Cracked plastic can have sharp edges that can cut fabric or skin.
Are safety eyes safe for children's toys?
Safety eyes are safe for toys intended for children aged 3 and older when properly installed. They are NOT safe for babies and children under 3 years old, regardless of how securely the washer is attached. For infant and toddler toys, always use embroidered eyes instead. This is a clear regulatory guidance in all major markets including the US, EU, UK, and Australia, and is also the guidance of major child safety organizations.
What is the difference between safety eyes and button eyes?
Safety eyes have a specifically designed locking post-and-washer mechanism that makes them more secure than buttons sewn onto fabric with thread. Button eyes sewn with thread can potentially be pulled off with force, while a properly locked safety eye cannot. Both types are inappropriate for babies and children under 3, but safety eyes are generally considered more durable for older children's toys. Aesthetically, safety eyes have a cleaner, more finished dome appearance, while button eyes offer more variety in color, shape, and texture and have a warmer, more handmade visual quality.
Building Your Safety Eye Toolkit
As you make more amigurumi, you will naturally accumulate a personal inventory of safety eyes in multiple sizes and colors. A practical starter collection for a new amigurumi maker would include: 9 mm black (a full pack of 20+ pairs, since these will be your most-used size), 12 mm black (a pack of 10 pairs for larger projects), 6 mm black (a pack for small pieces), and one or two packs of 9 mm in colored variations you find appealing — amber, blue, and green are versatile choices. Store these in a small segmented box or zip-lock bags labeled by size.
With this collection, you will be equipped for virtually any beginner or intermediate amigurumi pattern without needing to make a special trip to the craft store mid-project. The total cost for this starter eye collection, purchased in standard retail packs, is typically under $15–20 — a modest investment for tools that will be used across dozens of future projects.
Conclusion
Safety eyes are one of those amigurumi supplies that seem trivially simple until you realize how much detail, technique, and consideration goes into choosing and using them correctly. Selecting the right size for your project, installing them precisely before stuffing, understanding age-appropriate safety guidelines, and knowing your alternatives when plastic eyes are not the right choice — all of these are skills that directly affect the quality and safety of your finished toys.
If you are new to amigurumi and still building your supplies, a kit that includes pre-selected safety eyes matched to the pattern takes one more variable out of the equation. Explore our Beginner Crochet Kit collection to find a project that includes everything you need, eyes included, and get started crocheting right away.


