
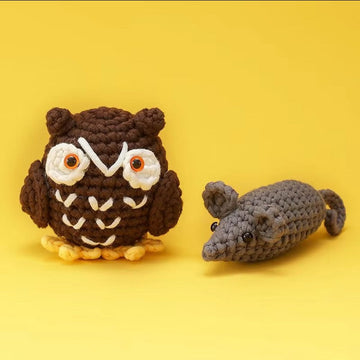
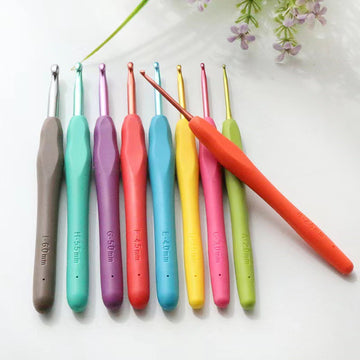

Introduction: The Secret to Professional-Looking Amigurumi
You've finished crocheting all the pieces of your amigurumi project. The head, body, arms, and legs are complete. You've sewn everything together and added the safety eyes. But something is off. The head tilts slightly to one side. One ear is bigger than the other. The body looks lumpy in places, and the whole creation seems to lean forward like it's about to topple over.
You followed the pattern exactly. Your stitch count was correct. So what went wrong?
The missing step that separates amateur-looking amigurumi from polished, professional results is blocking and shaping. These techniques — borrowed from the broader fiber arts world and adapted specifically for amigurumi — allow you to control the final form of your creation, evening out inconsistencies, defining curves, and giving your project that crisp, intentional look that makes people ask, "Did you really make that yourself?"
Blocking is the process of dampening, shaping, and drying your crochet pieces to set them in the desired position. Shaping is the art of using stuffing, wiring, and assembly techniques to create specific forms and silhouettes. Together, they transform a lumpy collection of crochet pieces into a character with personality and polish.
In this comprehensive guide, we'll cover every blocking method that works for amigurumi, when to block (and when not to), how to shape with stuffing and internal supports, and troubleshooting the most common shape problems beginners face. Whether you're making your first amigurumi animal or your fiftieth, these techniques will elevate your finished projects dramatically.
What Is Blocking and Why Does Amigurumi Need It?
Blocking originated in garment knitting and crochet, where it's used to open up lace patterns, even out stitch tension, and ensure pieces match their intended dimensions before seaming. For amigurumi, blocking serves different but equally important purposes.
When you crochet in the round with tight tension — as amigurumi demands — your stitches naturally pull the fabric in certain directions. The spiral construction of amigurumi means there's no turning chain to reset the tension, so slight biases accumulate over many rounds. Pieces may curl, twist, or develop an uneven surface texture. Blocking relaxes the yarn fibers, allowing them to settle into a more uniform arrangement.
Blocking also helps with assembly. When you need to sew two pieces together — say, attaching an arm to a body — blocked pieces have clean, flat edges that align more easily. An unblocked arm piece that curls at the opening is much harder to attach neatly than one that's been blocked flat.
Additionally, blocking can correct minor size discrepancies. If one ear came out slightly larger than the other (a common issue when crocheting under different tension on different days), careful blocking can stretch the smaller piece or slightly compress the larger one to bring them closer to matching.
Which Yarn Fibers Respond to Blocking?
Not all yarns block equally. Understanding how different fibers respond will help you choose the right method.
Acrylic Yarn (Most Amigurumi Kits)
Acrylic is the most common yarn in amigurumi kits because it's affordable, available in countless colors, and machine-washable. However, acrylic is essentially plastic — it has no natural memory for blocking with water alone. Wet blocking acrylic has minimal effect because the synthetic fibers don't have the scales that animal fibers do. For acrylic amigurumi, you need steam blocking (which we'll cover in detail below). The heat from steam slightly relaxes the acrylic fibers, allowing them to be reshaped, and the shape sets as the piece cools.
Important caution: Acrylic can melt or become permanently shiny if exposed to direct high heat. Always use steam — never let an iron touch acrylic yarn directly.
Cotton Yarn
Cotton blocks beautifully with water alone. It has excellent absorbency and holds its shape well after wet blocking. Cotton amigurumi pieces can be soaked, shaped, and air-dried with great results. The downside: cotton has less stretch than acrylic, so you have less room to manipulate the shape through blocking.
Wool and Wool Blends
Wool is the most blockable fiber — it has natural memory and responds dramatically to both wet and steam blocking. However, wool is less common in amigurumi because it can felt (shrink and mat together) if agitated in hot water, and it's more expensive than acrylic. If you're working with wool or a wool blend for a special project, wet blocking is highly effective.
Chenille and Velvet Yarns
Chenille and velvet yarns (popular for plushie-style amigurumi) require extra care. The fibers can crush or flatten under pressure, and steam can damage the texture. For chenille amigurumi, light mist-blocking (spraying with water and shaping gently) is the safest approach. Never apply direct heat or heavy pressure to chenille yarns.
Blocking Methods for Amigurumi: A Complete Guide
Method 1: Steam Blocking (Best for Acrylic Yarn)
Steam blocking is the most effective method for acrylic amigurumi — which covers the vast majority of kit-based projects. Here's the step-by-step process:
You'll need: A steam iron or handheld garment steamer, a blocking mat or folded towel, rustproof T-pins or blocking pins, and a spray bottle of water (optional).
- Pin the piece first. Lay your crochet piece on the blocking mat and gently shape it into the desired position. Use T-pins to hold the edges in place. For curved pieces like amigurumi heads, you may need to stuff the piece lightly with plastic bags or tissue paper to maintain its three-dimensional shape while blocking.
- Apply steam, not direct contact. Hold the iron or steamer 2-3 inches above the piece — never touch the yarn with the iron. Apply steam evenly across the entire surface for 10-15 seconds. The yarn should feel warm and slightly damp but not wet.
- Let it cool completely. This is the most important step. The acrylic fibers set their new shape as they cool. Do not remove the pins until the piece is fully cool to the touch — typically 20-30 minutes for small pieces, longer for larger ones.
- Remove pins and check. The piece should hold its new shape. If it springs back, repeat the process with slightly more steam.
Method 2: Wet Blocking (Best for Cotton and Wool)
For natural fiber amigurumi pieces, wet blocking gives excellent results.
- Soak the piece. Submerge the crochet piece in lukewarm water for 10-15 minutes. Add a small amount of wool wash or mild detergent if desired. Do not agitate wool pieces — just let them soak.
- Remove excess water. Lift the piece out gently (support its full weight — wet crochet is heavy and can stretch). Roll it in a clean towel and press gently to remove excess water. Never wring or twist — this distorts stitches and can damage the yarn.
- Pin and shape. Lay the damp piece on a blocking mat and pin it into the desired shape. Be more assertive with shaping at this stage than with steam blocking, since wet fibers are more malleable.
- Air dry completely. Let the piece dry for 12-24 hours depending on size and humidity. It must be completely dry before you remove the pins.
Method 3: Spray / Mist Blocking (For Light Shaping)
This is the gentlest method and works for all fiber types when you only need minor adjustments.
- Pin the piece in position on a blocking mat.
- Fill a spray bottle with clean water and mist the piece evenly until it's damp but not soaked.
- Gently pat and smooth the piece with your fingers to encourage fibers to settle.
- Let dry completely before removing pins (usually 4-8 hours for small pieces).
Method 4: Towel Blocking (For Flat Pieces Only)
For flat amigurumi pieces like ears, wings, or tails that need to dry flat:
- Dampen the piece (via any method above).
- Lay it flat between two clean, dry towels.
- Place a heavy book or flat weight on top.
- Leave for several hours or overnight.
This method is especially useful for pieces that tend to curl at the edges — the weight forces them flat.

When to Block: Before or After Assembly?
This is one of the most common questions, and the answer depends on your project.
Block before assembly when pieces need to be flat for neat seaming. Block ears, wings, tails, and other flat appendages before attaching them. Block body and head pieces if they have curled edges that would make joining difficult. Block any piece that is visibly misshapen compared to its counterpart.
Block after assembly when the finished amigurumi needs overall shaping. If your completed creation leans to one side or has an asymmetrical appearance, you can block the entire assembled piece. Use a combination of pins and temporary stuffing to hold the desired shape, then steam or mist-block.
Block both before and after for showpiece projects where every detail matters. This two-stage approach — blocking individual pieces for clean assembly, then blocking the finished piece for overall shape — produces the most professional results.
Shaping Techniques Beyond Blocking
Blocking addresses the fabric itself, but shaping is about what's inside and how pieces connect. Here are the key shaping techniques every amigurumi maker should know.
Strategic Stuffing
How you stuff determines the shape far more than most beginners realize. The stuffing isn't just filler — it's an active shaping tool.
- Firm stuffing for structure: Heads and bodies should be stuffed firmly enough that the fabric is taut but not stretched. You should be able to squeeze the piece and have it spring back. Under-stuffed pieces look deflated and sad.
- Light stuffing for flexibility: Arms, legs, and tails need enough stuffing to hold their shape but enough flexibility to pose naturally. A firmly stuffed arm that sticks straight out looks unnatural.
- Gradual stuffing: Don't stuff a piece all at once at the end. Add stuffing in layers as you crochet — small handfuls every few rounds. This prevents lumps and ensures even distribution.
- Stuffing tools matter: Use the back of a crochet hook, a chopstick, or a proper stuffing tool to push fiberfill into narrow areas like snouts, ears, and the tips of limbs. Your fingers alone can't reach these spaces effectively.
Internal Wiring for Posable Limbs
For amigurumi with posable arms, legs, or necks, internal wire supports give you control over the final pose.
Use craft wire, floral wire, or pipe cleaners — anything that holds its shape but can be bent repeatedly. For safety, always fold the ends of the wire into small loops (using pliers) so they can't poke through the crochet fabric. Insert the wire armature before stuffing, and surround it with fiberfill so the wire isn't directly against the crochet stitches. Wire is especially effective for amigurumi dragons with posable wings, monkeys with posable tails, and dolls with posable limbs.
Needle Sculpting (Thread Shaping)
Needle sculpting is an advanced technique where you use a long strand of yarn and a darning needle to pull the fabric into specific shapes after stuffing. Common applications include:
- Eye sockets: Running thread from one eye position to the other and pulling tight creates indented eye sockets that give the face dimension.
- Cheek definition: Strategic pulls from the mouth area to the cheeks create a smiling or rounded cheek effect.
- Finger/toe definition: On larger amigurumi, running thread between fingers or toes separates them visually.
To needle-sculpt: thread a long piece of matching yarn onto a darning needle, insert from the back of the piece to the point where you want an indentation, exit at the opposite point where you want the pull to originate, and tug gently. The yarn pulls the fabric inward at the entry point. Secure the thread with a knot hidden in the stuffing.
Assembly Angle Matters
How you attach pieces dramatically affects the final look. Here are common pitfalls:
- Arms too high: If you attach arms at the shoulder line, the amigurumi looks like it's shrugging. Attach slightly lower, at the upper chest, for a more natural look.
- Ears asymmetrical: Always pin both ears in place and check from multiple angles before sewing. Use a mirror or take a photo — the reversed view often reveals asymmetry your eyes missed.
- Head tilt: A slight head tilt can add personality (curious, playful), but an accidental tilt looks like a mistake. Decide intentionally whether you want the head straight or tilted, and pin it in place to preview before sewing.

Common Shape Problems and How to Fix Them
Problem: My Amigurumi Leans to One Side
Causes: Uneven stuffing, one leg slightly longer than the other, or the crochet spiral bias pulling the body to one side.
Fixes: If it's a minor lean, steam-block the entire assembled piece while pinning it in an upright position. For leg-length discrepancies, add a small felt or cardboard disc inside the bottom of the shorter leg to level it out. For spiral bias (common in continuous rounds), steam-blocking can counteract the twist.
Problem: The Head Won't Stay Upright
Causes: Insufficient neck support, head too heavy for the body, or the neck opening is too wide.
Fixes: Insert a short piece of dowel, a plastic straw, or a rolled-up piece of felt into the neck as an internal support column before sewing the head on. If the neck opening is too wide, sew it partially closed before attaching the head. For heavy heads (common with large safety eyes and lots of embroidery), add extra stuffing to the upper body to create a broader shoulder area that supports the head.
Problem: Flat Spots or Dents
Causes: Uneven tension, stuffing clumped in one area, or the piece was stored with something pressing against it.
Fixes: For acrylic yarn, steam the affected area and use your fingers to gently massage the stitches back into shape. For stubborn flat spots, insert a crochet hook through the fabric from inside and gently push the dent outward while steaming. Re-stuff the area if the stuffing has compacted.
Problem: Curling Edges on Flat Pieces
Causes: Tension is too tight at the edges, or the natural tendency of crochet fabric to curl.
Fixes: Towel-block the piece flat (see Method 4 above). If the curling persists after blocking, your tension may be too tight overall — try going up half a hook size for flat pieces like ears and wings. For pieces that will be sewn onto a body, a slight curl at the attachment edge can actually help the piece sit flush against the curved body surface, so don't over-correct.
Blocking Tools Worth Investing In
You don't need expensive equipment to start blocking, but a few tools make the process much easier:
- Blocking mats: Interlocking foam play mats (the kind sold for children's playrooms) are identical to expensive "blocking mats" at a fraction of the price. They hold pins securely and are heat-resistant enough for steam blocking.
- T-pins: Rustproof T-pins with a T-shaped head are easier to grip and remove than straight pins. Get a pack of 50 — you'll use more than you think.
- Handheld garment steamer: Much safer for acrylic yarn than an iron, and more convenient. A basic model costs $20-30 and is worth it if you make amigurumi regularly.
- Spray bottle: A fine-mist spray bottle for mist blocking. Dedicate one to crafting so it never contains cleaning chemicals.
- Stuffing tools: A set of silicone-tipped stuffing tools (or even chopsticks and the back of a crochet hook) for pushing fiberfill into narrow spaces.

FAQ: Blocking and Shaping Amigurumi
Do I need to block every amigurumi project?
No. For simple, round amigurumi shapes (basic balls, simple animals with no flat appendages), blocking is often unnecessary if your tension is consistent and your stuffing is even. Blocking becomes important when your project has flat pieces (ears, wings), visible asymmetry, or when you're making a gift or showpiece where you want the best possible finish. Most beginners can skip blocking for their first few projects and focus on consistent tension and even stuffing first.
Can I block amigurumi made with acrylic yarn?
Yes, but you must use steam blocking — wet blocking alone has almost no effect on acrylic. Hold the steamer or iron 2-3 inches away from the yarn. Never let the hot surface touch acrylic yarn directly, as it will melt and become shiny or stiff. The heat from steam relaxes the acrylic fibers temporarily, and they set into their new shape as they cool. Always let the piece cool completely before removing pins.
Will blocking make my amigurumi stiff?
No, not if done correctly. Steam-blocked acrylic retains its softness and flexibility — it simply holds its intended shape better. Wet-blocked natural fibers may feel slightly crisper immediately after drying, but this softens with handling. If your piece feels stiff after blocking, you may have applied too much heat or used starch or sizing products (which are generally unnecessary for amigurumi).
How long does blocking take?
Steam blocking: 30-45 minutes total (10 minutes of active work, 20-30 minutes cooling). Wet blocking: 12-24 hours (10 minutes of active work, then drying time). Mist blocking: 4-8 hours. The active time is minimal — blocking is mostly waiting. You can block pieces in the evening and they'll be ready the next morning.
Can I block an already-assembled amigurumi?
Yes. For minor shape issues (leaning, asymmetry), you can block the fully assembled piece. Pin it into the desired position on a blocking mat, stuff or prop up areas that need support, and steam or mist the areas that need reshaping. Be careful not to get water inside the stuffing — focus steam on the outer fabric only. For major issues, it's better to disassemble, block individual pieces, and reassemble.
What if my amigurumi still looks wrong after blocking?
If blocking doesn't solve the problem, the issue is likely internal (stuffing distribution, wire armature, assembly angles) rather than the crochet fabric itself. Re-examine your stuffing — is it even? Are limbs attached symmetrically? Does the piece need internal support? Refer to the shaping techniques section above. Sometimes the fix is as simple as adding more stuffing to a specific area or repositioning a limb.
Is blocking necessary for amigurumi made from a kit?
Most amigurumi kit projects — especially beginner kits — are designed to produce good results without blocking. The patterns are chosen specifically because they work well with basic techniques. However, if you want your kit project to look its absolute best, blocking flat pieces (ears, wings) before assembly can make a noticeable difference. Start with a beginner crochet kit to build your foundational skills, then add blocking to your toolkit as you progress to more complex projects.
Project-Specific Blocking Guide
Different types of amigurumi benefit from different blocking approaches. Here's a quick reference:
Simple round animals (bears, cats, basic birds): Usually don't need blocking. Focus on even stuffing and symmetrical assembly.
Animals with large flat ears (bunnies, elephants, dogs with floppy ears): Block ears flat before assembly. Towel-blocking works well here.
Animals with wings (birds, dragons, bats): Block wings flat and symmetrical. Pin both wings side by side on the blocking mat so you can compare them directly.
Dolls and human figures: Block body parts for clean seaming. Consider needle-sculpting for facial features.
Multi-piece complex projects: Block all pieces before assembly. Do a final light steam-block of the assembled project if needed.
Final Thoughts: Patience Is the Secret Ingredient
Blocking and shaping are not the most exciting parts of amigurumi — they're not as immediately satisfying as finishing the last stitch or seeing a face come together. But they are what separate "that's cute" from "wow, you made that?" It's the difference between a project that looks handmade (in the not-so-great way) and one that looks handcrafted (in the best possible way).
For beginners, don't feel pressured to master every technique at once. Start with the basics: even stuffing, symmetrical assembly, and maybe steam-blocking flat pieces that curl. Add more advanced techniques like needle sculpting and internal wiring as your confidence grows. Each project is practice, and each finished amigurumi will be better than the last.
If you're ready to put these techniques into practice, the Crochet Amigurumi Kits collection at WooHobby offers projects at every skill level. Each kit includes all the materials you need, plus clear instructions — the perfect canvas for practicing your blocking and shaping skills on a project you'll be proud to display.
Take your time with the finishing process. The extra 30 minutes you spend blocking and shaping will be visible in your finished project for years to come.


