

Roughly 10% of the world's population is left-handed, yet almost every crochet tutorial, diagram, and video you will ever find is filmed by — and for — right-handed crocheters. If you are a lefty who has ever sat down with a hook, a ball of yarn, and a YouTube tutorial, only to feel like you were watching someone work in a foreign language, this guide is for you.
Here is the truth that most beginner resources never tell you: left-handed crochet is not harder than right-handed crochet. It is exactly the same craft, mirrored. Every stitch, every technique, and every amigurumi pattern works identically for lefties — you simply work in the opposite direction. Once you understand a handful of mirror-image principles, the entire world of crochet opens up to you without a single modified pattern.
In this complete guide, you will learn how to hold the hook and yarn as a left-handed crocheter, how to translate right-handed tutorials in real time, which techniques genuinely need adjustment (there are fewer than you think), and why amigurumi — the Japanese art of crocheting stuffed animals — happens to be the single most lefty-friendly form of crochet you can choose.
Why Left-Handed Crocheters Struggle (And Why It's Not Your Fault)
Most left-handed beginners quit within the first two weeks. Not because their hands can't do the work, but because of three completely fixable problems:
1. Every tutorial is a mirror image of what you need to do
When a right-handed instructor inserts the hook, wraps the yarn, and pulls through, a left-handed learner has to mentally flip every single movement. That constant mental translation is exhausting. It's the equivalent of learning to write by watching someone write in a mirror. Beginners often don't realize this is what's slowing them down — they just conclude that they're "bad at crochet."
2. Well-meaning right-handed teachers give backwards advice
If your grandmother, friend, or craft-store instructor is right-handed, their muscle memory is useless to you when demonstrated side by side. They will say "insert the hook to the left" when you need to insert it to the right, or correct your (perfectly correct) mirrored technique because it looks wrong to them.
3. Some lefties are taught to crochet right-handed — and it rarely sticks
A generation ago, many left-handed crafters were simply told to learn right-handed. Some managed it; a large number gave up entirely. If you tried to learn right-handed years ago and failed, you did not fail at crochet. You failed at crocheting with your non-dominant hand, which is a completely different (and much harder) task.
The fix for all three problems is the same: learn crochet as a genuinely left-handed craft from day one, using the mirror-image strategies below.
How to Hold the Hook and Yarn as a Left-Handed Crocheter
Left-handed crochet setup is a straightforward mirror of the right-handed version:
- The hook goes in your left hand. This is your working hand — it does the inserting, wrapping, and pulling.
- The yarn goes over your right hand. Your right hand controls tension and holds the work.
- You crochet from left to right across a row, instead of right to left like a right-handed crocheter.
Choose your grip: pencil or knife
There are two standard ways to hold a crochet hook, and both work identically for lefties:
- Pencil grip: Hold the hook like a pencil, resting between your thumb and index finger. This grip offers fine, precise control and suits crocheters who write with a light touch.
- Knife grip (overhand grip): Hold the hook like a dinner knife, with your hand over the top of the shaft. This grip uses larger arm muscles rather than small hand muscles, which reduces fatigue during long amigurumi sessions and is the grip most amigurumi crocheters eventually settle on, because the tight stitches amigurumi requires take a bit more force to work.
Try both for ten minutes each. There is no "correct" answer — approximately 60% of crocheters use the knife grip and 40% use the pencil grip, and the split is the same among lefties.
Tensioning yarn with your right hand
Wrap the working yarn over your right index finger, then weave it under your middle finger and over your ring finger (or loop it once around your pinky — whichever feels natural). Your right index finger stays slightly raised, feeding yarn to the hook at a consistent tension. This feels awkward for everyone — righties and lefties alike — for the first three to five hours of practice. It becomes automatic faster than you expect.

The Golden Rule: Everything Mirrors, Nothing Changes
Here is the principle that makes left-handed crochet simple: every instruction in every pattern is identical for you. "Single crochet 6 into a magic ring" means exactly the same thing. "Increase in the next stitch" means exactly the same thing. The only difference is the physical direction your work travels:
- Right-handed crocheters work rows from right to left; you work from left to right.
- Right-handed crocheters work amigurumi rounds counter-clockwise (when viewed from above with the right side facing you); you work rounds clockwise.
- Your finished stitches lean slightly in the mirror direction — visible only to a trained eye examining the fabric closely.
You never need "left-handed patterns." Standard written patterns — including every pattern included in modern amigurumi kits — work for you exactly as printed. The only materials that require flipping are visual ones: video demonstrations, photo tutorials, and stitch charts.
How to Learn From Right-Handed Tutorials: 4 Mirror Techniques
Since 95%+ of crochet tutorials are filmed right-handed, learning to "flip" them is the single most valuable skill a left-handed beginner can develop. Here are four techniques, in order of effectiveness:
1. Mirror the video (best method)
Many video players can flip a video horizontally, turning any right-handed tutorial into a perfect left-handed demonstration:
- On a computer: Browser extensions can mirror any video with one click, and VLC Media Player can flip downloaded videos via its video-effects menu (Tools → Effects and Filters → Video Effects → Geometry → Transform → Flip horizontally).
- On a phone or tablet: Several free apps play videos mirrored, and some tutorial platforms have a built-in mirror button.
When the video is mirrored, the instructor appears to crochet left-handed, and you can copy their movements directly with zero mental translation.
2. Sit opposite your teacher, not beside them
If you're learning from a right-handed person face to face, sit facing them rather than next to them. From across the table, their right-handed movements are already a mirror image from your viewpoint — you can simply copy what you see. This one seating change is the difference between a frustrating lesson and a productive one.
3. Watch in a real mirror
Prop your phone or tablet in front of an actual mirror and watch the reflection. Old-school, slightly awkward, but it works anywhere with zero technology.
4. Learn from written instructions plus your own hands
Written instructions have no handedness at all. "Insert hook into next stitch, yarn over, pull up a loop, yarn over, pull through both loops" describes a single crochet perfectly for either hand. Many left-handed crocheters eventually prefer written patterns over video precisely because there is nothing to flip.
Left-Handed Technique Guide: The Core Amigurumi Stitches
Every amigurumi project is built from a tiny vocabulary of stitches. Here is how each works left-handed:
The slip knot and chain
Make a slip knot exactly as a right-hander would (a knot has no handedness) and place it on your hook. To chain: yarn over — which for you means bringing the yarn over the hook from back to front as you hold the hook in your left hand — and pull through the loop. Your chain will grow toward the right instead of the left. That's it.
The magic ring, left-handed
The magic ring (adjustable loop) starts nearly every amigurumi piece, and it is the technique lefties most often struggle to learn from right-handed videos. The left-handed version:
- Drape the yarn over your right-hand fingers and cross the working yarn over the tail to form a loop, with the crossing point pinched between your right thumb and middle finger.
- Insert your hook (left hand) through the loop from front to back, catch the working yarn, and pull up a loop.
- Chain 1 to secure, then work your first round of single crochet stitches into the ring, working clockwise.
- Pull the tail firmly to close the ring — the hole should disappear completely.
If the magic ring fights you, use the two-chain alternative: chain 2, then work 6 single crochet into the second chain from your hook. It leaves a slightly less tidy center but is dramatically easier, and no one will ever notice on a finished stuffed animal.
Single crochet — 90% of every amigurumi project
Amigurumi is overwhelmingly built from single crochet (sc). Left-handed: insert your hook under both loops of the next stitch (working to the right), yarn over, pull up a loop (two loops now on hook), yarn over, pull through both loops. Done. Once your left hand owns this one motion, you can physically make almost any amigurumi pattern ever written.
Increases and invisible decreases
An increase is simply two single crochets in one stitch — identical for lefties. The invisible decrease (insert hook under the front loops only of the next two stitches, yarn over, pull through both, yarn over, pull through remaining loops) also mirrors perfectly. The front loop of each stitch is the one closer to you regardless of which hand holds the hook, so written decrease instructions need no translation at all.
The Few Things That Genuinely Differ for Left-Handed Crocheters
In the interest of complete honesty, here are the only situations where handedness actually matters — and what to do about each:
1. Spiral direction and the "lean" of stitches
Your amigurumi rounds spiral clockwise instead of counter-clockwise, and your stitches lean slightly the opposite way. On a finished toy this is cosmetically invisible. The only practical consequence: the subtle diagonal "jog" where colors change in striped pieces travels in the mirror direction. Nobody has ever returned a crocheted octopus because its stripe jog leaned left.
2. Colorwork and letters read in reverse
If a pattern places a colorwork motif — say, a letter "R" on a sweater or an asymmetric patch on a toy's face — following the chart as written will produce a mirror image. The fix: flip the chart (photograph it and mirror the image, or read chart rows in the reverse direction). For amigurumi this comes up rarely, since most stuffed-animal color changes are simple symmetric stripes.
3. Asymmetric shaping reverses
If a pattern says a tail curves to the right, yours will curve to the left. Your penguin's wing positions will mirror the photos. Functionally irrelevant — your penguin is simply facing the other way in family photos.
4. Stitch charts read in the mirror direction
International crochet symbol charts are drawn for right-handed crocheters and read right-to-left on right-side rows. You read them left-to-right. Written patterns (which is what virtually all amigurumi kits use) have no such issue.
That is the complete list. Four items, none of which affects a beginner's first ten projects.

Why Amigurumi Is the Best First Project for Left-Handed Beginners
If you are choosing your very first crochet project as a lefty, amigurumi has structural advantages over scarves, blankets, and garments:
- One dominant stitch. Amigurumi is roughly 90% single crochet. You master one mirrored motion instead of five.
- Worked in continuous rounds. No turning chains, no row-end edges — the places where left-handed beginners most often go wrong on flat projects simply don't exist.
- Mistakes are invisible. A slightly uneven stitch disappears entirely once the piece is stuffed. A wonky scarf edge is on display forever; a wonky bear tummy is just a cuddlier bear.
- Small pieces, fast wins. An amigurumi head is finished in an evening. Fast feedback keeps new crocheters motivated through the awkward first hours.
- Written patterns dominate. Amigurumi patterns are almost always written line-by-line ("Rnd 4: [sc 2, inc] x6 — 24 sts"), the one format that requires zero left-handed translation.
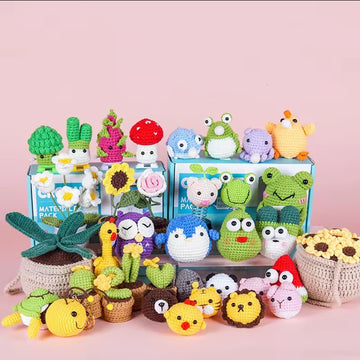
A complete kit removes the remaining friction: pre-matched yarn in the correct weight, the right hook size, safety eyes, stuffing, and a written pattern designed for first-timers. If you're starting from zero, the Beginner Crochet Kit collection is built exactly for this stage — every kit includes everything a left-handed learner needs, with patterns written in standard US terms that work identically for either hand.
A 4-Week Learning Plan for Left-Handed Beginners
Week 1: Hands and habits (30 minutes per day)
Practice holding the hook in your left hand, tensioning yarn with your right, and making chains. Aim for 30 consecutive even chains. Then practice single crochet into a practice chain — expect ugly, tight, uneven stitches. This is universal, not a lefty problem.
Week 2: The round
Master the magic ring (or the chain-2 alternative) and crochet flat circles: 6 sc in the ring, then increase rounds to 12, 18, 24, 30 stitches. Flat circles teach the increase rhythm that shapes every amigurumi body part. Use a stitch marker to track the start of each round — essential in spiral crochet for either hand.
Week 3: Shaping
Crochet a plain sphere: increase rounds, straight rounds, then invisible decreases, stuffing before you close. A sphere is the parent shape of nearly every amigurumi head and body in existence.
Week 4: Your first real project
Start a beginner-rated kit project — something rated for first-timers with pieces larger than 5cm (tiny pieces are fiddly for every beginner). By the end of the week you will have a finished animal made entirely with your left hand, and the "handedness problem" will be permanently behind you.
Tools and Setup Notes for Lefties
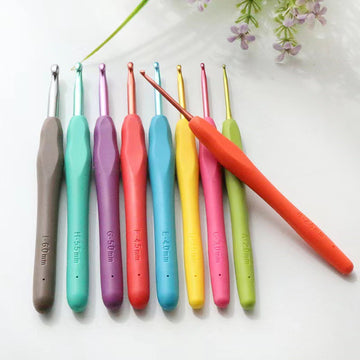
- Crochet hooks are ambidextrous. Standard hooks are radially symmetric — there is no such thing as a "left-handed crochet hook," so never pay extra for one. Ergonomic rubber-grip handles are equally comfortable in either hand.
- Row counters and stitch markers are handedness-neutral. Clip-on locking stitch markers are the amigurumi essential.
- Scissors are the one genuine lefty issue. If you already own left-handed scissors, keep them in your project bag; standard scissors cut fine for yarn either way, but comfort matters over hundreds of snips.
- Lighting: position your light source to your right side so your left (working) hand doesn't cast shadow on the stitches — the mirror of the standard advice given to righties.
Frequently Asked Questions About Left-Handed Crochet
Do left-handed crocheters need special patterns?
No. Written crochet patterns are completely handedness-neutral — "sc 6 in magic ring" means the same thing for everyone. Left-handed crocheters work the same instructions in mirror image, and the finished item comes out correct. The only materials that need flipping are visual: videos, photo step-by-steps, and symbol charts.
Is crochet harder for left-handed people?
The stitches are exactly as easy or hard — the craft is fully mirror-symmetric. What is genuinely harder is learning from right-handed tutorials, which is a resource problem, not a skill problem. Lefties who use mirrored videos or written patterns learn at the same pace as right-handed beginners: typically comfortable with single crochet within 5–10 hours of practice.
Should a left-handed person just learn to crochet right-handed?
Usually not. Crocheting with your non-dominant hand means slower progress, worse tension control, and higher frustration — it's the most common reason lefties give up. The exception: strongly ambidextrous people, or lefties who already do other fine-motor crafts right-handed, sometimes prefer it. Try left-handed first for at least five hours before considering a switch.
Do amigurumi kits work for left-handed crocheters?
Yes, completely. Kits include written patterns, yarn, a hook, safety eyes, and stuffing — all handedness-neutral. A left-handed crocheter following a kit pattern produces a mirror-image toy that looks identical to the photo (at most, an asymmetric detail like a curled tail points the other way).
Which direction do left-handed crocheters work?
Left-handed crocheters hold the hook in the left hand, tension yarn with the right hand, work flat rows from left to right, and work amigurumi rounds clockwise — the exact mirror of right-handed crochet.
How do I do a magic ring left-handed?
Form the loop over your right-hand fingers with the working yarn crossing over the tail, insert the hook with your left hand from front to back, pull up a loop, chain 1, then work your stitches into the ring going clockwise. Pull the tail to close. If it won't click, chain 2 and work 6 sc into the second chain instead — a beginner-safe substitute.
Will my stitches look different from a right-handed person's?
Under close inspection, your stitches lean in the mirror direction and your rounds spiral clockwise instead of counter-clockwise. On a finished, stuffed amigurumi, the difference is essentially undetectable — even experienced crocheters have to look closely at the fabric to tell.
The Bottom Line
Left-handed crochet is not a workaround, an adaptation, or a compromise — it is simply crochet, mirrored. The patterns don't change, the stitches don't change, and the finished toys are every bit as good. The only real obstacle is a world of right-handed tutorials, and that obstacle dissolves the moment you mirror a video, sit across from your teacher, or work from a written pattern.
Start with the mirror techniques in this guide, give your hands the 5–10 hours they need, and choose a first project designed to be forgiving. A complete kit from the Crochet Amigurumi Kits collection pairs written patterns (zero flipping required) with pre-matched materials, so the only thing you need to bring is your perfectly capable left hand.
Ten percent of the world crochets this way. Welcome to the club — we work clockwise here.


