
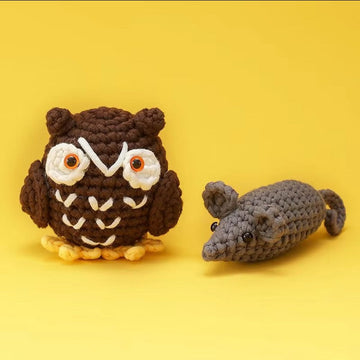

Walk into any craft store or browse any crochet supply site and you will find hundreds of gadgets all claiming to be essential: ergonomic hooks in twelve styles, yarn bowls, electric ball winders, blocking mats, gauge rulers, hook organizers shaped like cacti. It's overwhelming — and for a beginner deciding what to buy before their first amigurumi project, it's paralyzing.
Here is the honest answer up front: a complete amigurumi tool kit contains about 8 essential items, most of which cost only a few dollars. Everything else falls into two categories — genuinely useful upgrades you might add after a few projects, and clutter you will never miss.
This guide walks through every tool an amigurumi crocheter actually uses, in order of importance: what it does, what separates a good one from a bad one, what you should expect to spend, and — just as important — which popular purchases you can safely skip. By the end you'll know exactly what belongs in your project bag, whether you're assembling a kit piece by piece or checking what's inside a pre-packed one.
The 8 Essentials: Tools Every Amigurumi Project Requires
1. A crochet hook in the right size (the one non-negotiable)
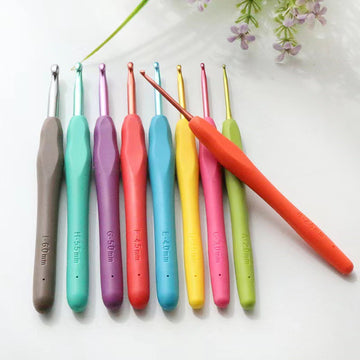
Everything in amigurumi flows through the hook. For stuffed animals worked in standard worsted-weight (medium/#4) yarn, the workhorse sizes are 2.5mm to 4.0mm — deliberately smaller than the 5.0–5.5mm the yarn label recommends, because amigurumi needs a tight, stuffing-proof fabric.
What matters in a hook:
- Handle comfort. Amigurumi's tight stitches put more strain on your grip than blanket crochet. A hook with a soft ergonomic handle (rubber or silicone, roughly 12–15mm thick) reduces hand fatigue noticeably during sessions over 45 minutes. Bare aluminum hooks work fine, but most amigurumi makers who crochet regularly switch to ergonomic handles within their first year.
- Smooth throat and head. The hook's throat (the slanted section that grabs yarn) should be polished smooth. Cheap hooks with rough molding seams split yarn constantly — the most common source of beginner frustration that gets misdiagnosed as "bad yarn."
- Inline vs tapered: Inline hooks (the head is in line with the shaft) produce very uniform stitches and suit crocheters who tension tightly. Tapered hooks glide faster. For amigurumi's tight fabric, many makers find inline slightly easier to control, but this is preference, not law.
You do not need a full set of 12 sizes on day one. One good hook in the size your pattern calls for beats a dozen mediocre ones.
2. Locking stitch markers (buy 10, lose 5, still have plenty)
Amigurumi is worked in continuous spirals with no visible seam between rounds, which means without a marker you have no idea where a round begins or ends. A locking stitch marker — the kind shaped like a small plastic safety pin — clipped into the first stitch of every round is the difference between a symmetric bear head and a lopsided one.
Specifics that matter:
- Get locking markers, not the closed rings sold for knitting. Closed rings cannot be added to or removed from a crocheted stitch.
- A pack of 10–20 costs very little, and you genuinely need only 1–3 per project (one for the round start, a couple for marking increase points or the center front of a face).
- In a pinch, a bobby pin, paper clip, or scrap of contrasting yarn works. But real markers snag less and survive being dragged up 40 rounds.
3. A tapestry needle (the tool that finishes every project)
Every amigurumi ends the same way: weaving in yarn tails and sewing pieces together. That job belongs to a tapestry needle (also called a yarn or darning needle) — a large-eyed, blunt-tipped needle in metal or plastic.
- Blunt tip is non-negotiable. A sharp sewing needle splits your yarn and stabs your fingers; a blunt tip slides between stitches the way seaming requires.
- For worsted-weight yarn, sizes 13–18 (roughly 5–7cm long) are the sweet spot. The eye must comfortably fit your yarn doubled over.
- A bent-tip tapestry needle is a worthwhile small upgrade for amigurumi specifically: the angled tip scoops under stitches on a stuffed, curved surface far more easily than a straight needle.
- Buy at least two or three. Tapestry needles migrate to the same dimension as missing socks.
4. Sharp small scissors
Any scissors cut yarn, but small, sharp embroidery-style scissors (roughly 9–10cm) earn their place: they snip tails close to the fabric without accidentally cutting a stitch, fit inside a project bag, and cut cleanly enough that yarn ends don't fray before you weave them in. Dull household scissors chew acrylic yarn into fuzz, which makes tails almost impossible to thread through a needle.
5. Safety eyes (and why sizing is really about proportions)
Safety eyes — plastic eyes with a post and locking washer — give amigurumi its characteristic charm. Practical facts:
- The most-used sizes for palm-sized amigurumi are 6mm to 12mm; a mixed pack covers most patterns.
- They must be installed before stuffing and closing — the washer locks permanently from inside, and it does not come back off. Double-check placement (pin or mark positions first) because there is no undo.
- Child-safety note: for toys intended for children under 3, skip safety eyes entirely and embroider eyes with yarn or embroidery floss instead. Even properly locked eyes are considered a choking risk for under-3s by toy safety standards such as EN 71 and ASTM F963.
6. Fiberfill stuffing
Polyester fiberfill is the standard amigurumi stuffing: lightweight, washable, hypoallergenic, and inexpensive. A 250g bag stuffs roughly 4–8 palm-sized animals. The practical skill is using more than you think — under-stuffing is the #1 cause of lumpy, floppy finished toys — while adding it in walnut-sized pieces rather than one big wad, which creates lumps.
7. Row counter (or the humble pen and paper)
Amigurumi patterns are dense with round-by-round counts ("Rnd 7–11: sc around — 30 sts"), and losing your place mid-piece means tedious stitch-counting to recover. Options from free to fancy:
- Pen and paper / pattern printout: tick off each round as you finish. Free, reliable, works forever.
- Clicker counters: a small mechanical counter you click at each round's end.
- Phone apps: free counter apps work well, with the one real drawback that your crochet time becomes phone-adjacent time.
8. Pins for assembly (the most skipped, most regretted tool)
When it's time to sew a head to a body and two ears to a head, pinning the pieces in place first — then looking at the toy from the front, side, and above — is the single biggest quality upgrade in amigurumi assembly. Long quilting pins with ball heads, or better yet foam-safe T-pins, hold stuffed pieces in position while you evaluate and adjust. Sewing unpinned parts by eye is why so many first bears have one ear noticeably higher than the other.

Genuinely Useful Upgrades (Add After a Few Projects)
None of these are needed for project #1, but each earns its keep for regular crocheters:
Ergonomic hook set
Once you know you love amigurumi, a set of ergonomic hooks in sizes 2.0–6.0mm covers every pattern you'll meet. Buying a set costs far less per hook than buying sizes one at a time.
Stuffing stick or hemostat forceps
Narrow limbs — a giraffe neck, octopus tentacles, teddy arms thinner than your finger — are nearly impossible to stuff evenly with fingers alone. A wooden stuffing stick (or a chopstick) works; locking hemostat forceps are the professional's choice, letting you place tiny amounts of fiberfill precisely into extremities. Under $10 and transformative for any pattern with skinny parts.
Yarn needle threader
Threading fuzzy worsted yarn through a needle eye is a small daily friction. A sturdy threader (get one designed for yarn, not the delicate wire ones for sewing thread) removes it.
Project bag with structure
A zippered bag or box keeps the active project, its hook, markers, and pattern together — and keeps cats, dust, and chaos out. Anything works, but a bag that stands open on its own while you pull yarn from it is noticeably nicer than a floppy tote.
Craft glue or fabric glue
For securing embroidered details' knots, felt patches, or stubborn yarn ends on display pieces. Use sparingly and never on toys for small children (stitched attachments only for safety).
Notions case
A small tin or clamshell case for the tiny items — markers, needles, threader, spare safety eyes — so they stop living loose at the bottom of your bag. Repurposed mint tins have started more notion collections than any purpose-made product.
Five Popular Purchases You Can Skip (At Least at First)
- Yarn bowls. Lovely objects, and genuinely nice for blanket crochet with big skeins that roll. For amigurumi's small yarn amounts, your yarn sits calmly beside you. Skip until you crochet daily and want one as a gift to yourself.
- Electric ball winders and swifts. These solve a problem — hand-wound hanks — that amigurumi yarn (typically center-pull skeins of acrylic or cotton) does not have.
- Blocking mats and steamers. Essential for lace shawls; nearly irrelevant for stuffed toys, whose shape comes from stuffing, not blocking. The rare amigurumi piece that needs flattening (an ear, a fin) can be steamed over a kettle.
- Gauge swatch rulers. In garment crochet, gauge determines whether a sweater fits. In amigurumi, being slightly off-gauge just makes the whole animal slightly bigger or smaller — and the real test (can you see stuffing through the fabric?) needs no ruler.
- Hook sets in exotic materials. Bamboo, rosewood, and glass hooks are beautiful, but wood drags on tight amigurumi stitches. Smooth aluminum or ergonomic-handled aluminum is genuinely better for this craft, and cheaper.
Budgeting: What a Complete Setup Really Costs
Priced item by item, a complete beginner amigurumi toolkit breaks down roughly like this:
- Quality ergonomic hook (one size): $4–10
- Locking stitch markers (pack of 20): $3–5
- Tapestry needles (set of 3–6, ideally with a bent tip): $3–6
- Small sharp scissors: $5–10
- Safety eyes (mixed pack): $6–10
- Fiberfill (250g): $8–12
- Quilting pins or T-pins: $3–5
- Worsted yarn for a first project (2–3 colors): $8–15
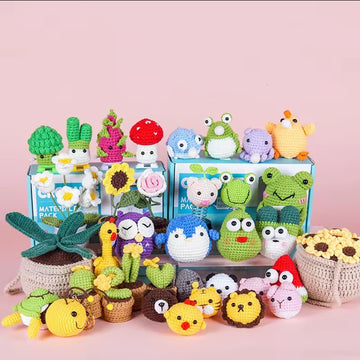
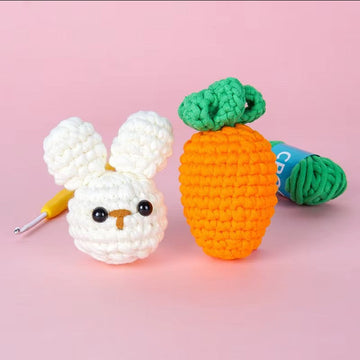
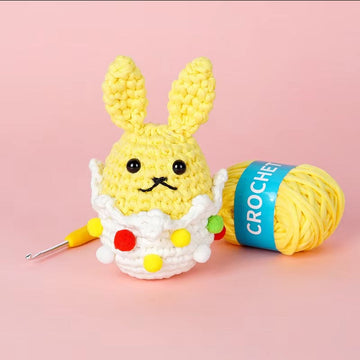
Total: roughly $40–70 assembled piecemeal — before you've chosen a pattern, and with the real risk of buying the wrong hook size, the wrong eye size, or yarn that doesn't suit tight stitching. This is exactly the math that makes complete kits compelling for a first project: a well-assembled kit bundles pre-matched yarn, the correct hook, safety eyes, stuffing, a tapestry needle, and a beginner-tested written pattern in one box, typically for less than the cost of gathering everything separately. If you'd rather start crocheting tonight than comparison-shop for a week, browse the Crochet Amigurumi Kits collection — every kit ships with the tools its pattern actually requires.
And if you already know this craft is going to stick, crochet kit bundles are the economical path: multiple projects' worth of materials at a lower per-project cost, which also means spare yarn, spare eyes, and backup needles accumulating into exactly the toolkit this article describes.

Organizing Your Amigurumi Workspace
Tools are only half the story — a workable setup keeps them useful:
The three-zone principle
- Active zone (within arm's reach): current project, its hook, one marker clipped in, the pattern. This is your project bag's contents.
- Session zone (on the table): scissors, tapestry needle, row counter, stuffing for the piece you're about to close.
- Storage zone (shelf or drawer): yarn stash, spare hooks, bulk stuffing, the notions tin.
The failure mode this prevents: every tool living in one giant bag, so every session starts with five minutes of archaeology.
Light and seating
Amigurumi's tight, dark-colored stitches are the hardest crochet fabric to see. Two practical rules: crochet dark yarn in daylight or under a bright task lamp positioned on the side opposite your hook hand, and take a 5-minute break every 30–40 minutes — your tension (and your wrists) will thank you. Working navy blue single crochet by the light of a TV screen is the classic recipe for missed stitches.
Keeping patterns findable
Whether paper or digital, keep patterns with notes: which hook you actually used, which round you modified, where you placed the eyes. Six months later, when someone asks for "another one of those penguins," those notes are gold.
Tool Care: Making Everything Last
- Wipe aluminum hooks occasionally — hand oils plus yarn fuzz slowly build a sticky film that drags.
- Store safety eyes in their sorted compartments; a loose pile of mixed sizes means measuring each eye with a ruler forever after.
- Keep fiberfill in a sealed bag — it absorbs household odors and attracts dust surprisingly well.
- Dedicate your small scissors to yarn only. Paper dulls blades faster than anything else in a craft room.
Frequently Asked Questions About Amigurumi Tools
What tools do I need to start amigurumi?
Eight items cover a complete start: a crochet hook (2.5–4.0mm for worsted yarn), locking stitch markers, a blunt tapestry needle, small sharp scissors, safety eyes (6–12mm), polyester fiberfill, a row counter (or pen and paper), and pins for assembly. Everything else is optional. A complete beginner kit typically includes all the project-specific items in one box.
How much does a full amigurumi tool kit cost?
Assembled individually, a complete beginner setup runs roughly $40–70 including yarn for a first project. Individual tools are cheap — most cost $3–10 each — but they add up, and beginners often buy wrong sizes. Pre-matched kits usually cost less than piecing together the equivalent materials separately.
Do I need special scissors for crochet?
No special type is required, but small, sharp embroidery-style scissors (about 9–10cm) work best: they cut yarn cleanly without fraying, snip tails close to the fabric safely, and fit in a project bag. Dull scissors fray acrylic yarn ends, making them hard to thread and weave in.
What is the difference between a tapestry needle and a sewing needle?
A tapestry needle has a large eye that fits yarn and a blunt tip that slides between stitches without splitting them. A sewing needle has a small eye for thread and a sharp point that pierces fibers — wrong on both counts for assembling crochet. For amigurumi, a bent-tip tapestry needle is the most convenient style because it scoops under stitches on curved, stuffed surfaces.
Can I do amigurumi without safety eyes?
Yes. Embroidered eyes made with yarn or embroidery floss are a complete substitute — and they're the required choice for toys given to children under 3, since safety-eye posts are a choking hazard for that age group under toy-safety standards like EN 71 and ASTM F963. Felt circles sewn on are a third option for display pieces.
Why do amigurumi patterns use a smaller hook than the yarn label says?
Yarn labels recommend hook sizes for drapey fabric — blankets and garments. Amigurumi needs the opposite: dense, stiff fabric with gaps too small for stuffing to show through. Dropping 1.5–2.5mm below the label's recommendation (e.g., a 3.0mm hook with worsted yarn labeled for 5.5mm) produces that tight fabric.
What should I look for in a beginner crochet kit?
Four things: a written pattern rated for true beginners (mostly single crochet, pieces larger than 5cm), yarn in a light color (dark stitches are hard to see while learning), the correct hook size included, and complete finishing supplies — safety eyes, stuffing, and a tapestry needle. The Beginner Crochet Kit collection is curated around exactly these criteria.
The Bottom Line
Amigurumi has one of the lowest tool barriers of any handcraft: eight inexpensive items, most under $10, and you are fully equipped for years of stuffed animals. The craft-store wall of gadgets is mostly noise — spend your money on good yarn and one comfortable hook, add the genuinely useful upgrades (bent-tip needle, hemostats, a decent project bag) as your projects demand them, and skip the yarn bowl until you've earned it.
Better yet, let a well-designed kit make the decisions for your first project, learn what each tool does with materials already matched to the pattern, and build your permanent toolkit from experience instead of guesswork. Your future self — the one with a shelf of finished bears, octopuses, and dragons — will be glad you started simple.


